User Guides: Horizon Dashboard
This section provides brief walkthroughs for common tasks in Tier5.
Accessing the Dashboard
To access the Horizon dashboard, you will need to log in.
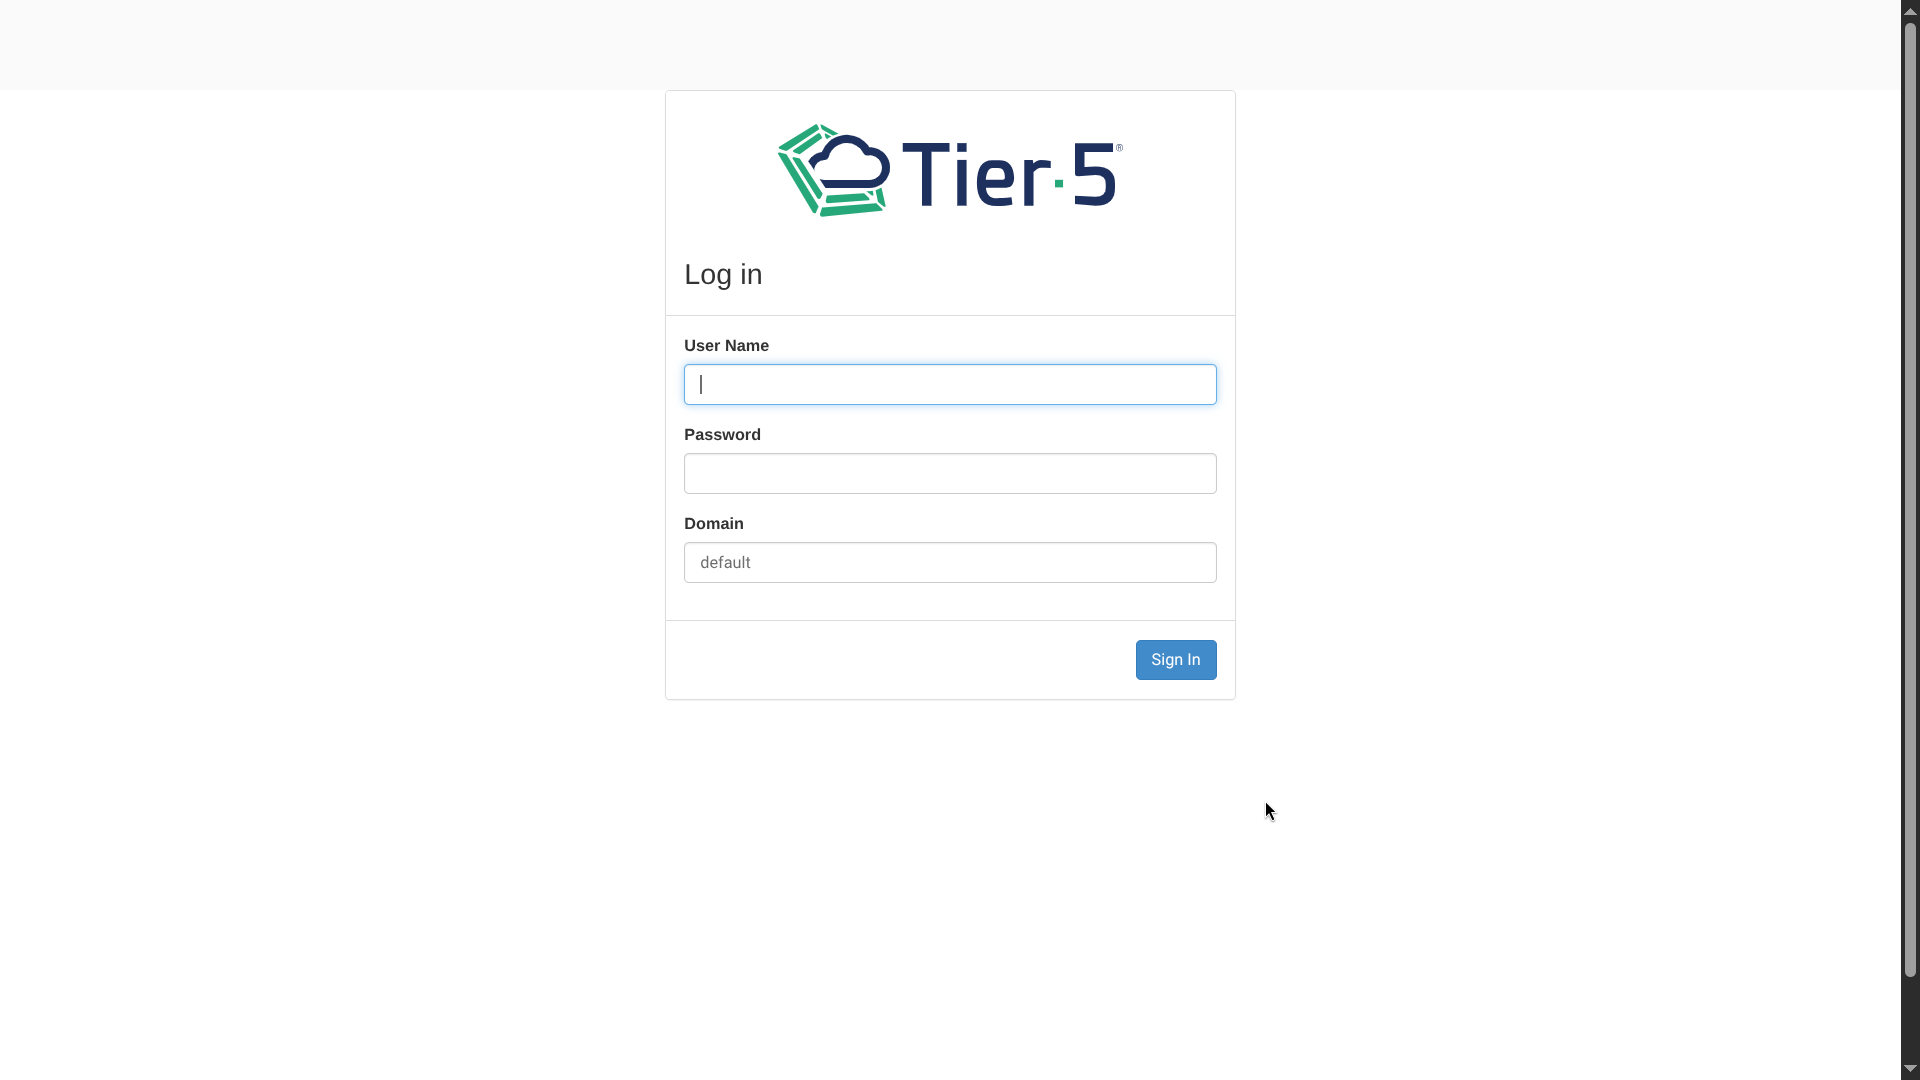
- Username / Password: Enter your provided credentials.
- Domain:
- default: Use this for private (hosted or on-premise) clouds.
- [Specific Domain]: If you are in a shared cloud environment, enter your assigned domain.
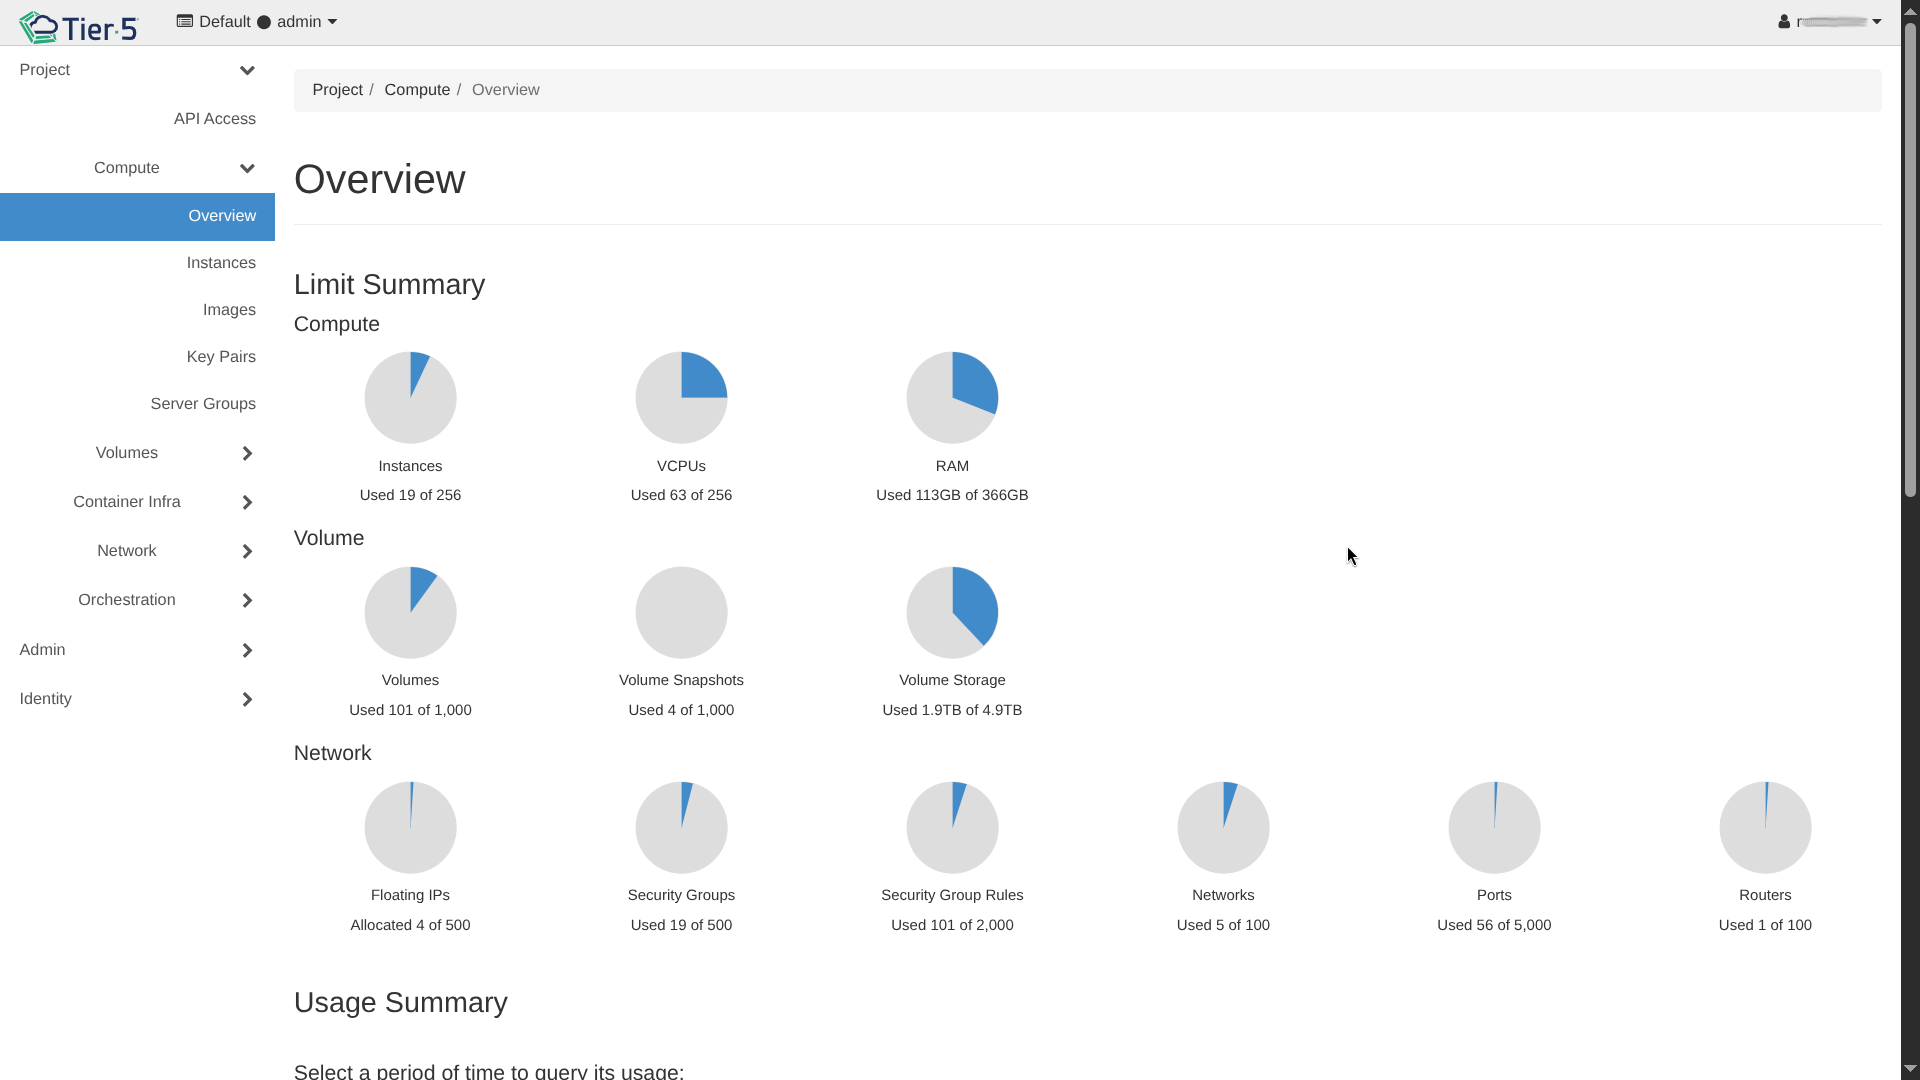
Dashboard Overview
Once logged in, you will see the main dashboard overview.
Managing Compute (Nova)
Launching an Instance
-
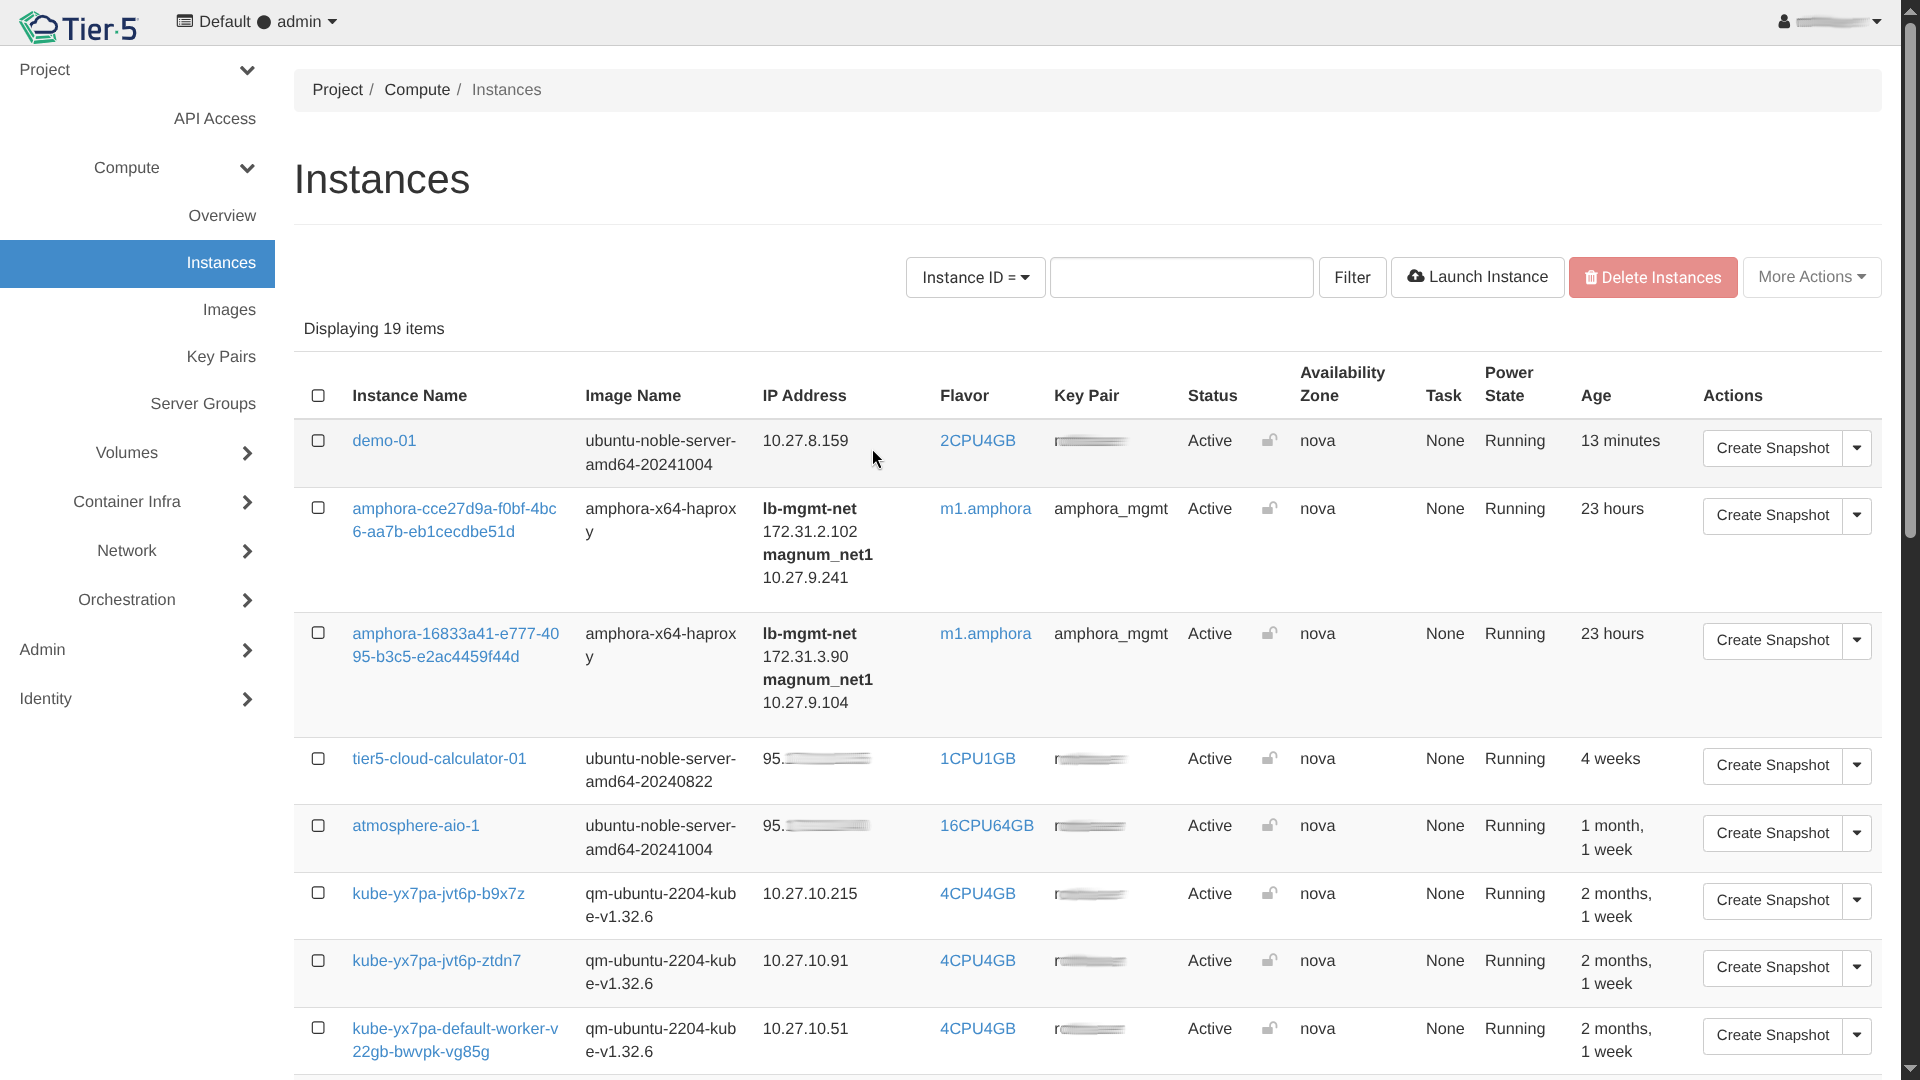
Navigate to Compute → Instances:
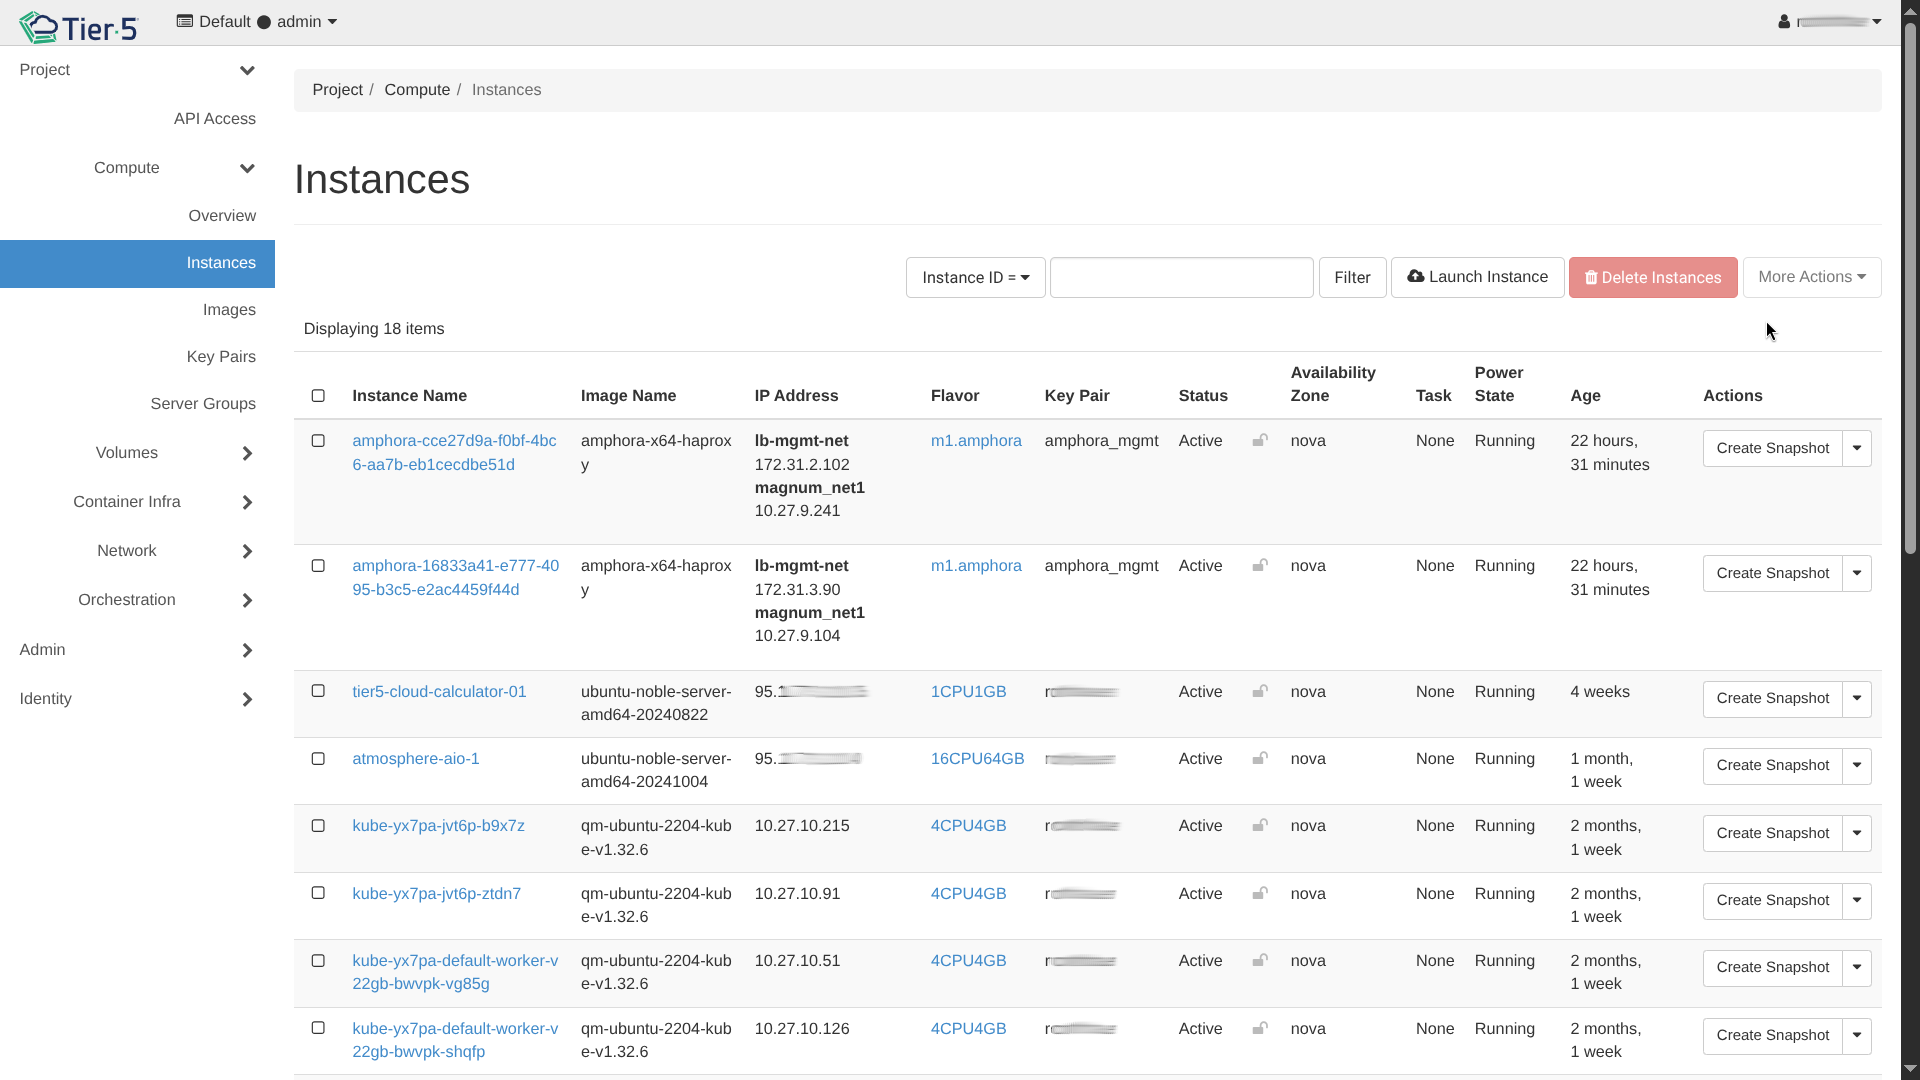
- This view shows all your running virtual machines, their internal/floating IPs, and power state.
-
Click Launch Instance:
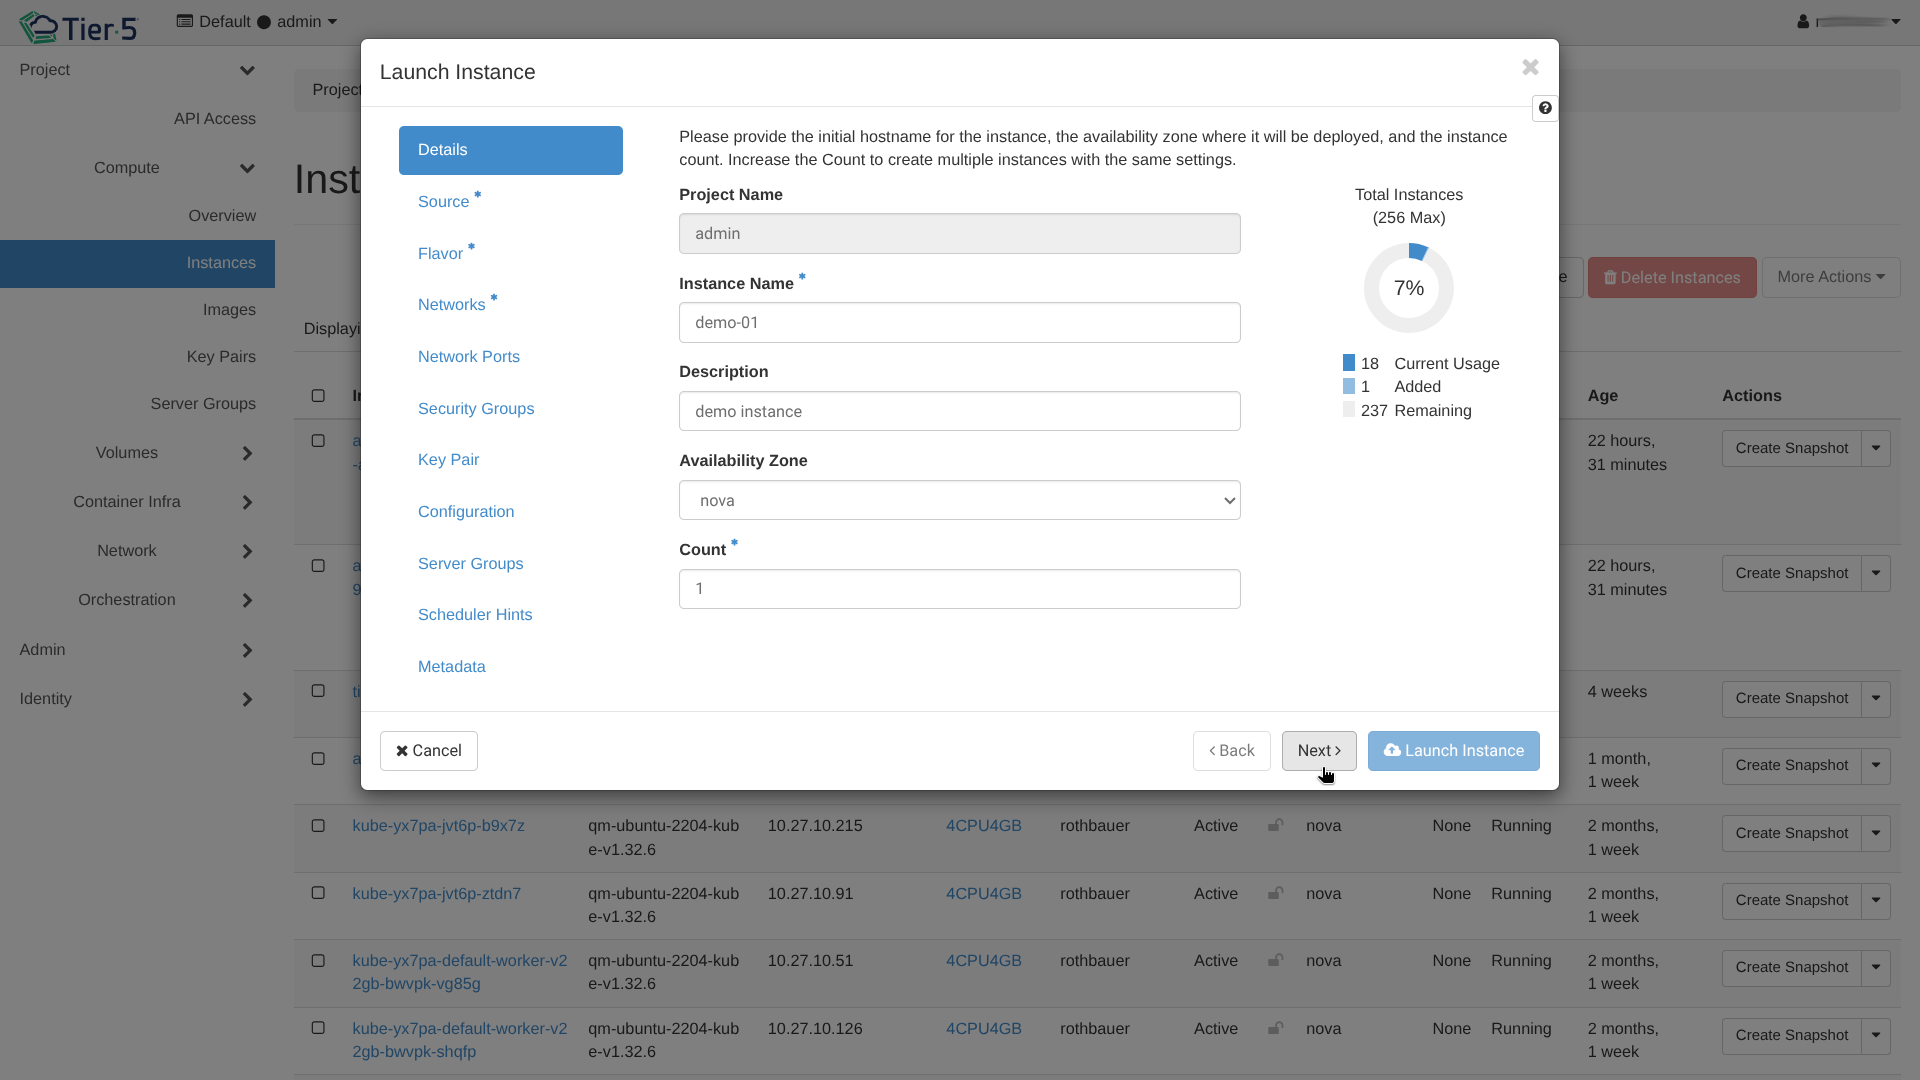
- Instance Name: Give your VM a unique name.
- Availability Zone: Select the zone (e.g.,
nova). - Count: Launch multiple identical instances at once if needed.
-
Select the Boot Source:
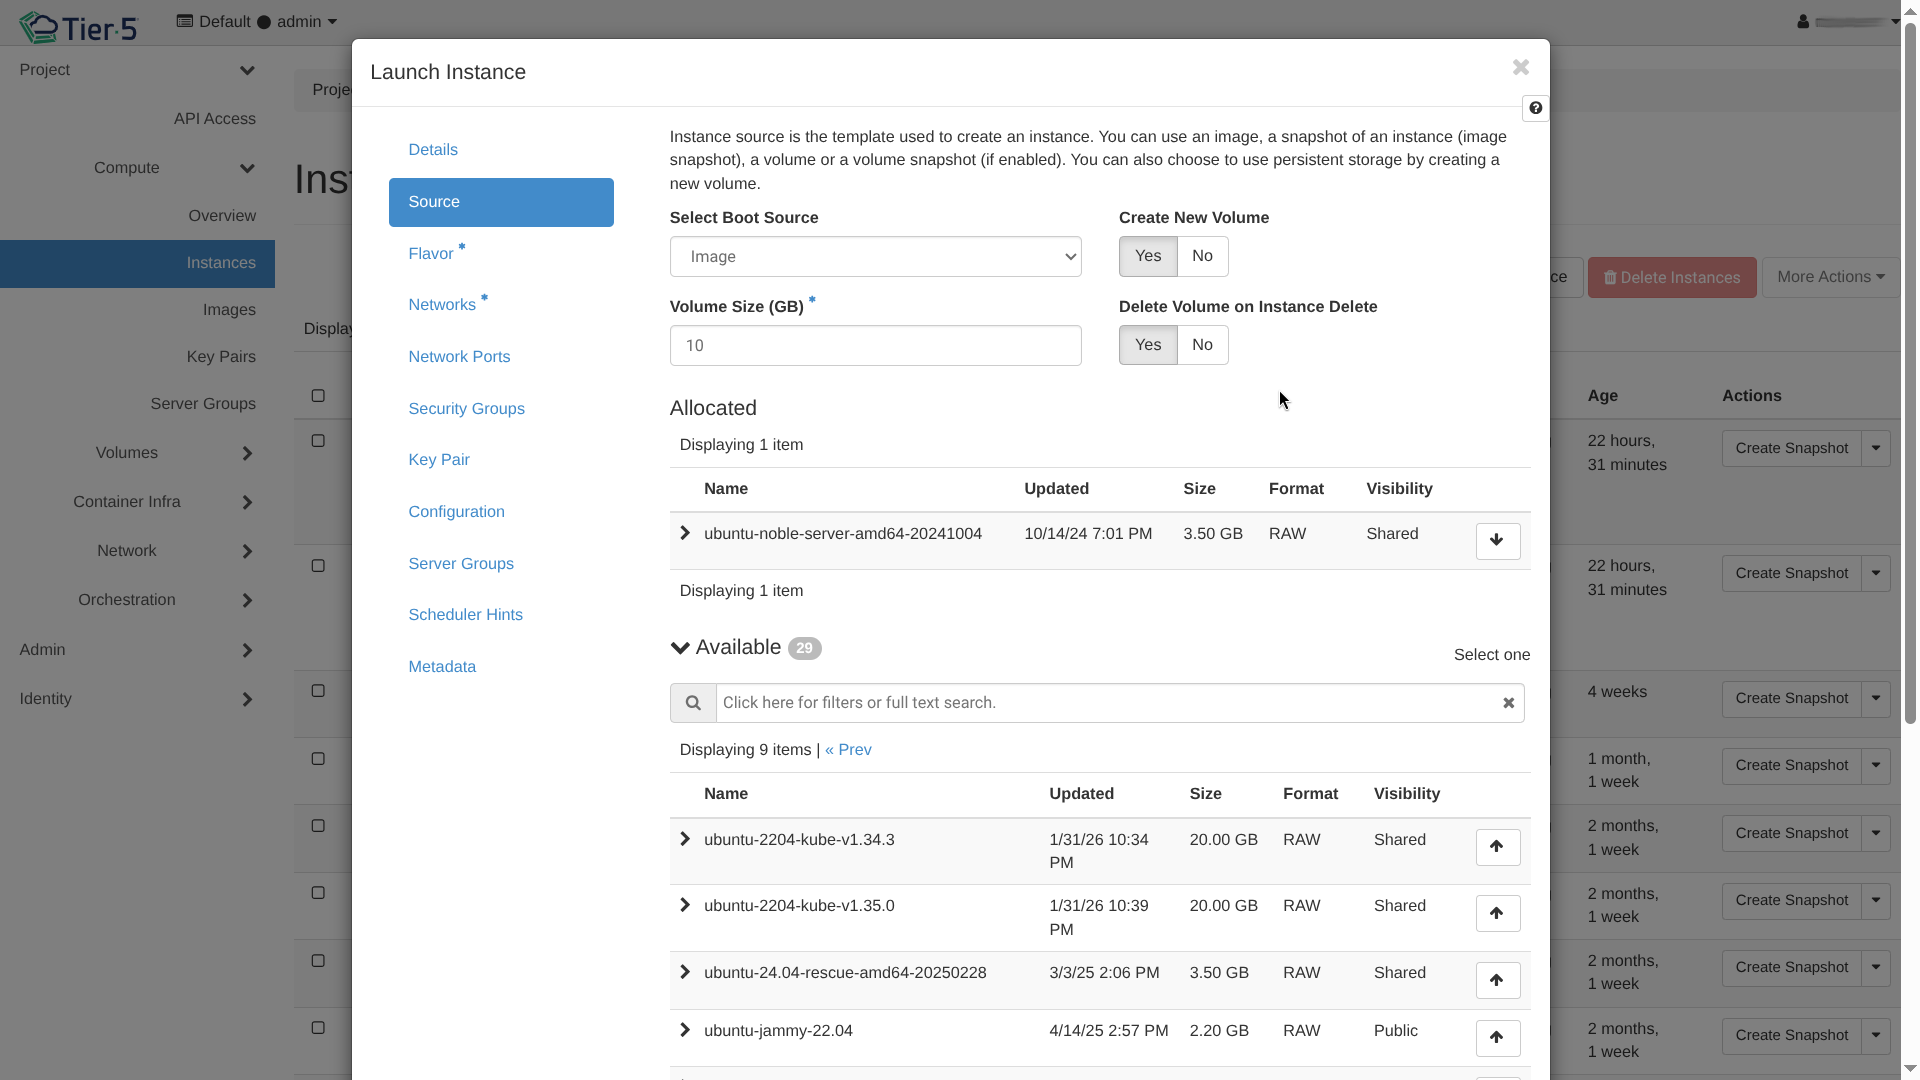
- Image: Boot from a pre-uploaded OS image (e.g., Ubuntu, CentOS).
- Volume: Boot from a persistent block storage volume.
- Volume Size: Define the size of the root disk.
- Delete on Terminate: Checked by default for ephemeral root disks. Uncheck if you want the volume to persist/survive after the instance is deleted.
-
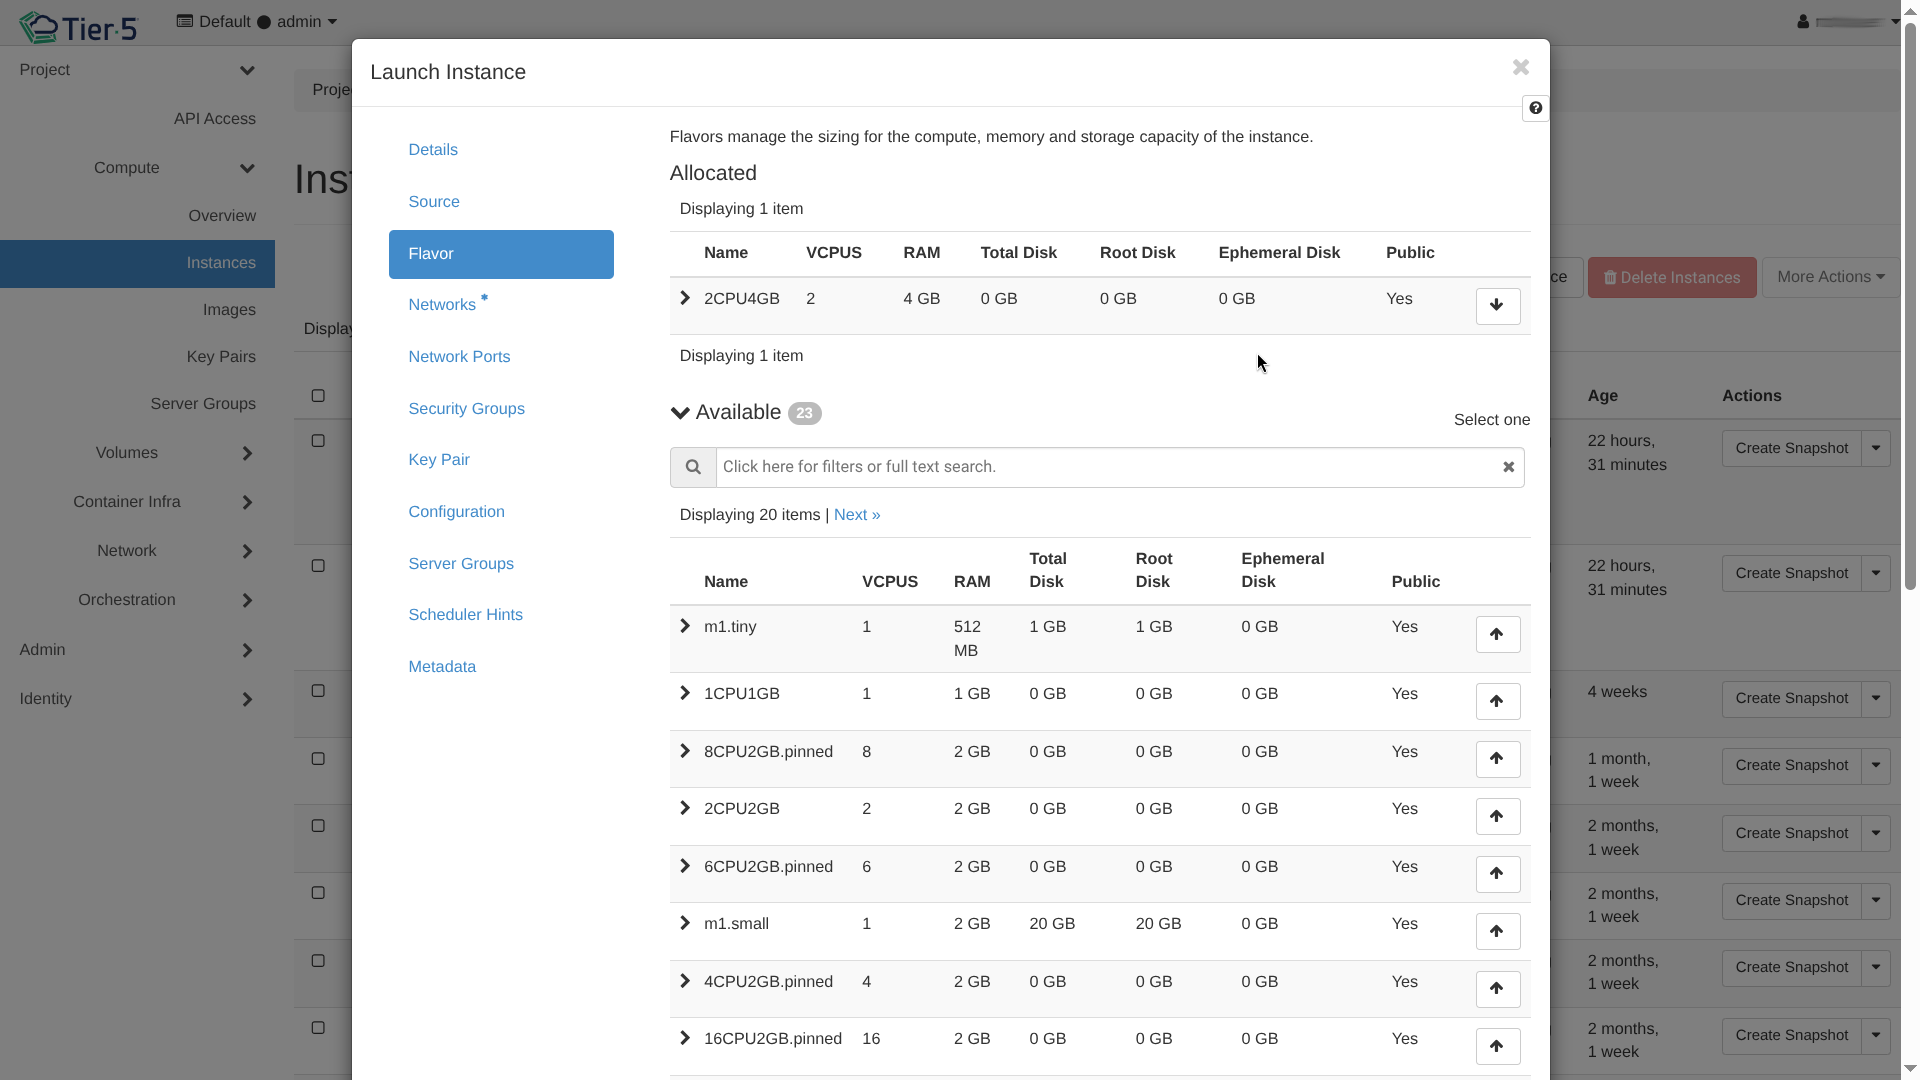
Select the Flavor:
- Flavors define the compute capacity (vCPU, RAM, Disk).
- Choose a flavor that matches your workload requirements.
-
Configure Networking:
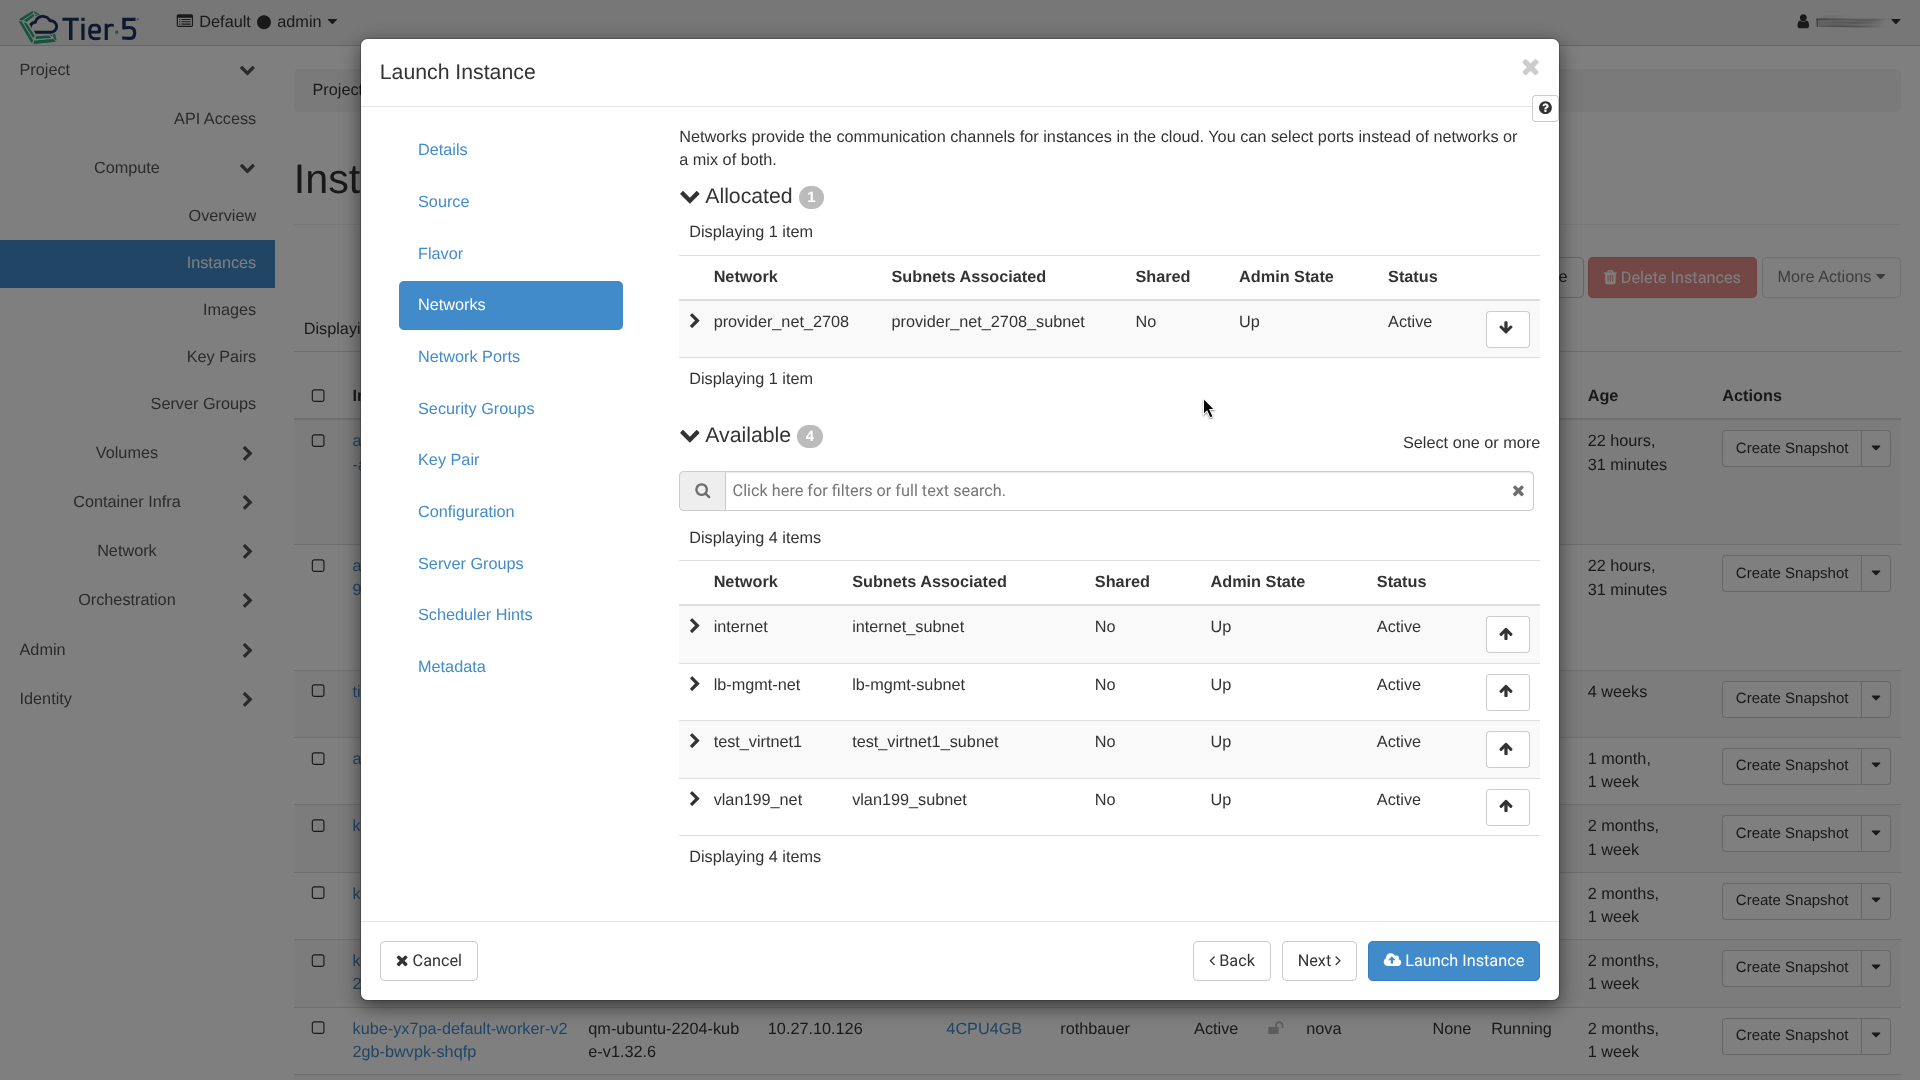
- Select the private network(s) to attach to the instance.
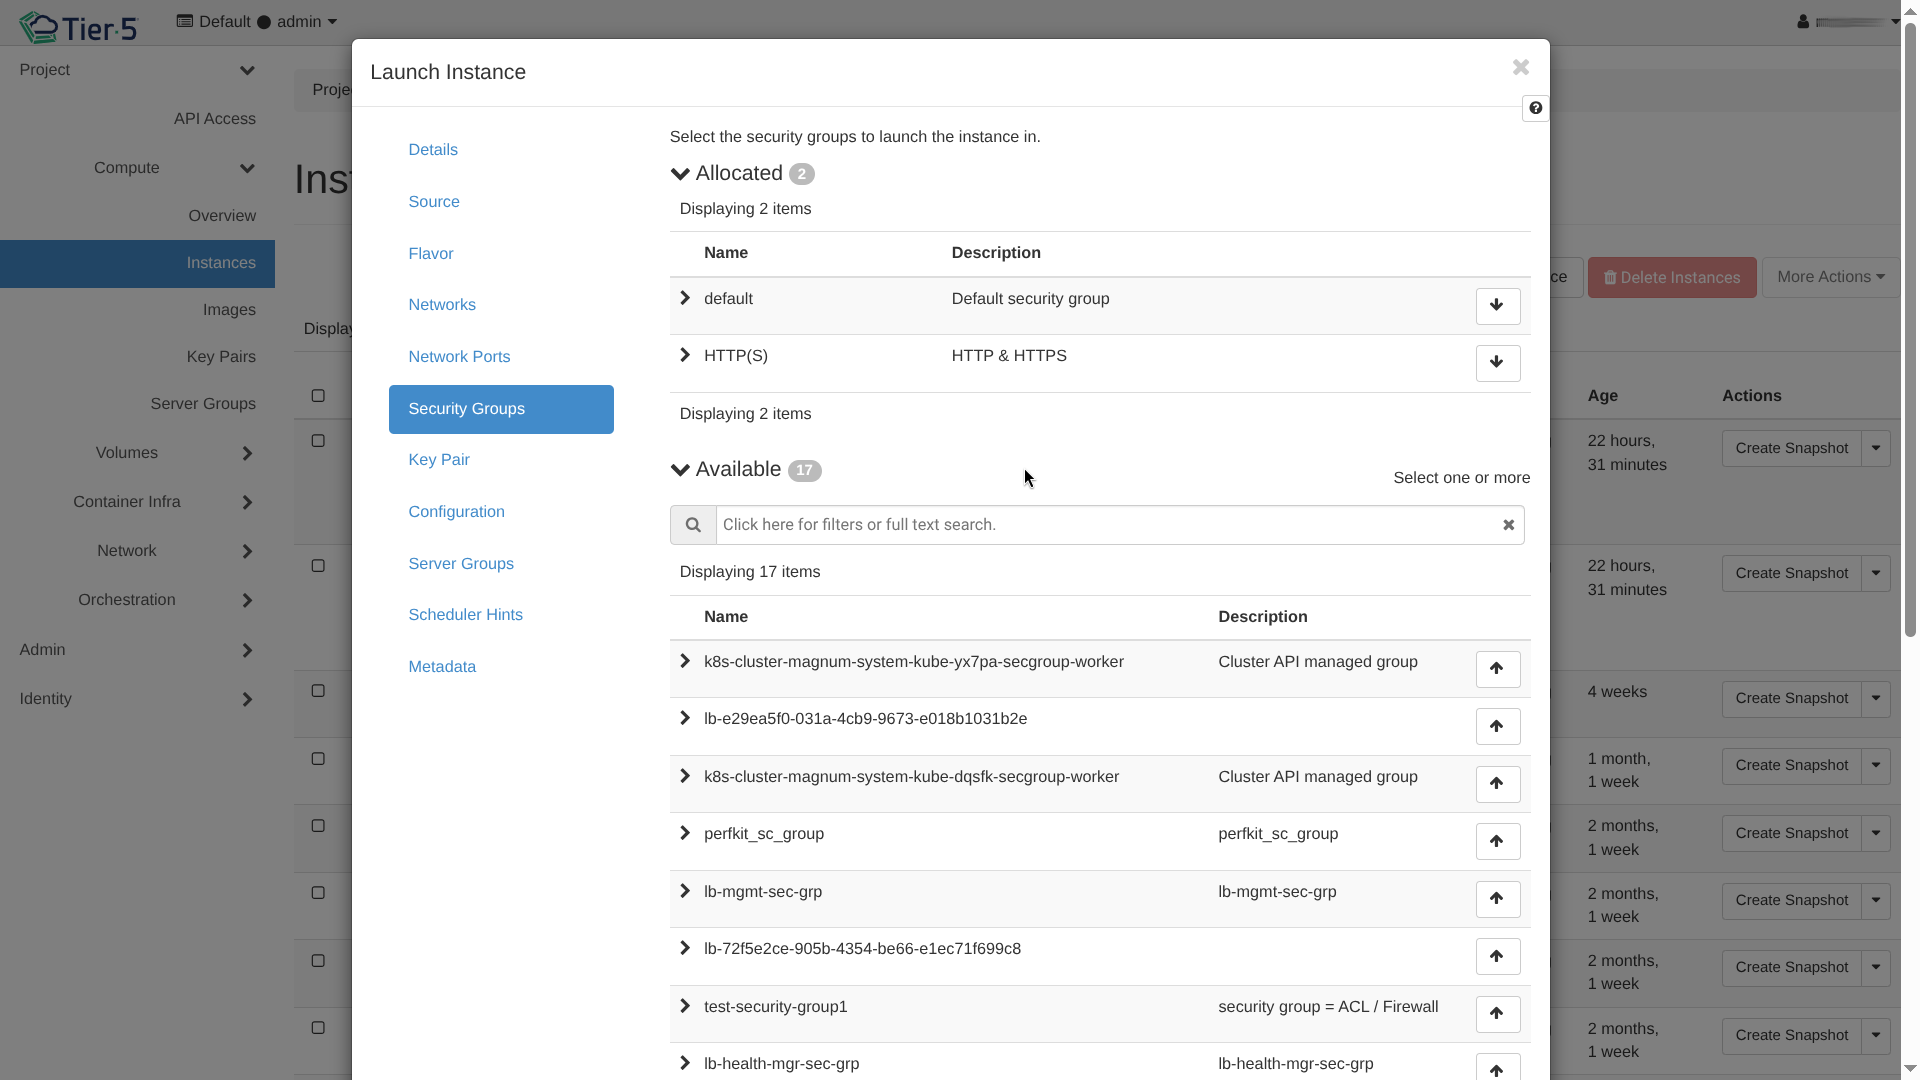 * Security Groups: Assign firewall rules (e.g.,
 default,ssh-web). -
System Configuration:
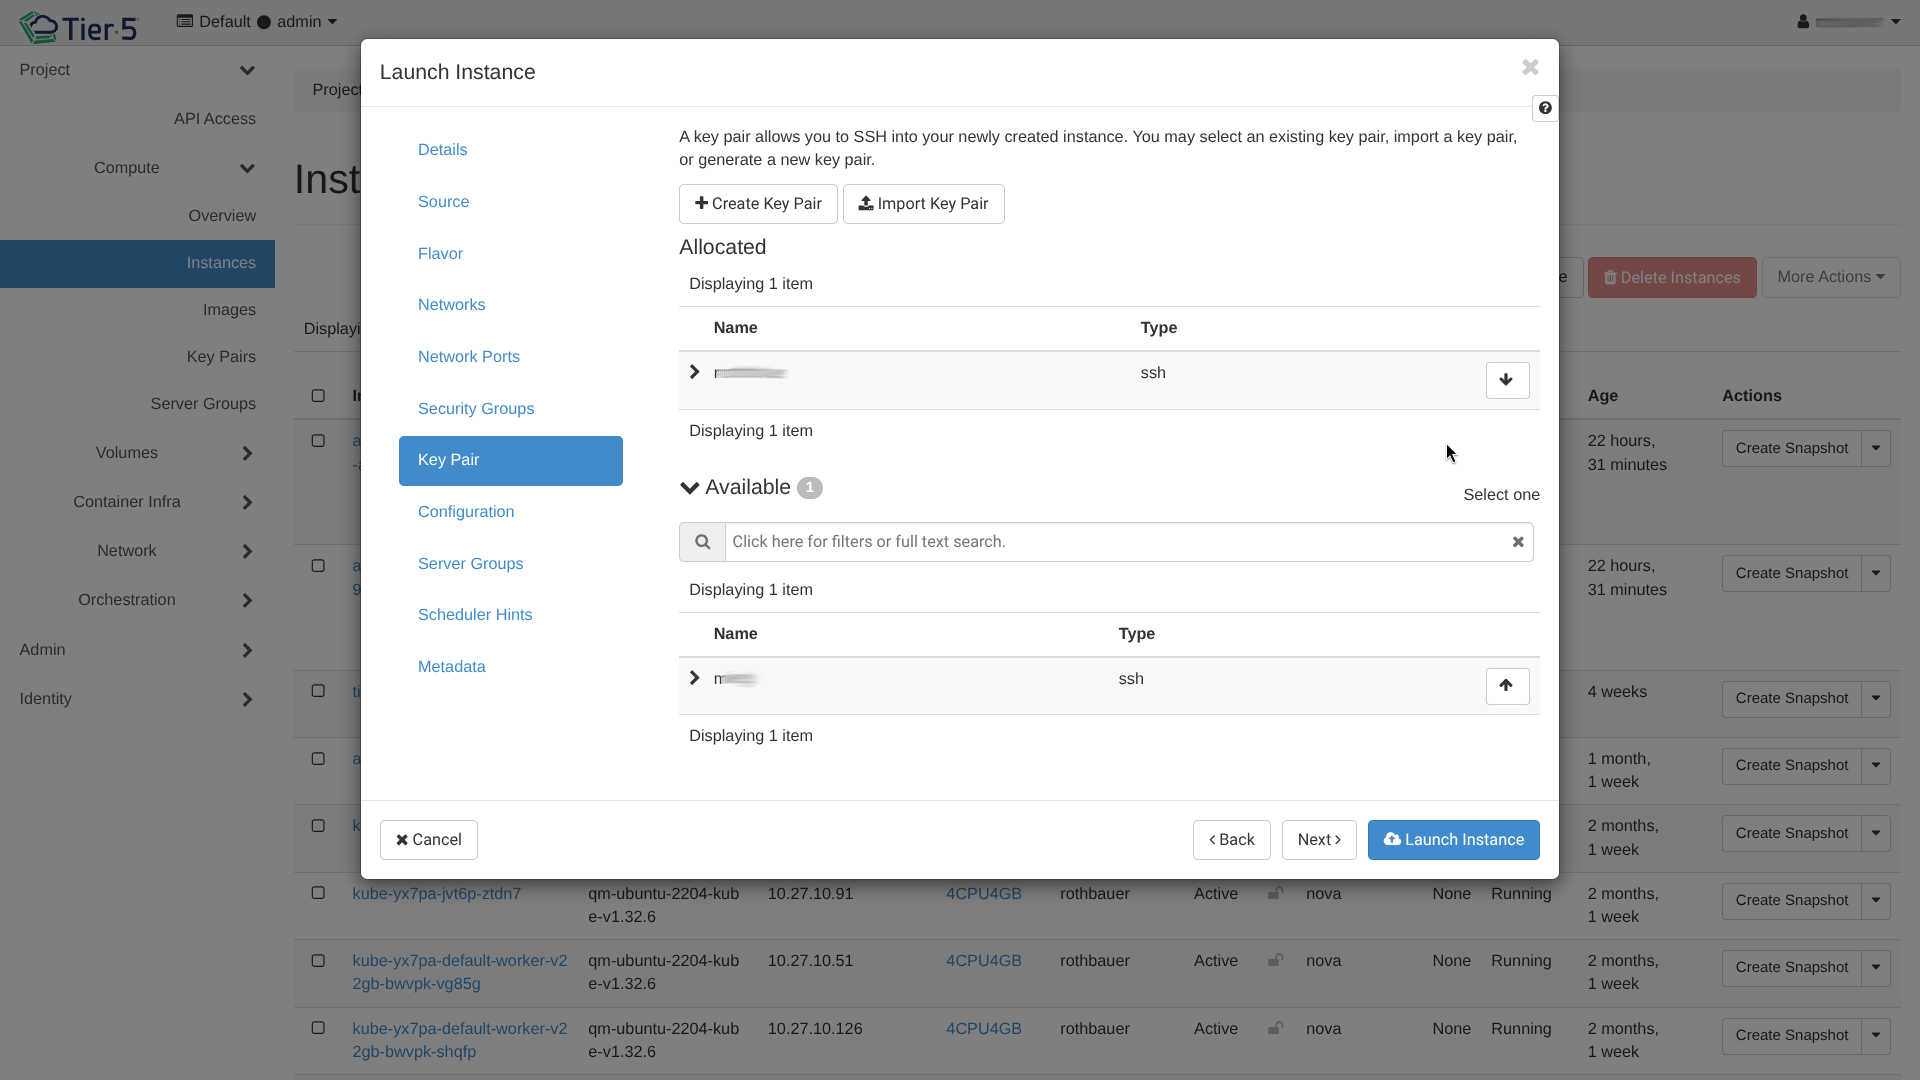
- Key Pair: Select an SSH key pair for secure access.
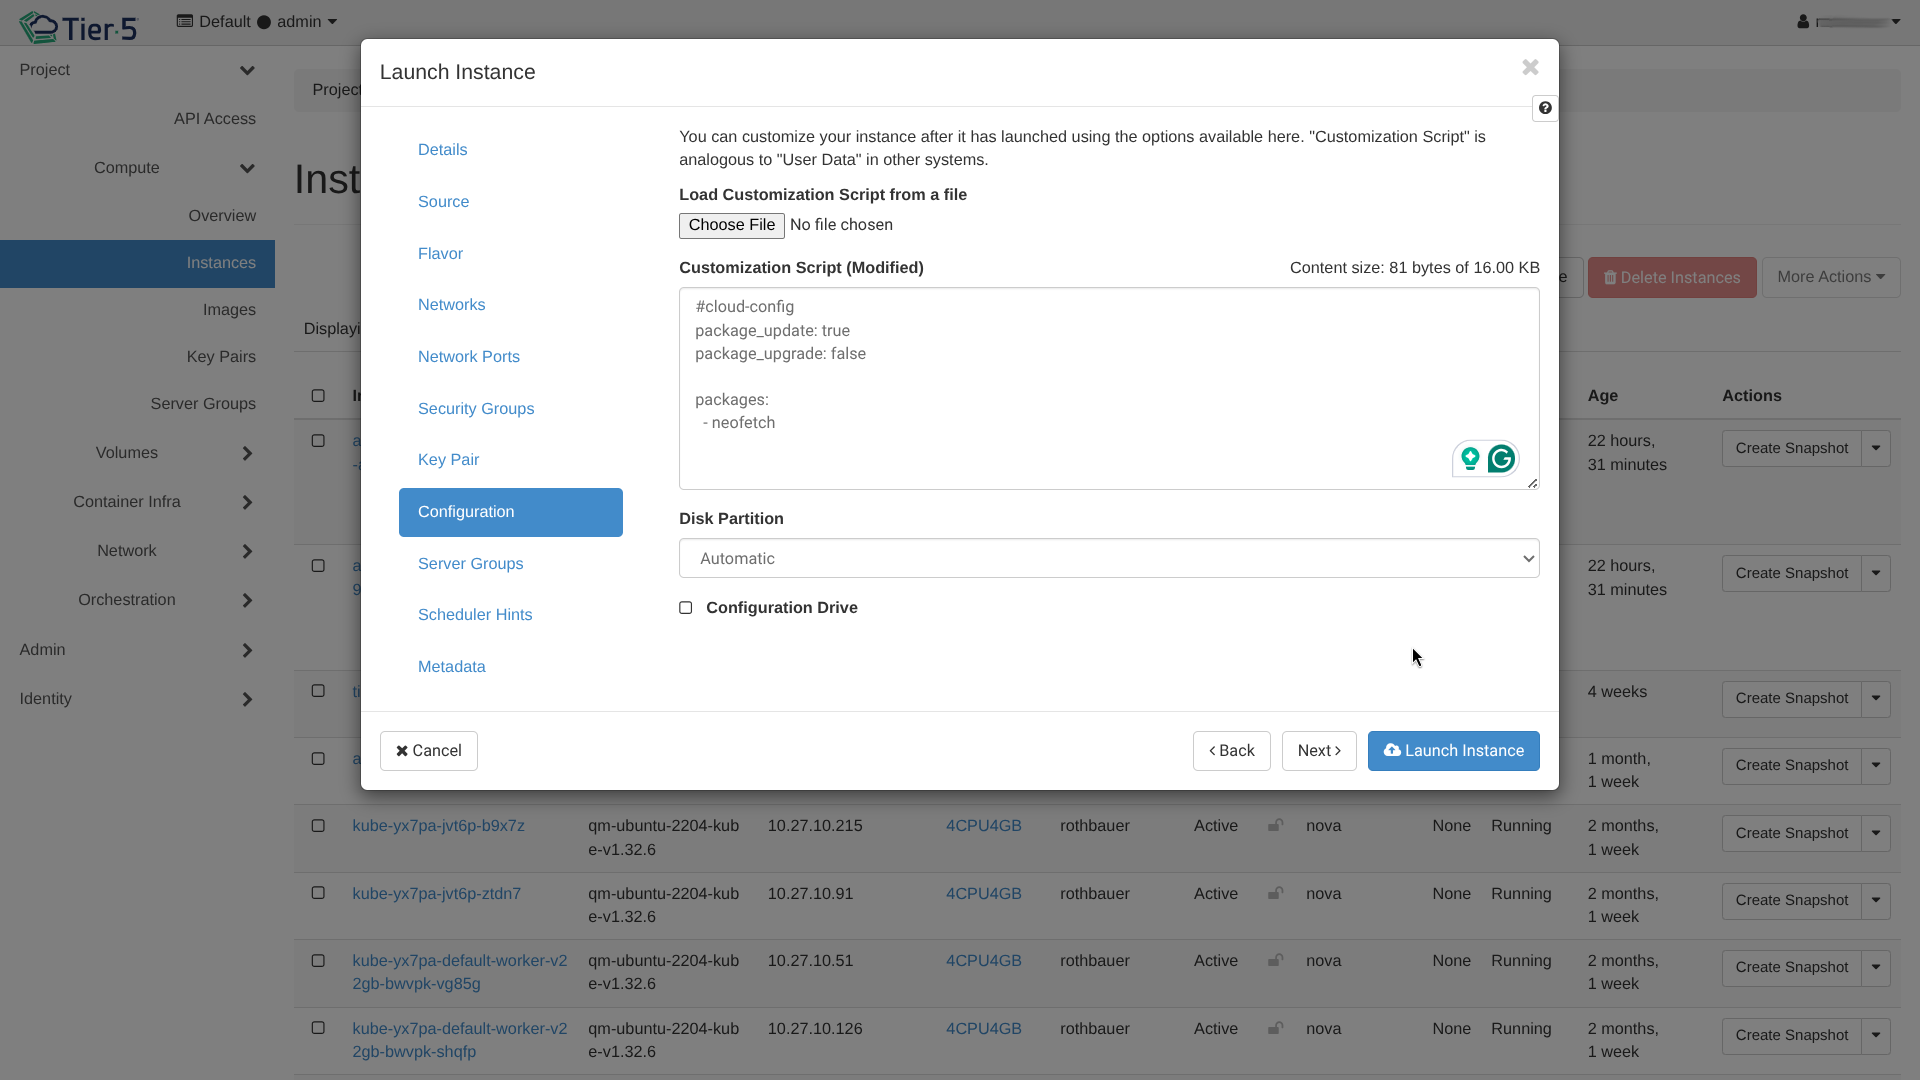
- Configuration: You can optionally provide a customization script (Cloud-init).
-
Server Groups:
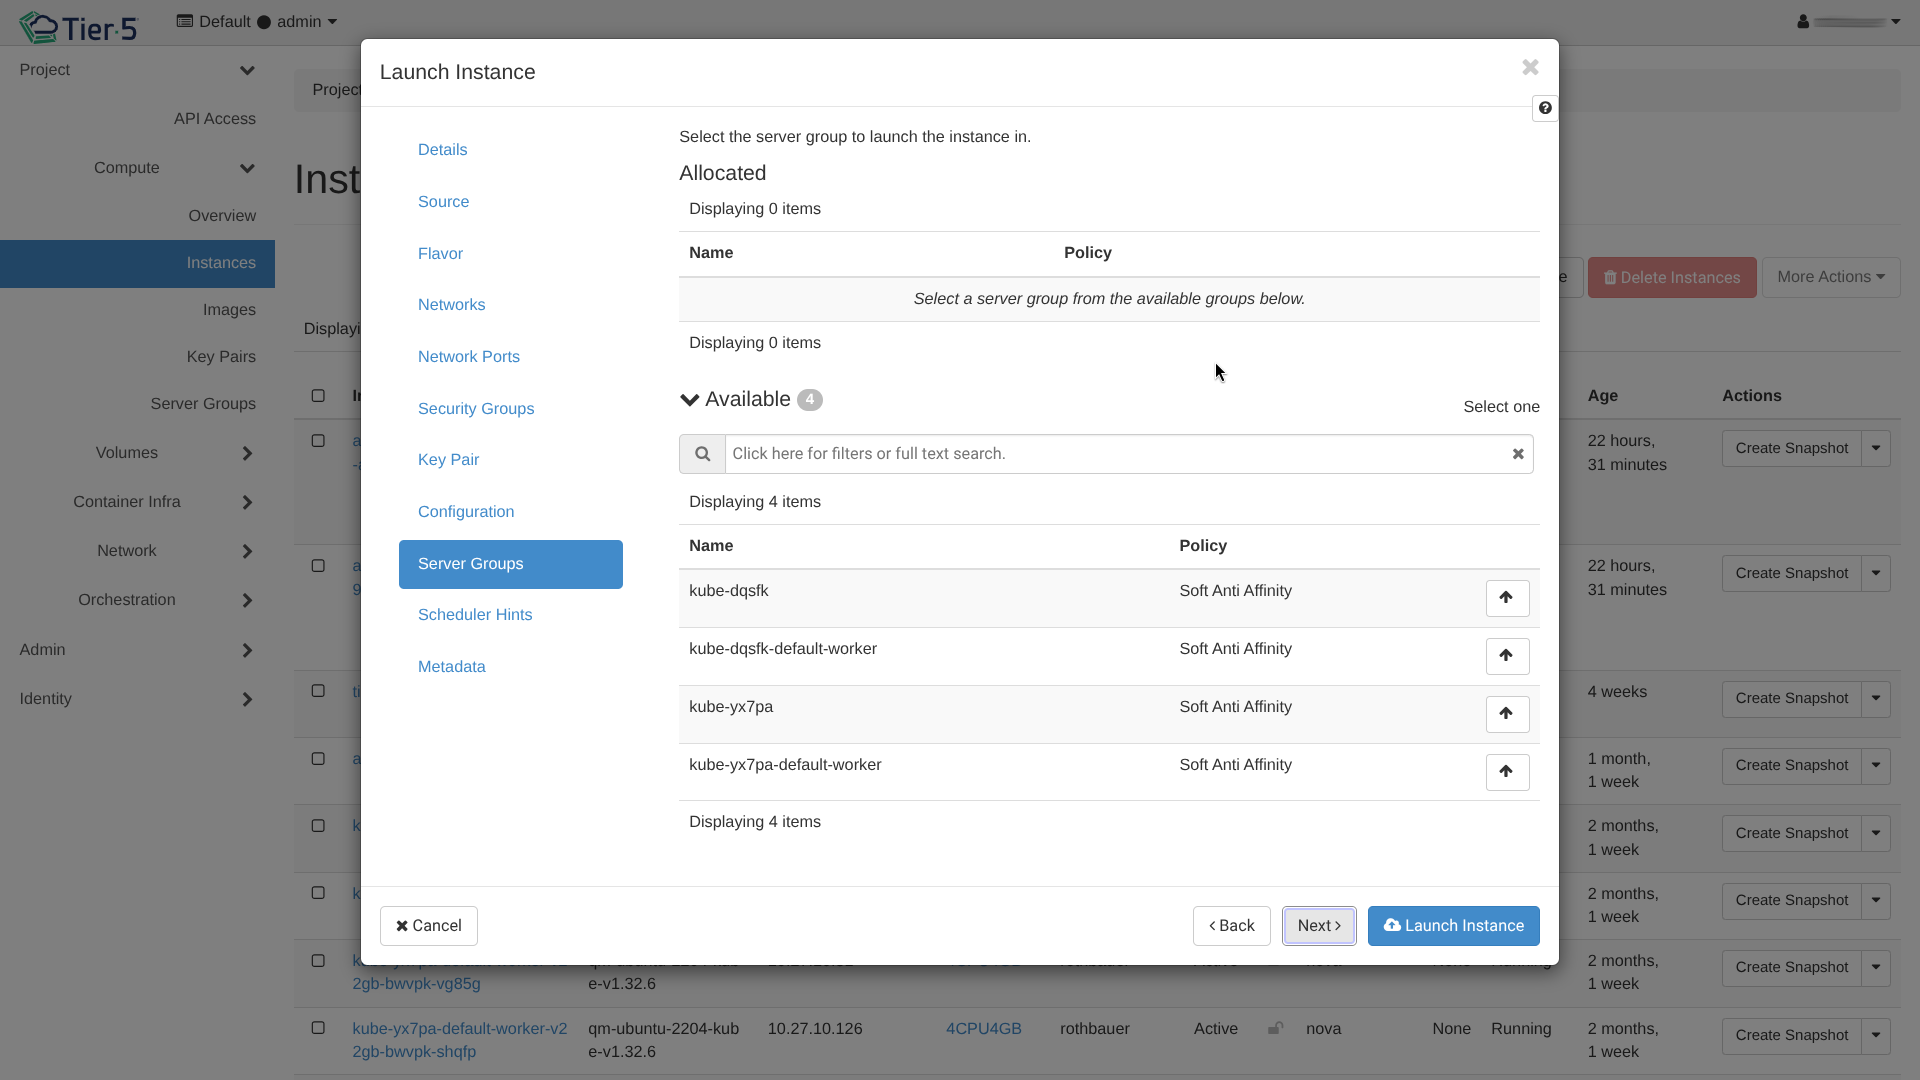
- Server Group: Select a server group to apply affinity or anti-affinity policies (e.g., ensure instances run on different physical hosts).
-
Scheduler Hints:
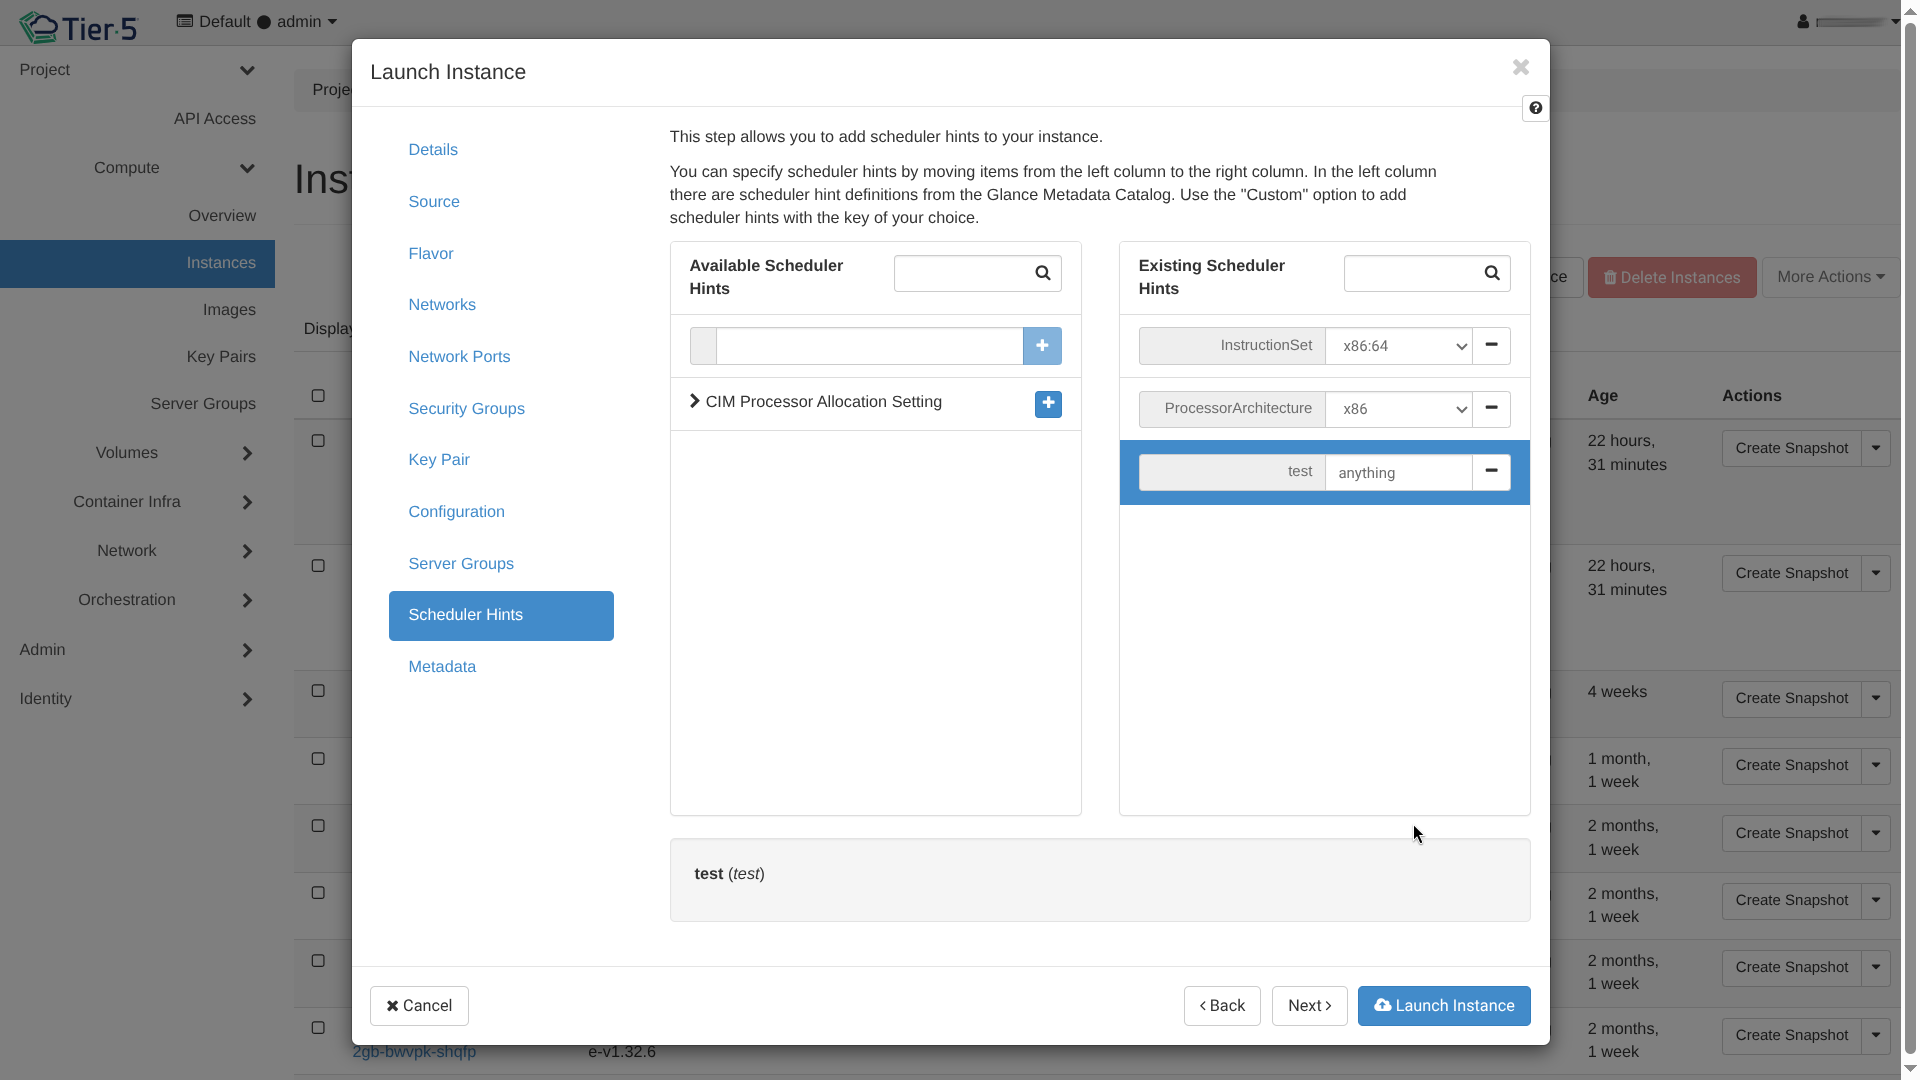
- Custom Hints: Add custom scheduling hints if required by your cloud environment.
-
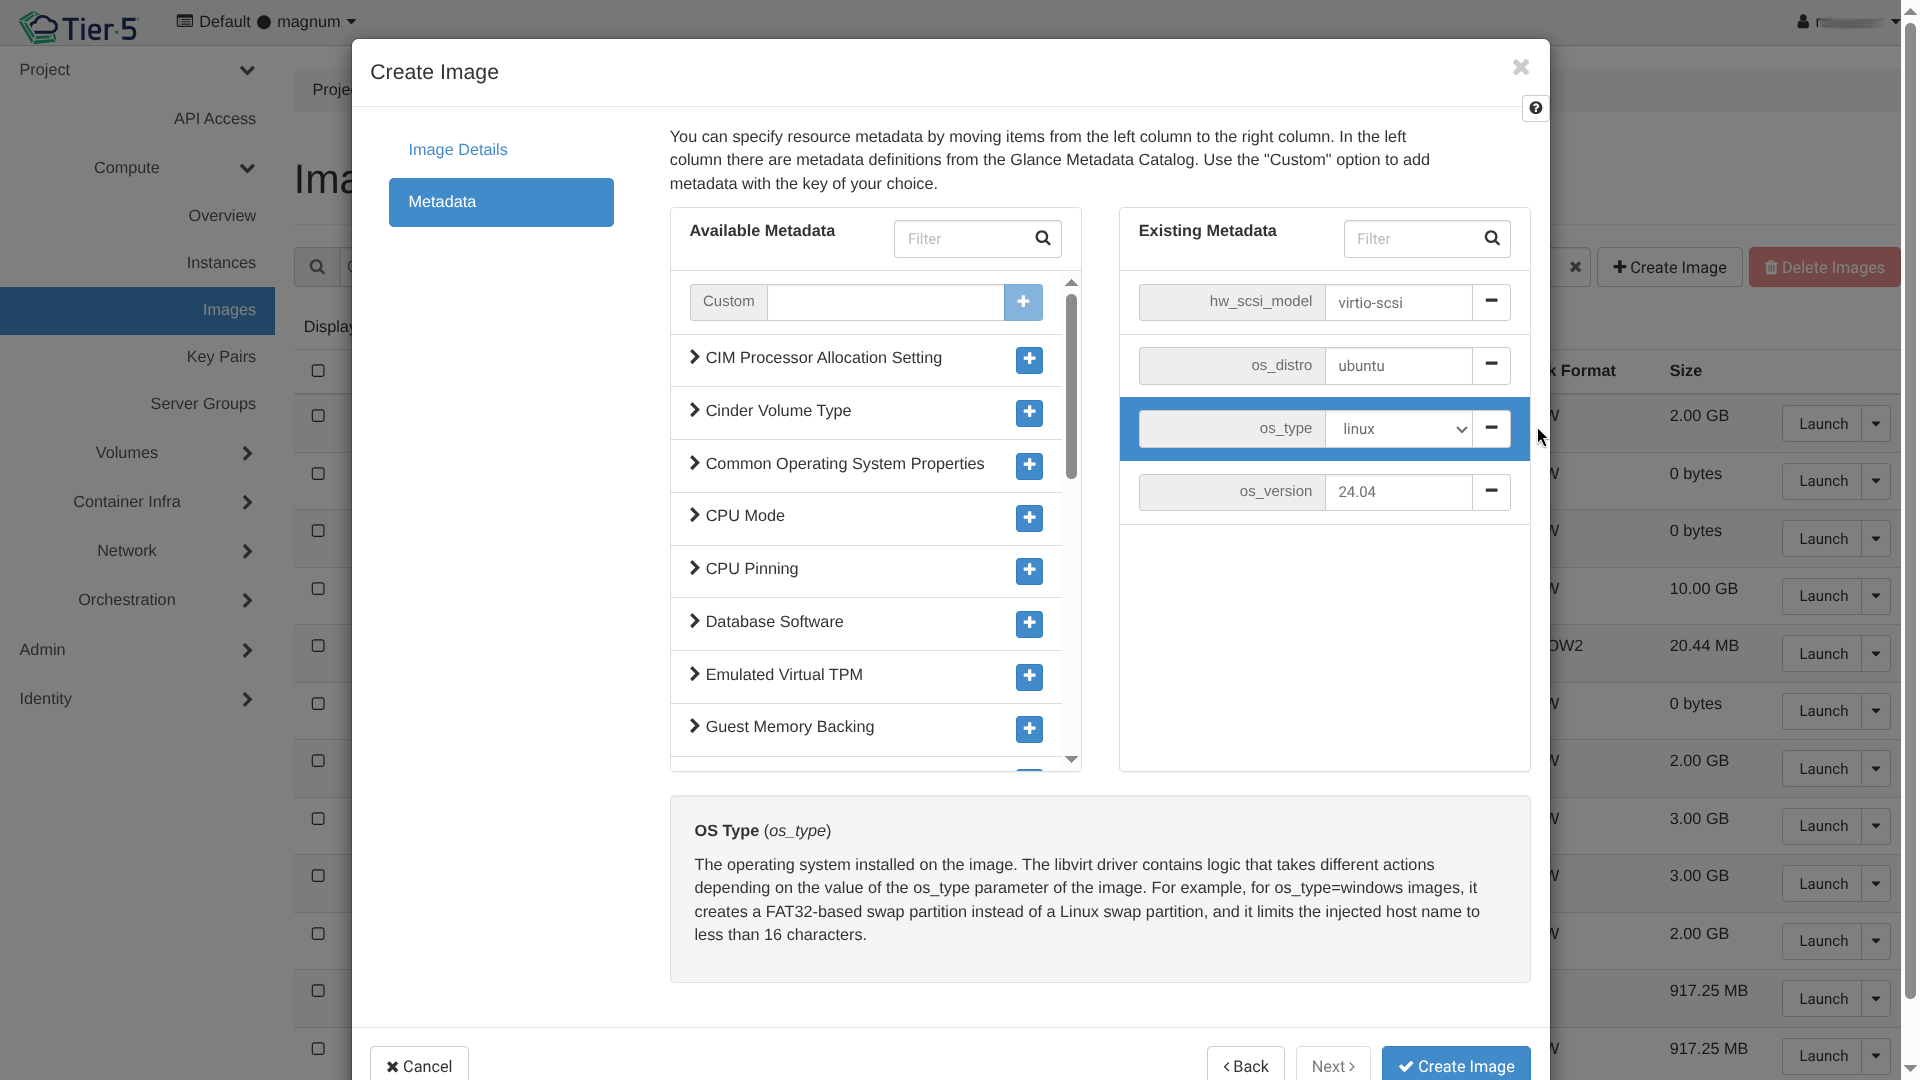
Metadata:
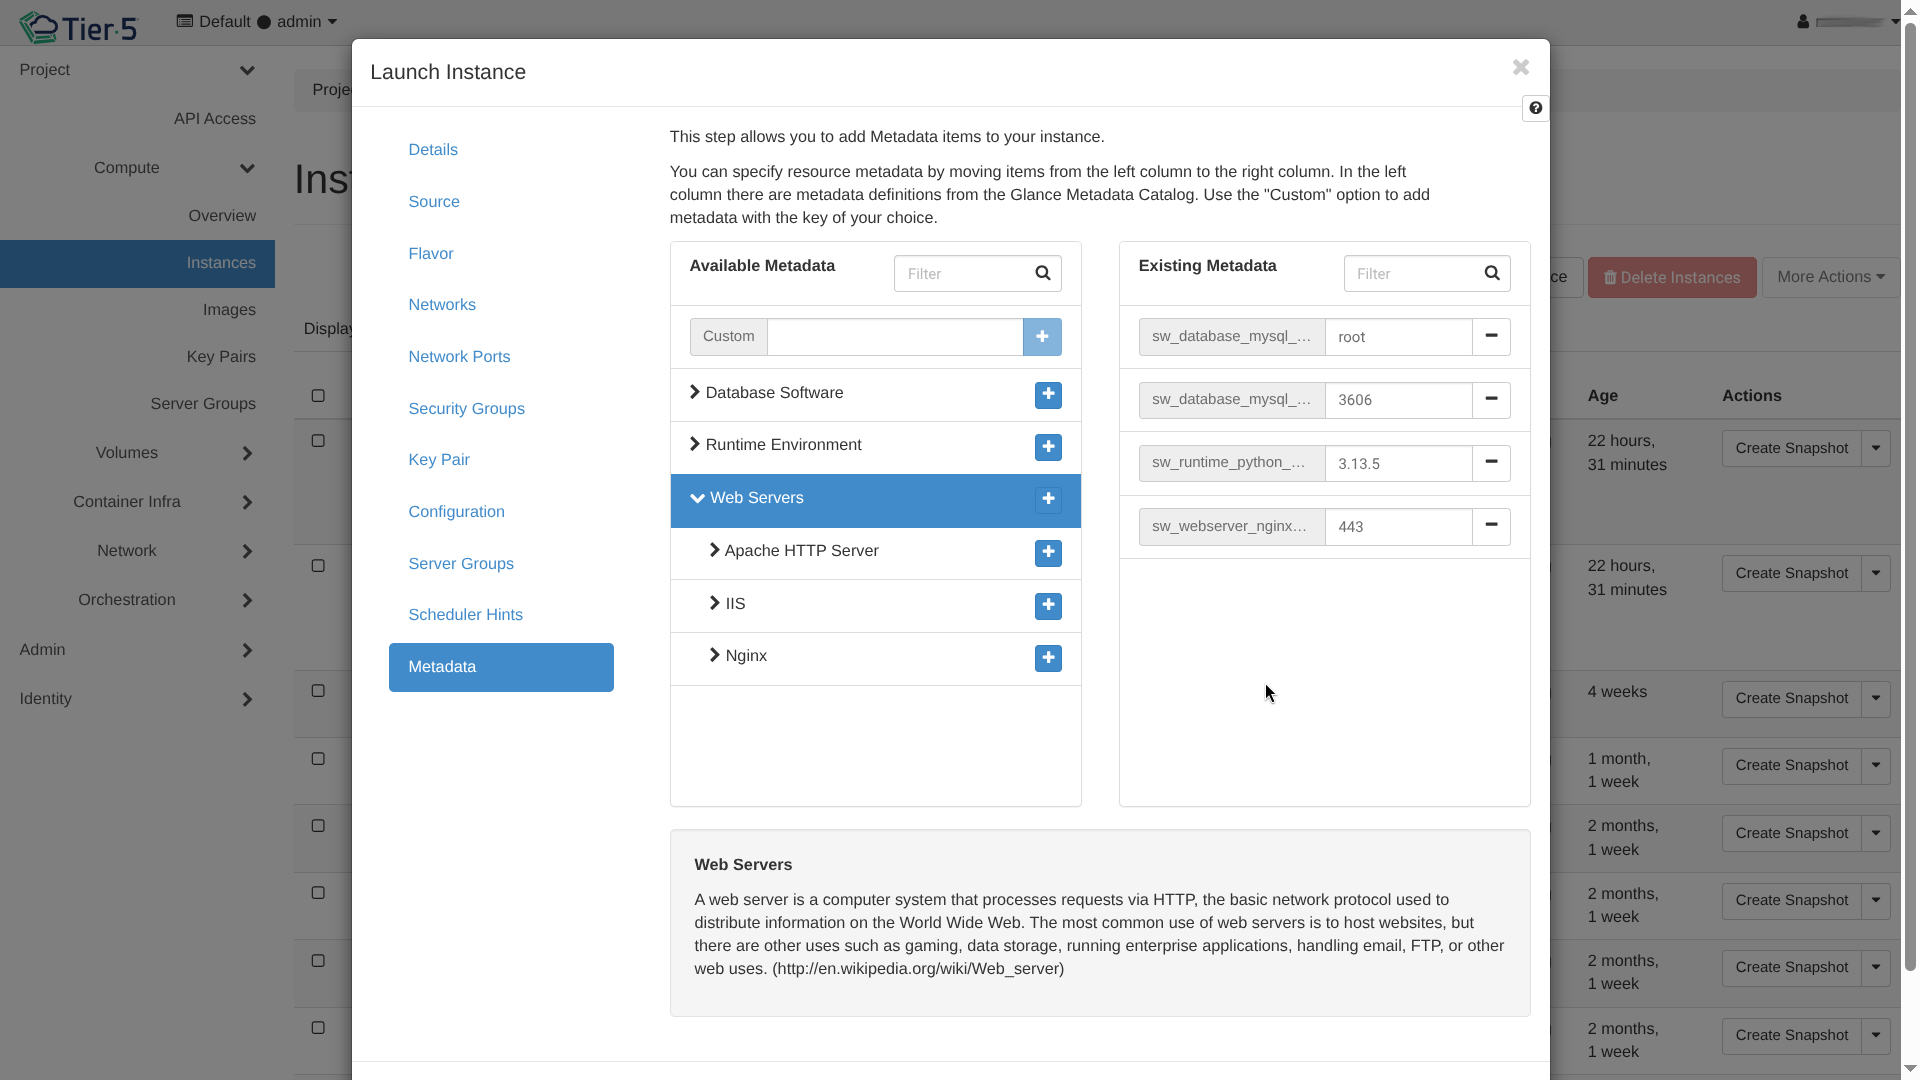
- Metadata: Add custom key-value pairs to the instance.
-
Review and Launch:
-
Click Launch Instance to start the provisioning process.
-
The status will change from
BuildtoActiveonce ready.
-
Resizing an Instance
If your workload increases, you can resize the instance to a larger flavor.
- Ensure the VM is powered off for safe resizing (recommended).
- Select Resize Instance from the actions menu.
Managing Images
- Images: View available base OS images.
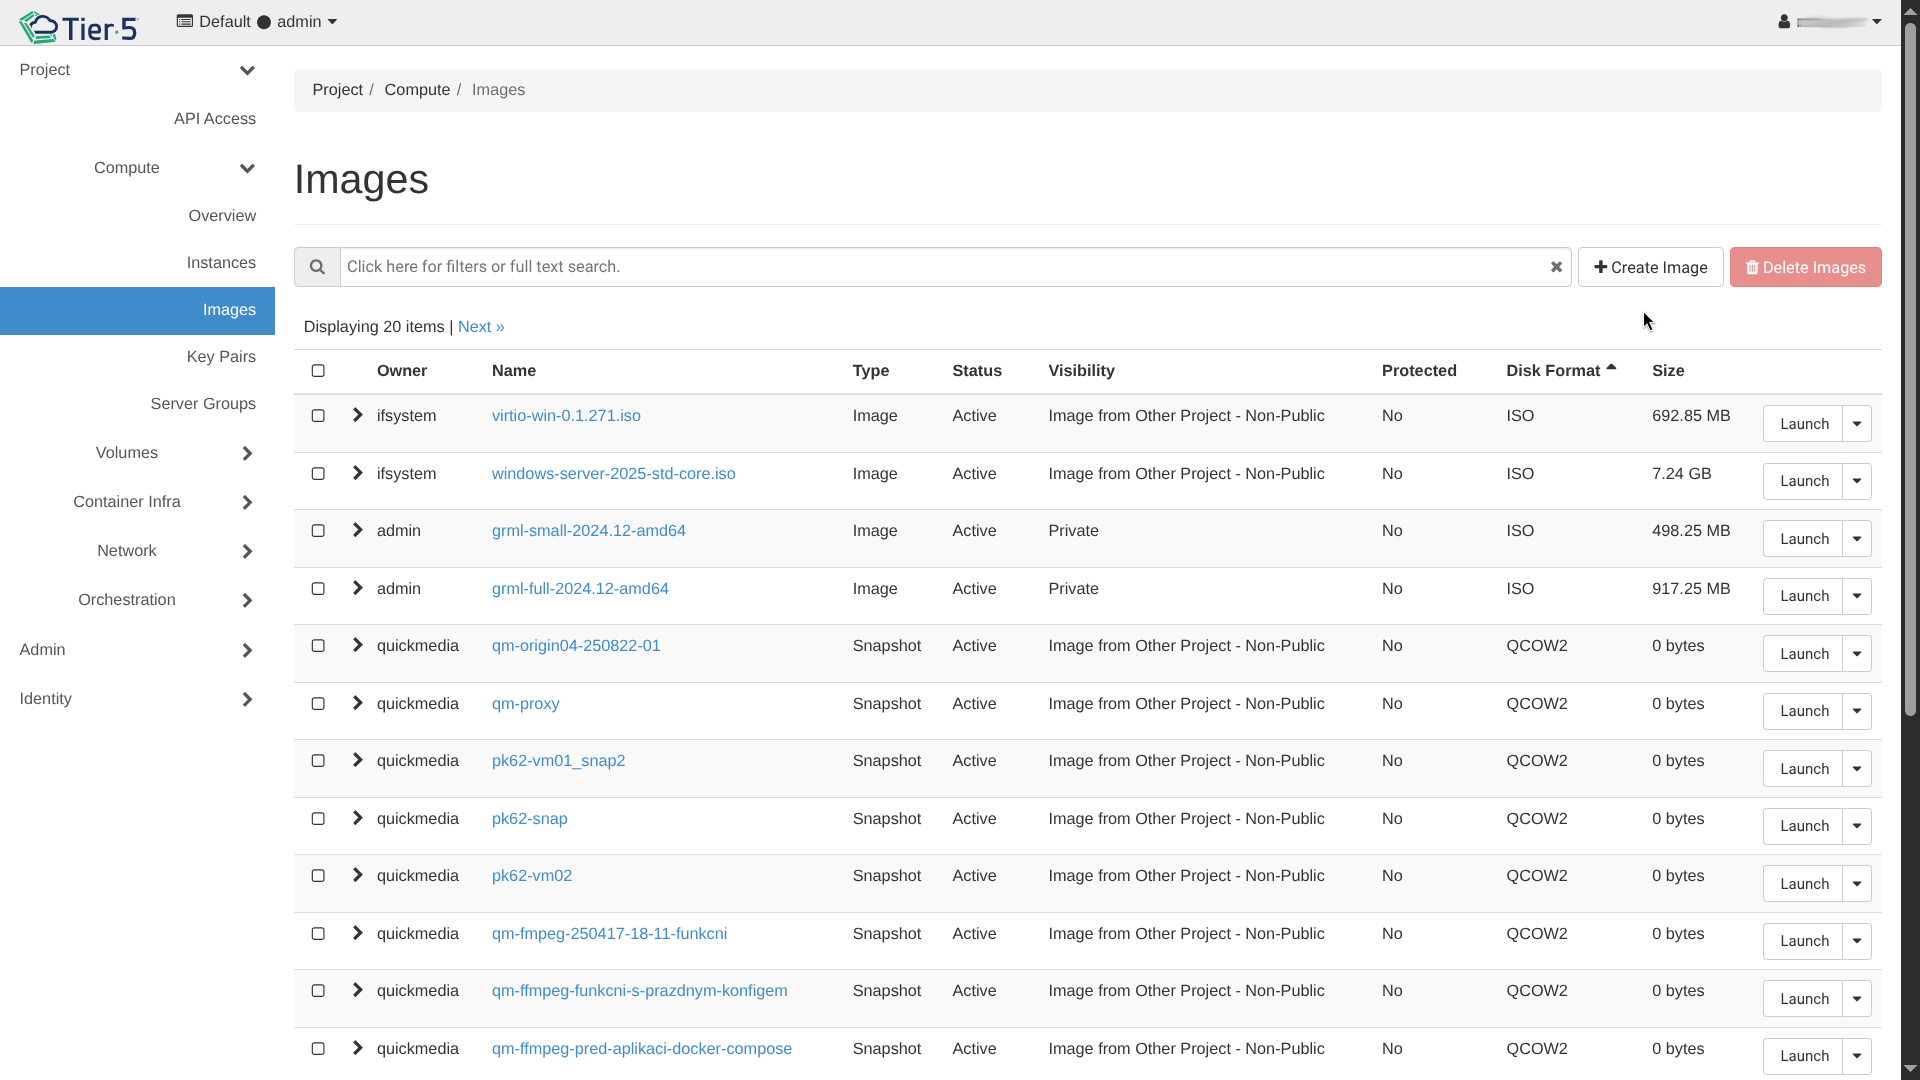
Uploading an Image
To upload a local image file (e.g., Ubuntu noble-server-cloudimg-amd64.raw):
- Click Create Image.
-
Image Details:
- Image Name: Enter a descriptive name.
- File: Click Browse to select the file from your local machine.
- Format: Select RAW for Disk Format and Bare for Container Format.
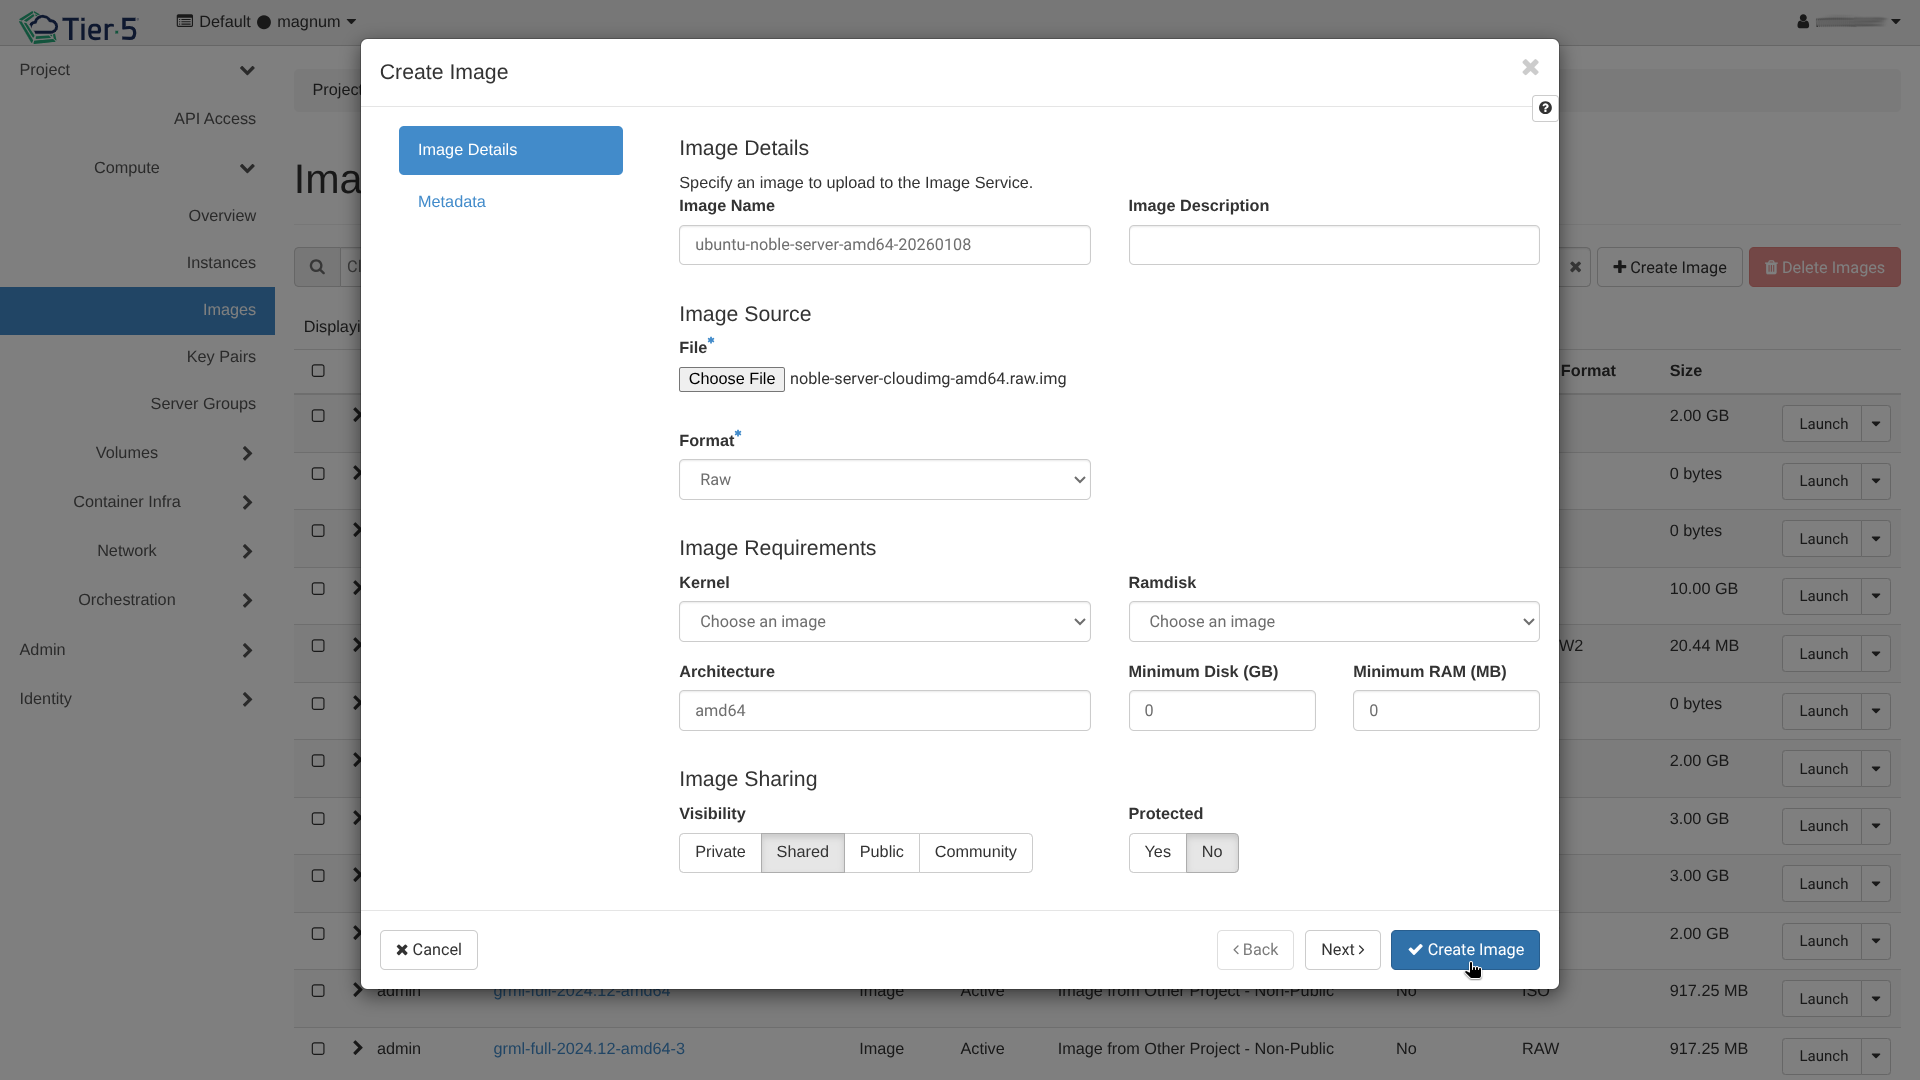
Optimal Formats
We strongly recommend using RAW disk format and Bare container format for the best compatibility and performance.
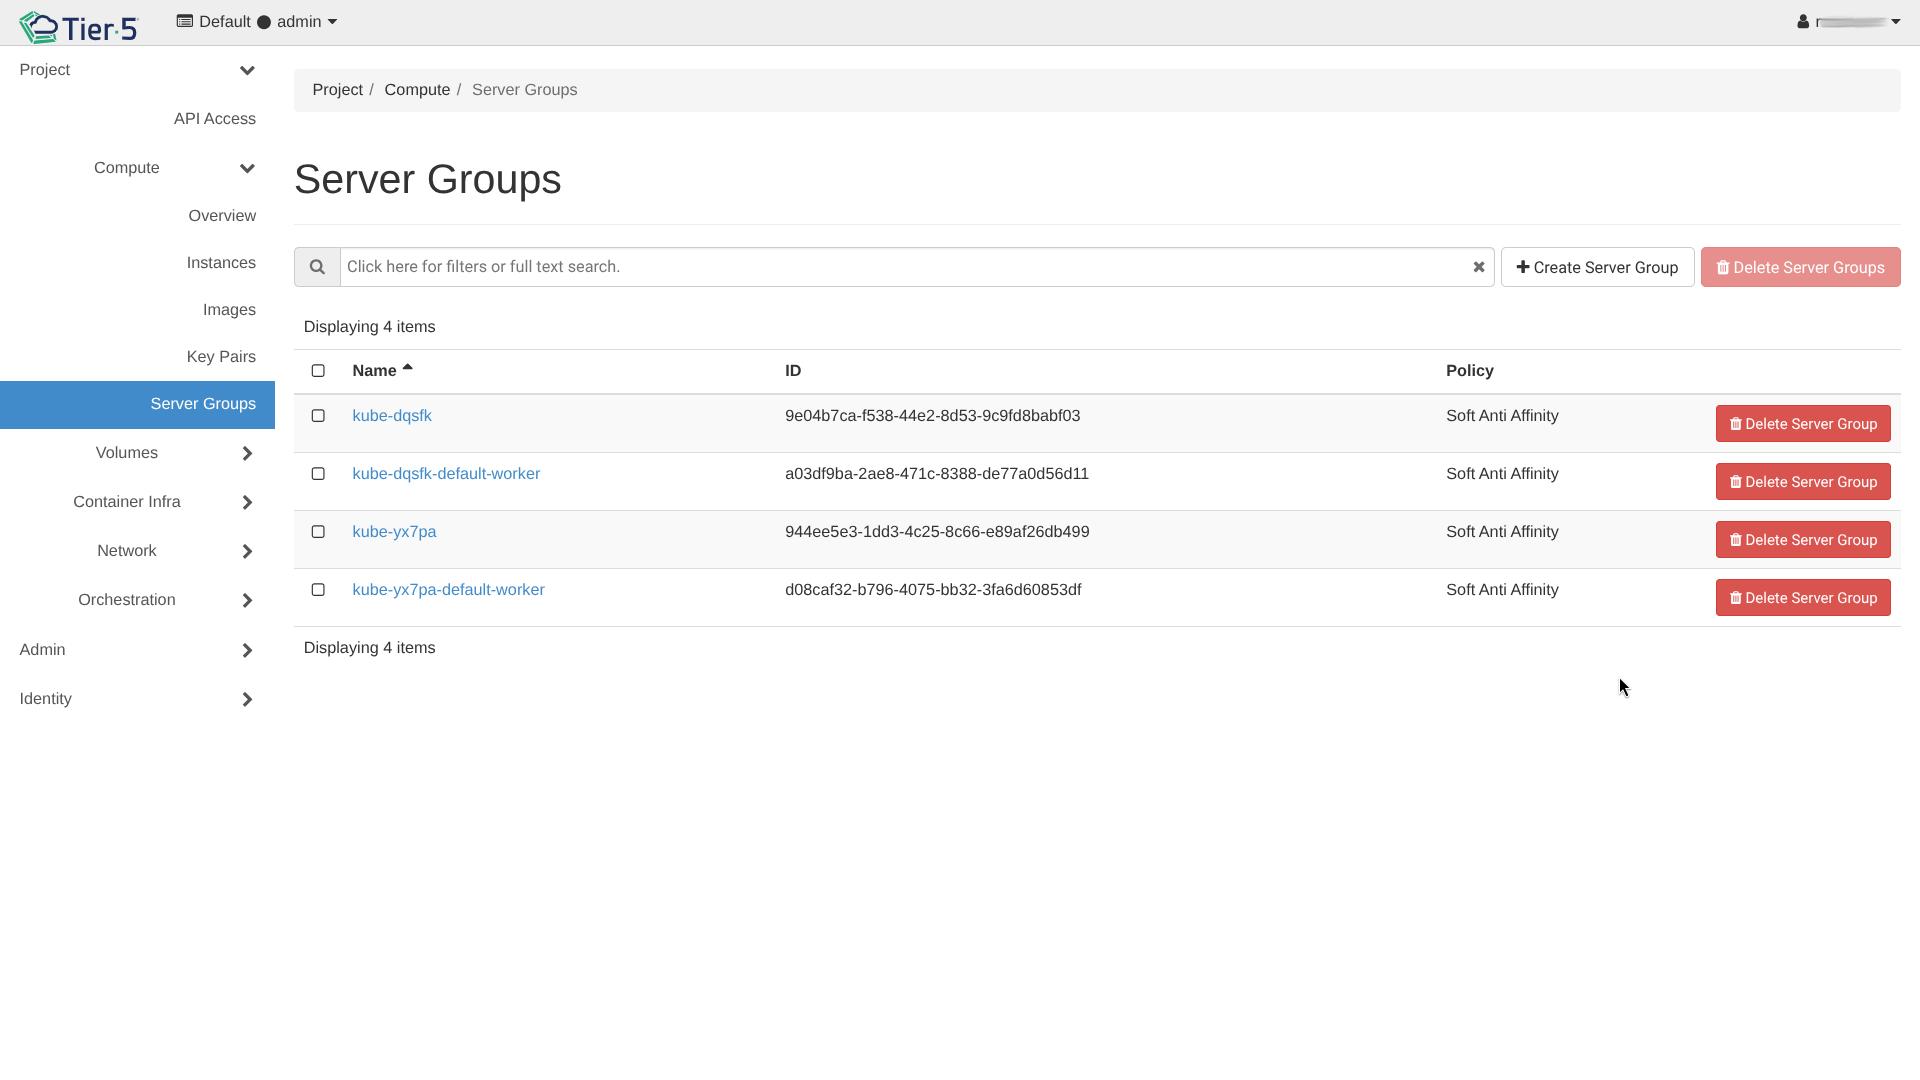
Managing Server Groups
- Server Groups: Create and manage groups to control instance placement (Affinity/Anti-Affinity).
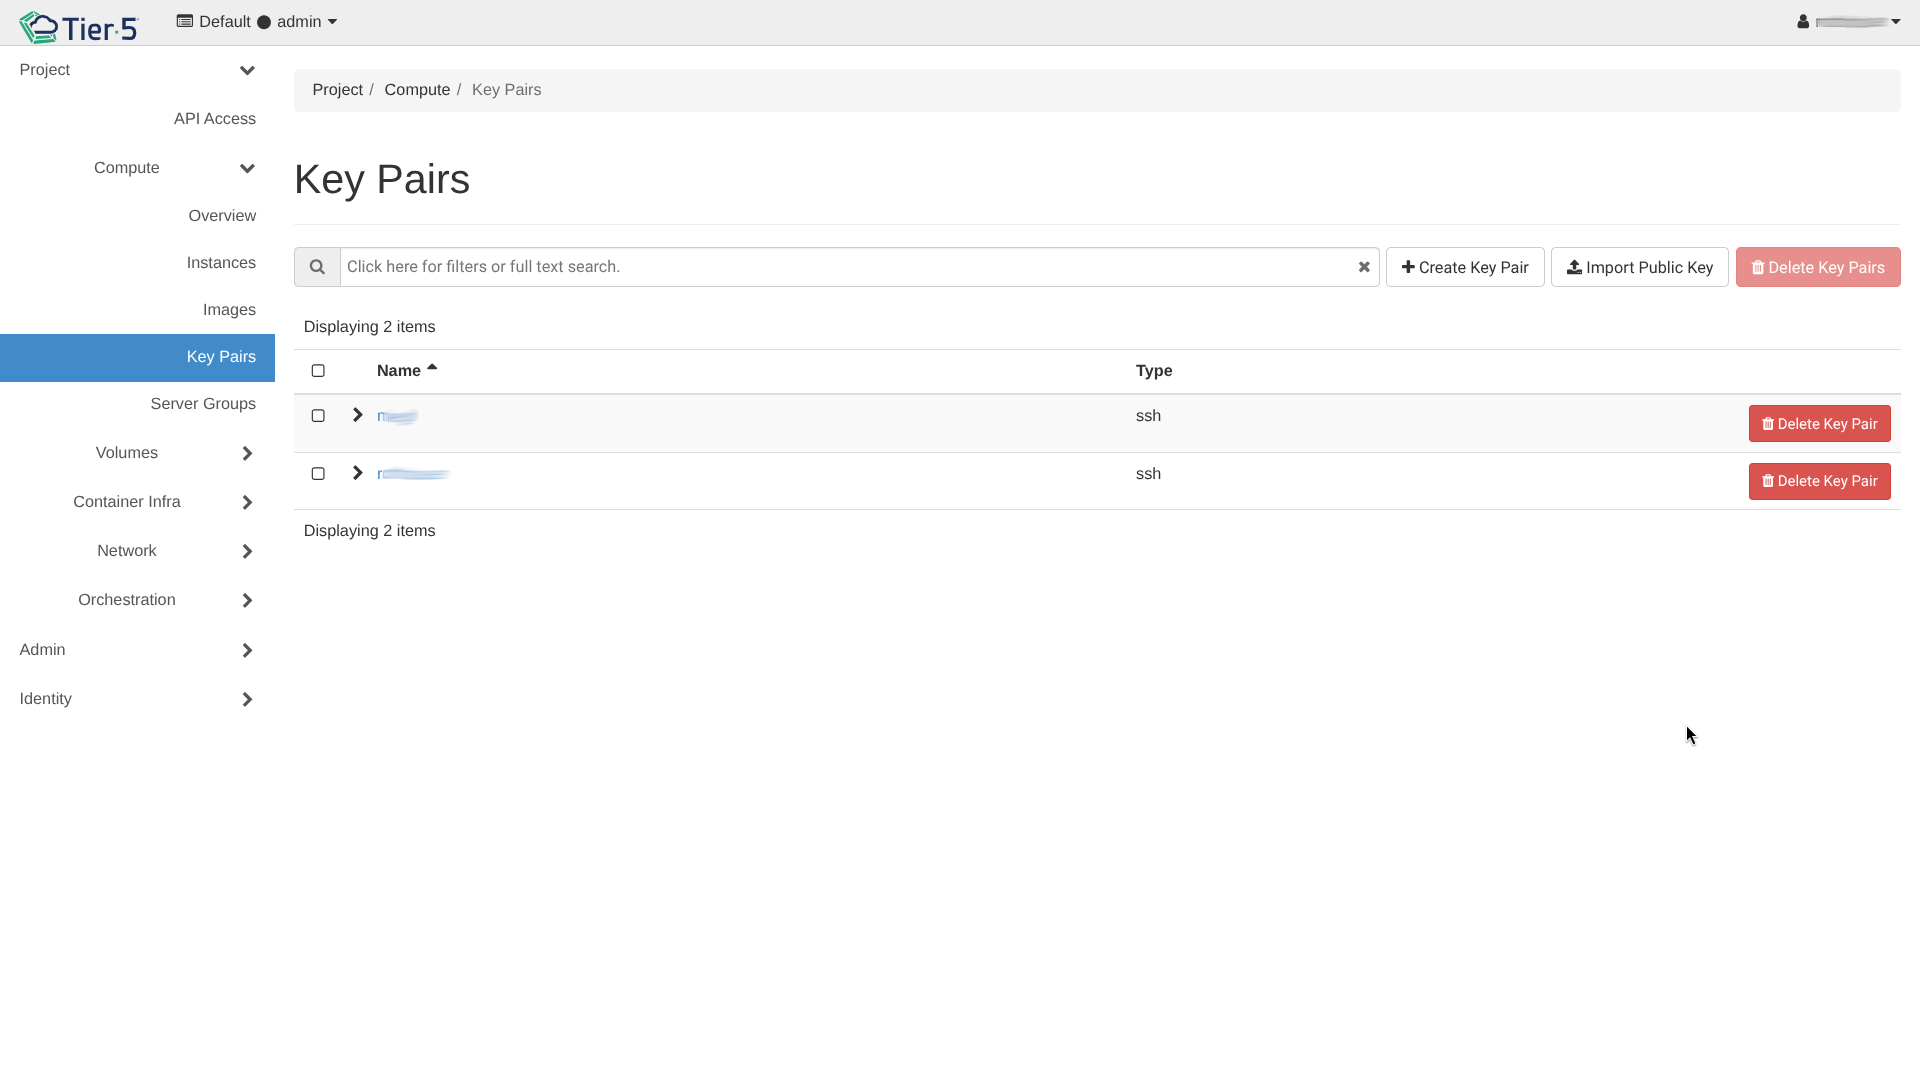
Managing Key Pairs
- Key Pairs: specific SSH keys for accessing instances.
Networking (Neutron)
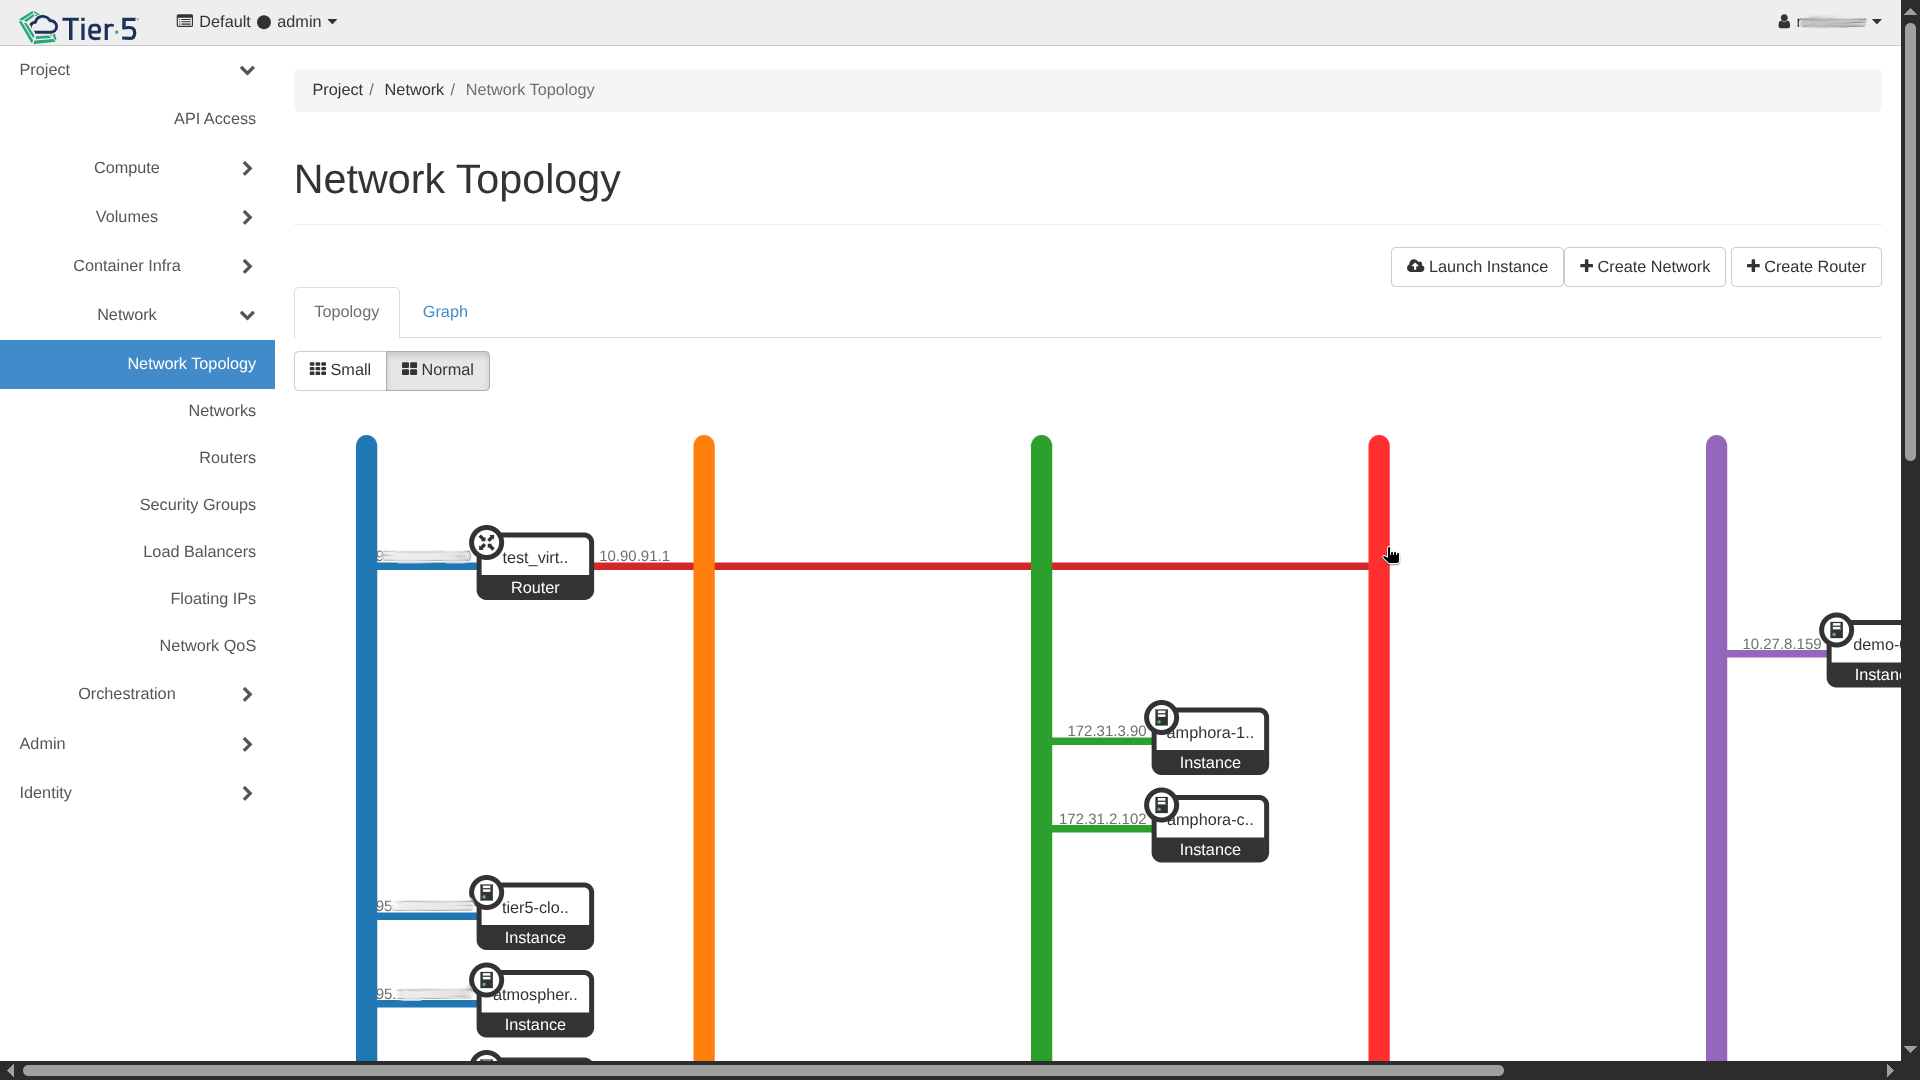
Network Visualization
The Network Topology view provides a graphical representation of your infrastructure.
Creating a Private Network
- Go to Network → Networks.
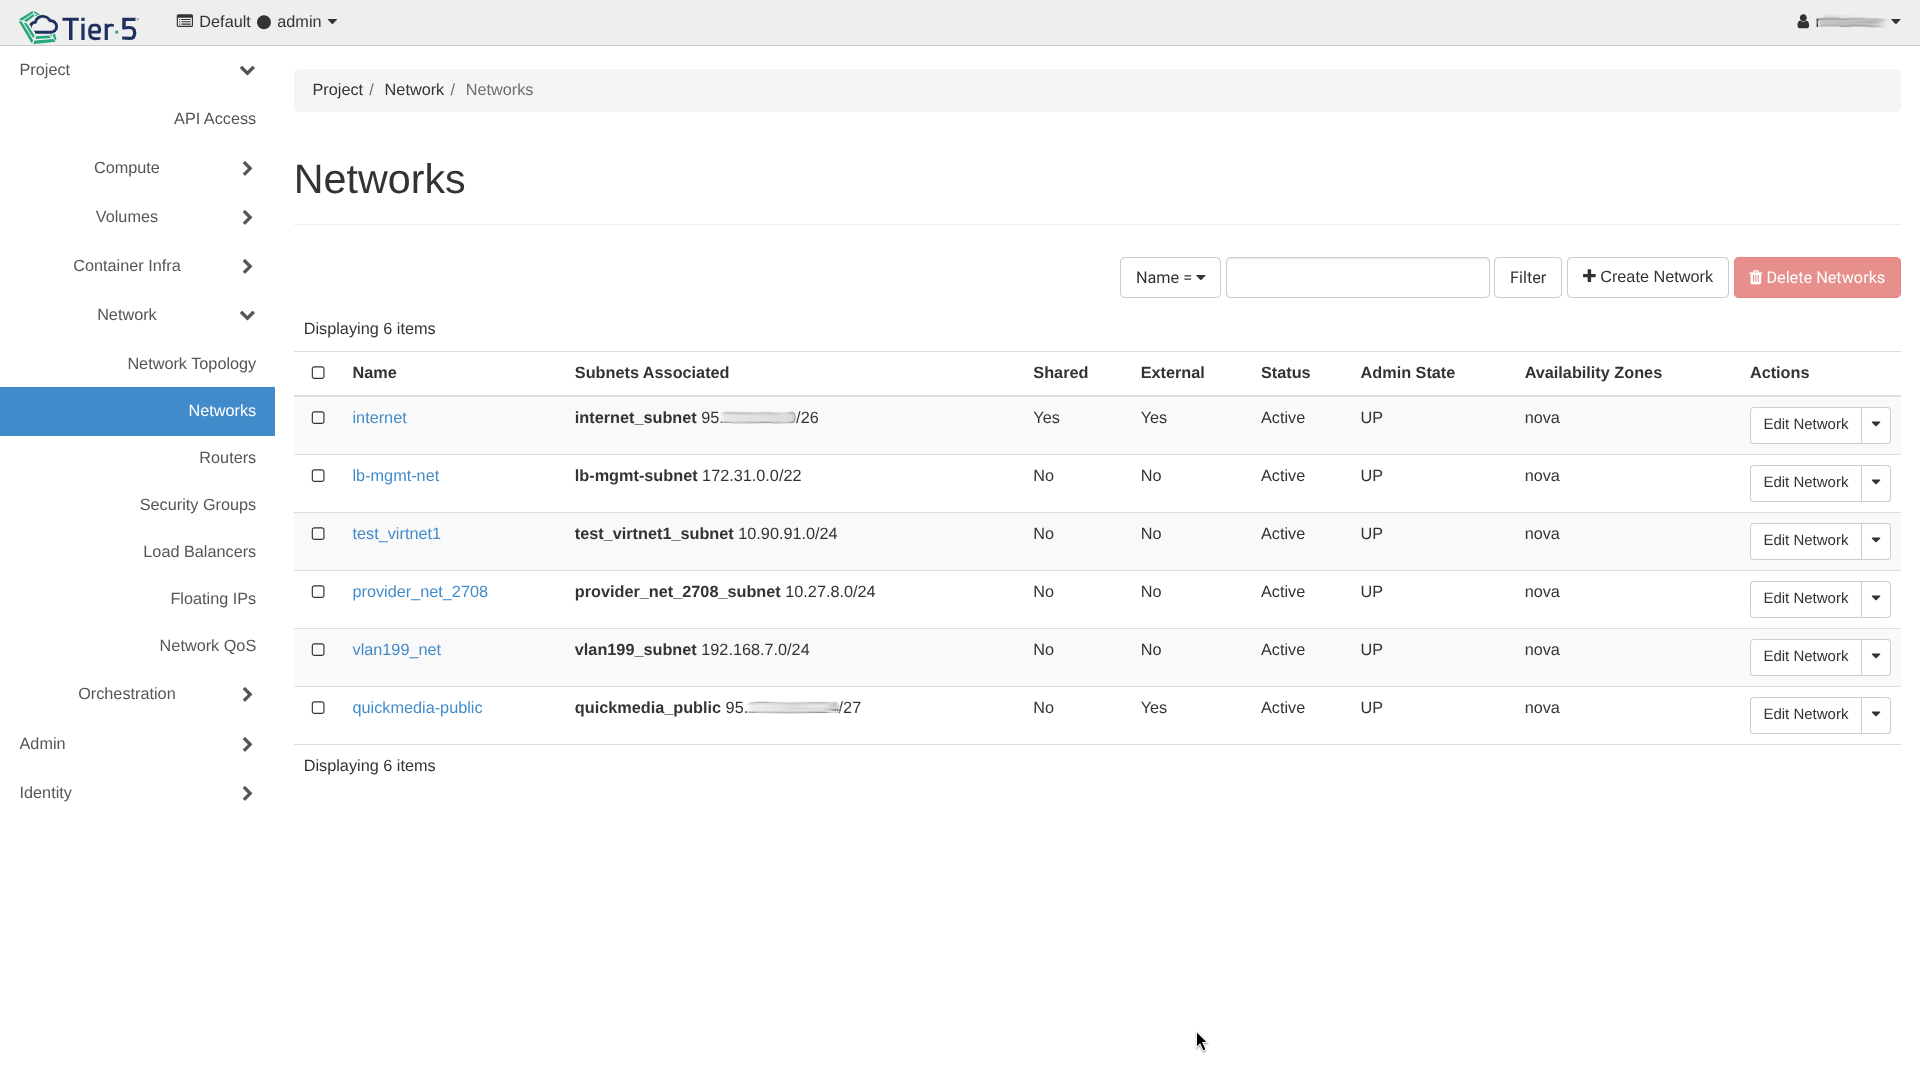
- Click Create Network.
- Define the Network Name and Subnet (CIDR, Gateway).
- Configure DHCP to automatically assign IP addresses to instances.
Configuring Security Groups
Security groups act as a virtual firewall for your instances. By default, all incoming traffic is blocked.
1. Go to Network → Security Groups.
 2. Click Manage Rules on a security group.
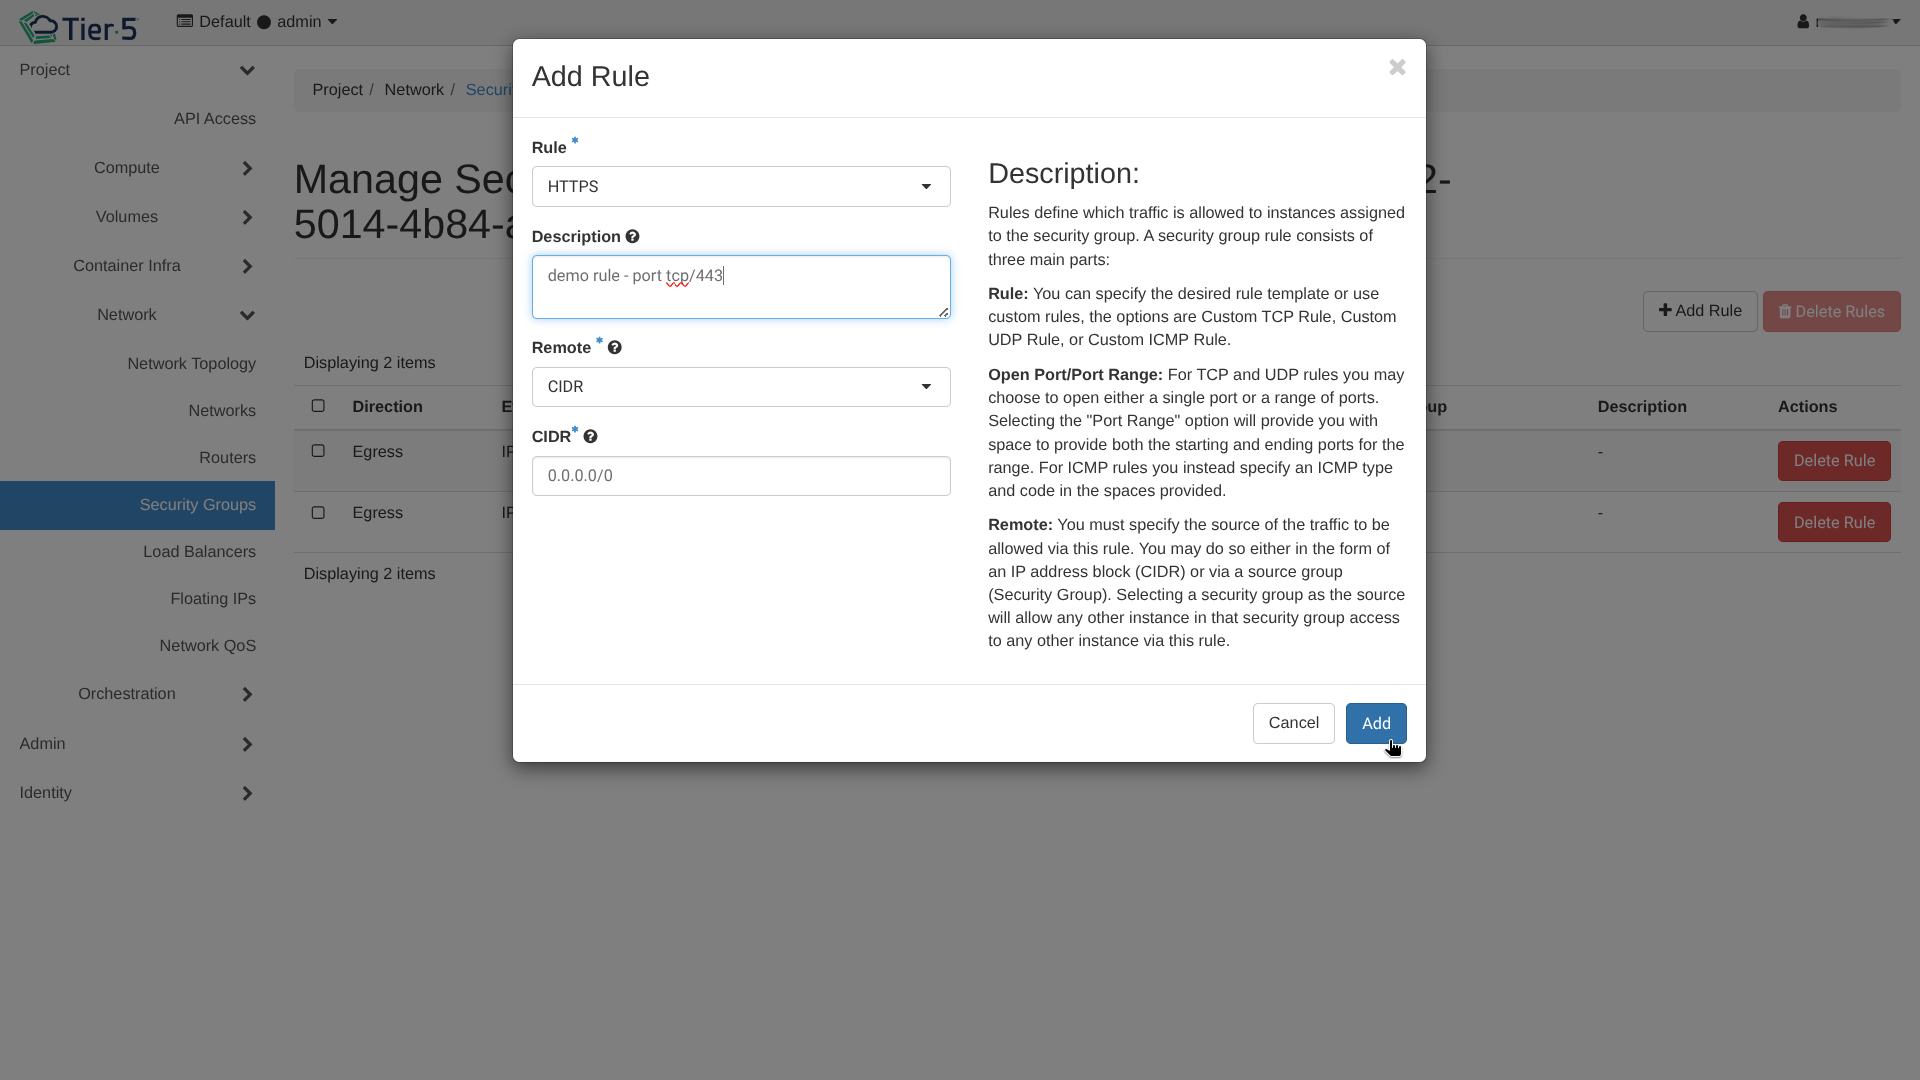
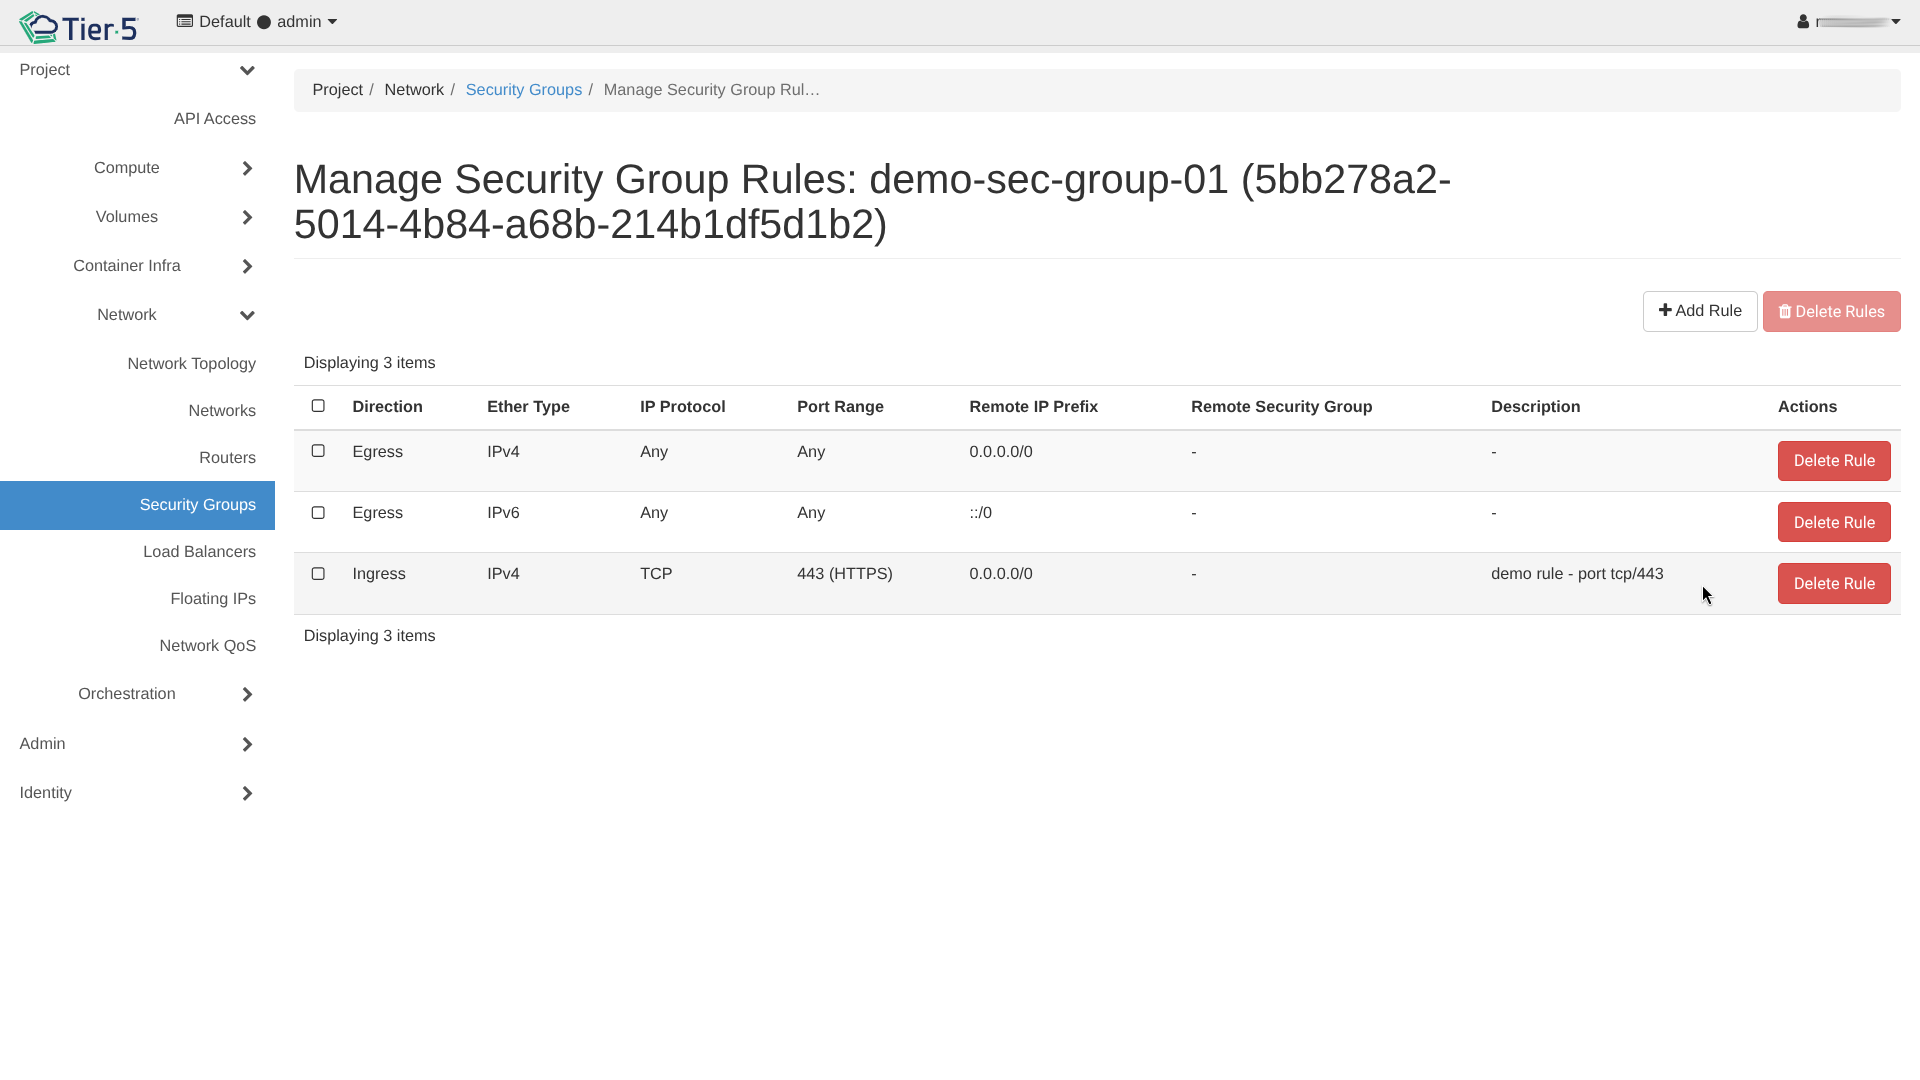 3. Add Rule: Allow specific traffic.
* SSH: TCP Port 22
* HTTP/HTTPS: TCP Port 80/443
* ICMP: For ping/traceroute
3. Add Rule: Allow specific traffic.
* SSH: TCP Port 22
* HTTP/HTTPS: TCP Port 80/443
* ICMP: For ping/traceroute
Load Balancing (Octavia)
To distribute traffic among multiple web servers:
- Navigate to Network → Load Balancers.

- Click Create Load Balancer.
- Load Balancer Details: Name, IP address (VIP), and Subnet.
- Listener: Protocol (HTTP/TCP) and Port (e.g., 80).
- Pool: The group of backend servers.
- Members: Add your actual Compute instances to the pool.
- Monitor provisioning status until it is Active.
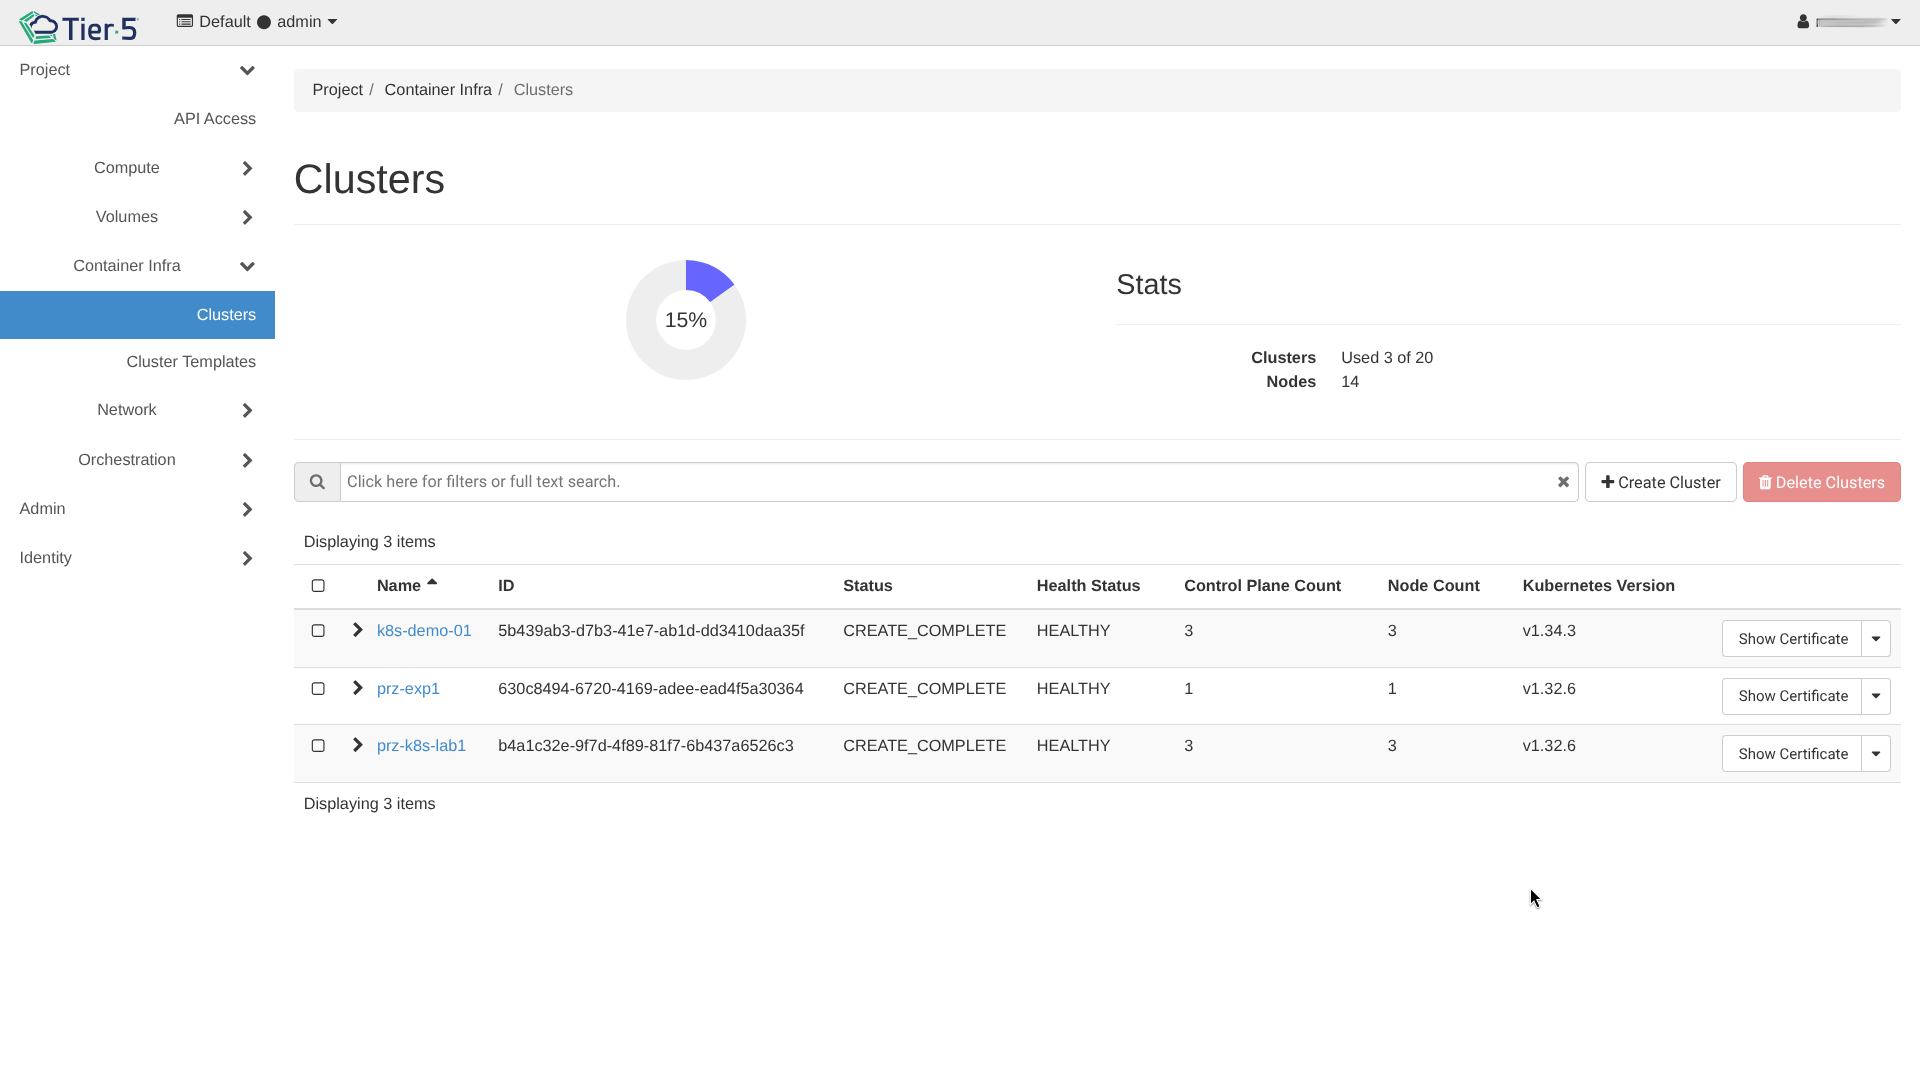
Kubernetes Clusters (Magnum)
Tier5 allows you to deploy fully managed Kubernetes clusters using Magnum.
Advanced Workloads: Kata Containers
For workloads requiring stronger isolation, you can use Kata Containers with your Magnum clusters. See the Kata Containers Guide.
-
Cluster Templates: Start by selecting or creating a template that defines the OS, Container Runtime (Docker/containerd), and Network Driver.
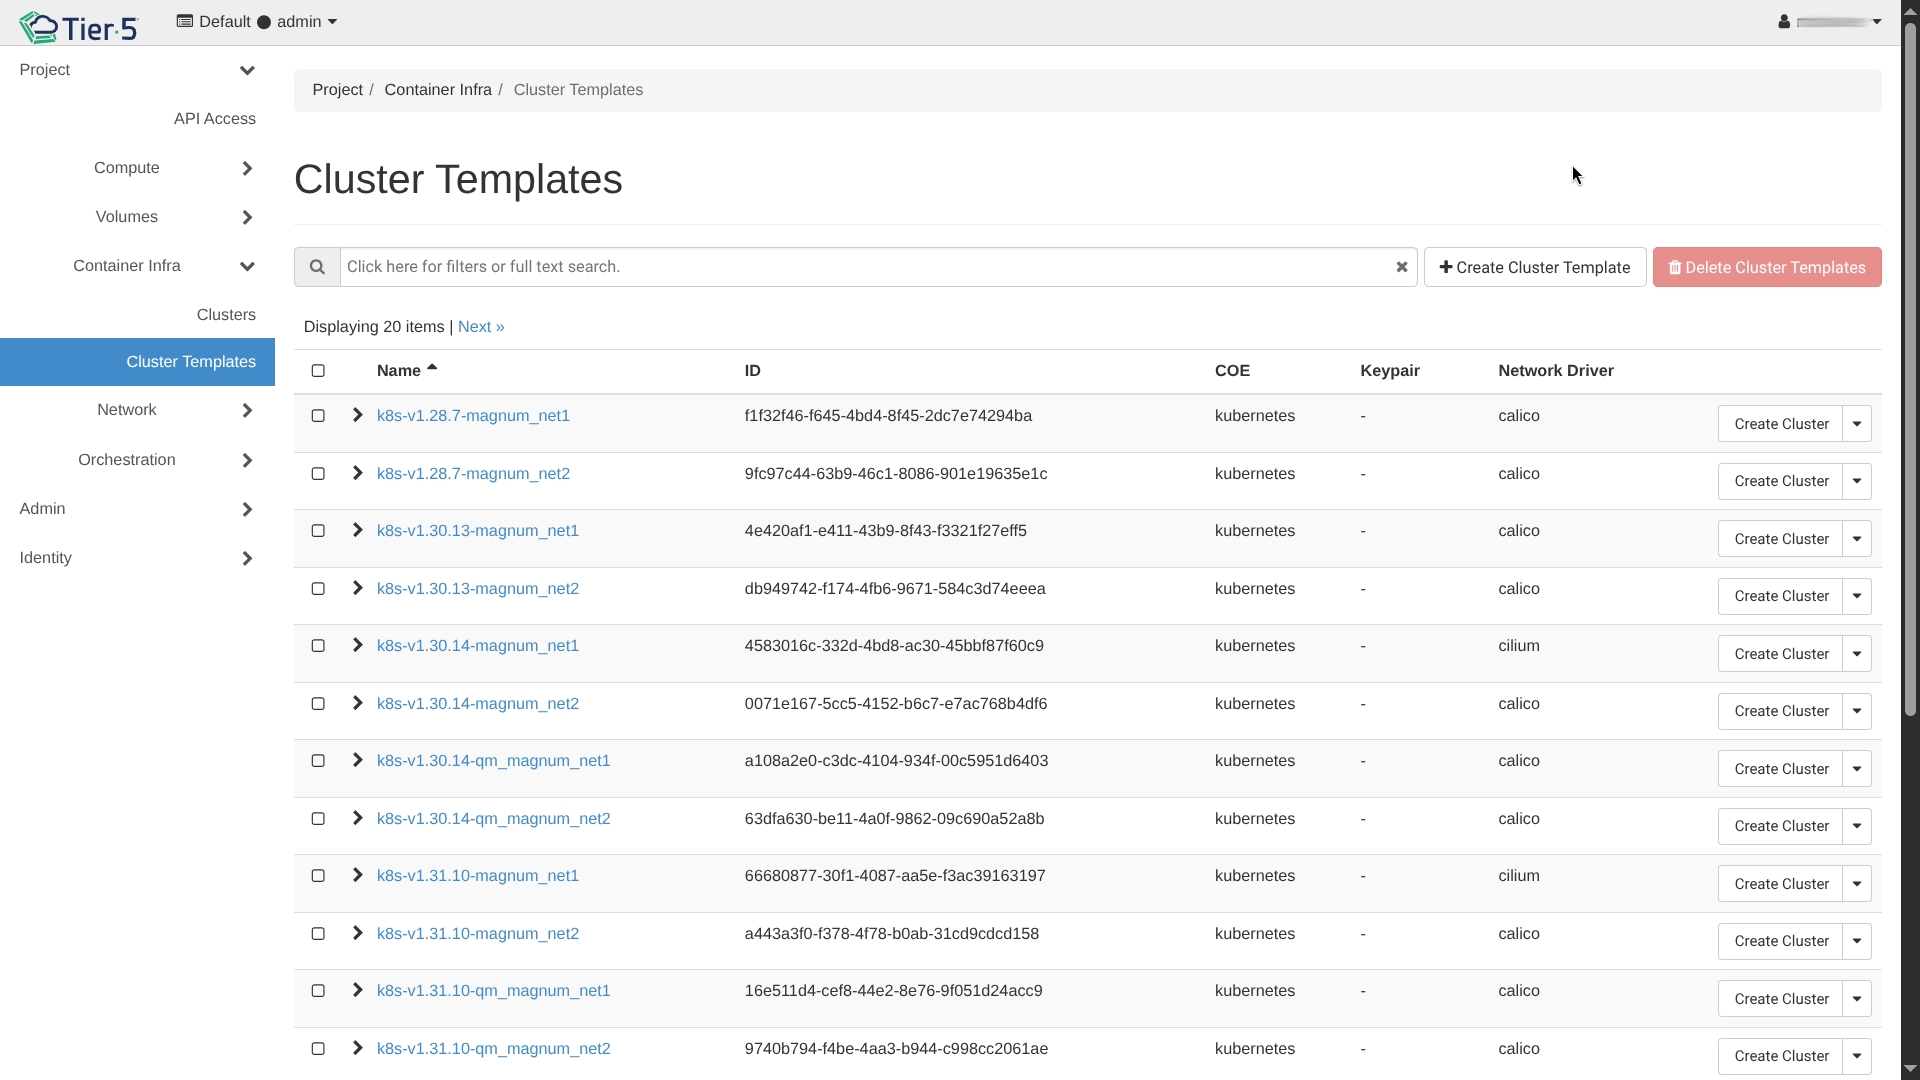
-
Create Cluster: Go to Container Infra → Clusters and click Create Cluster.
-
Configure Cluster Details:
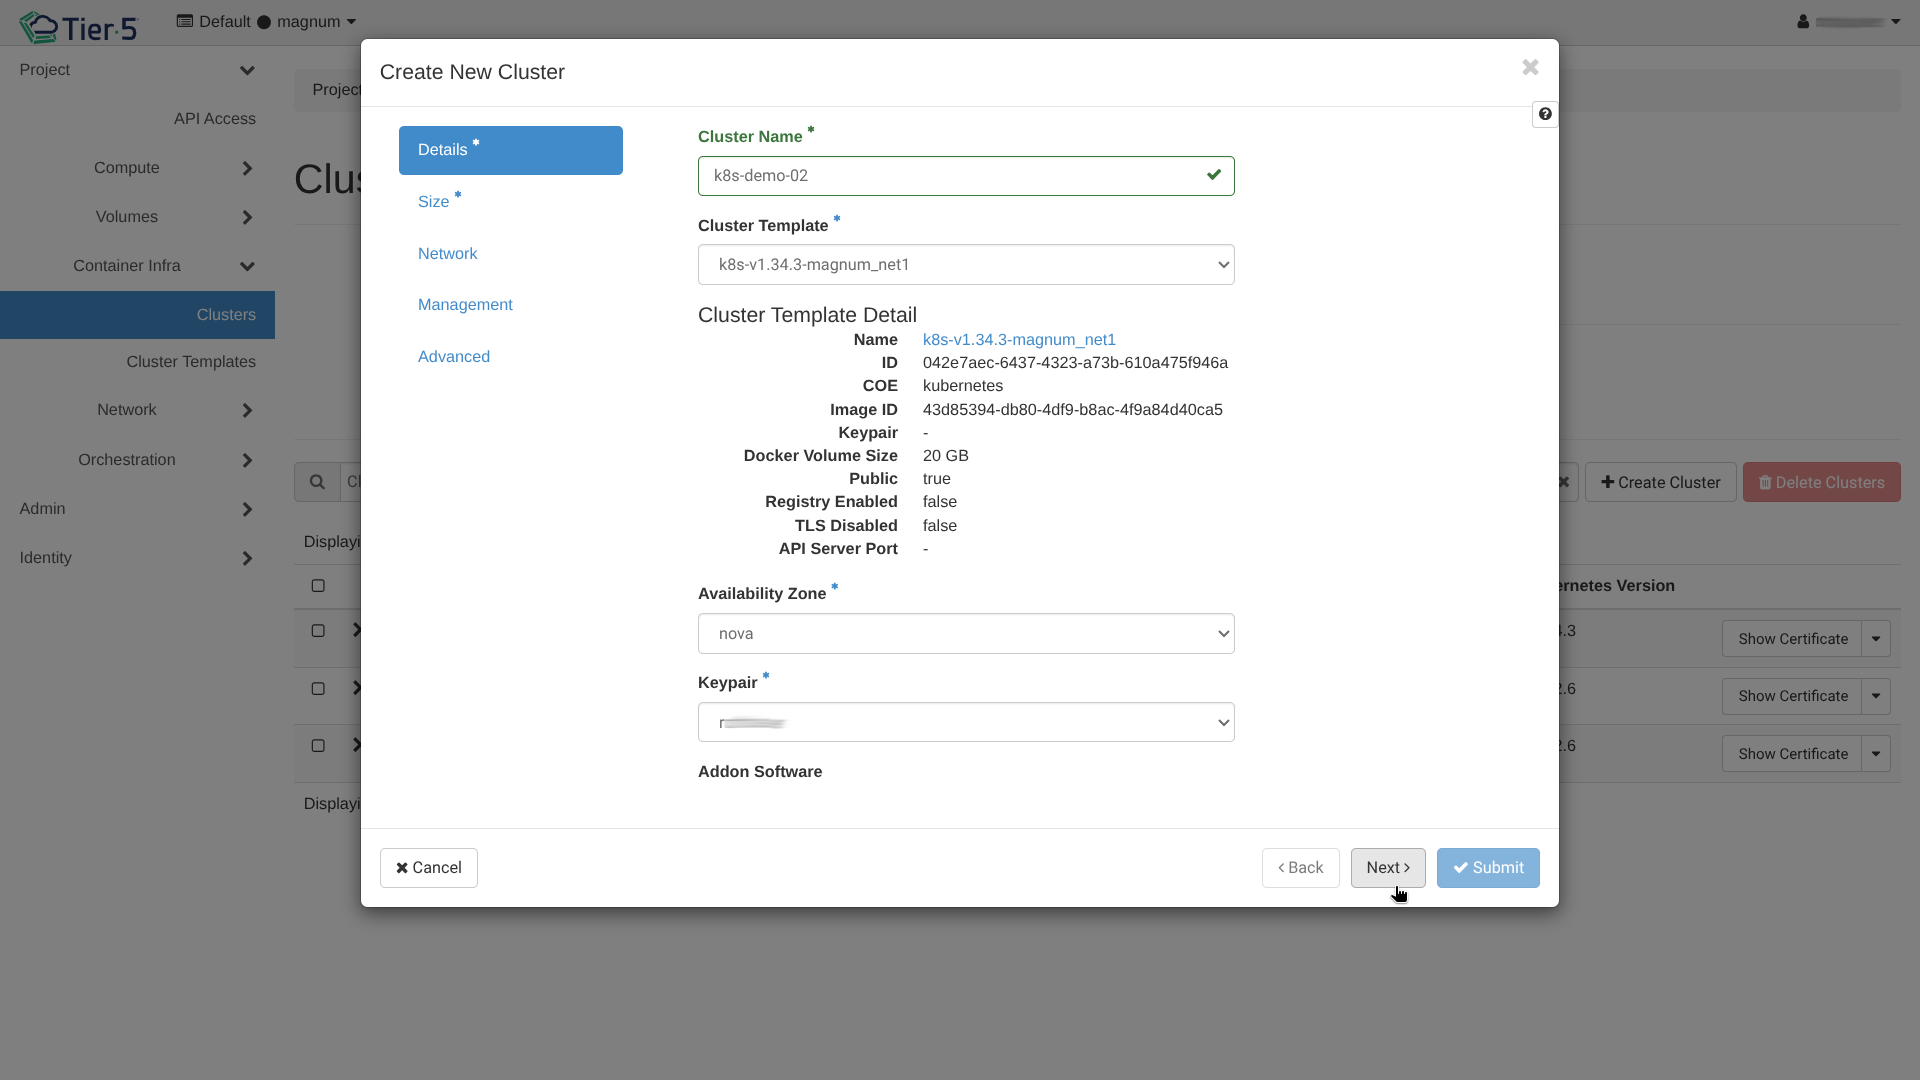
- Master Count / Node Count: Define the size of your cluster.
- Keypair: SSH key for node access.

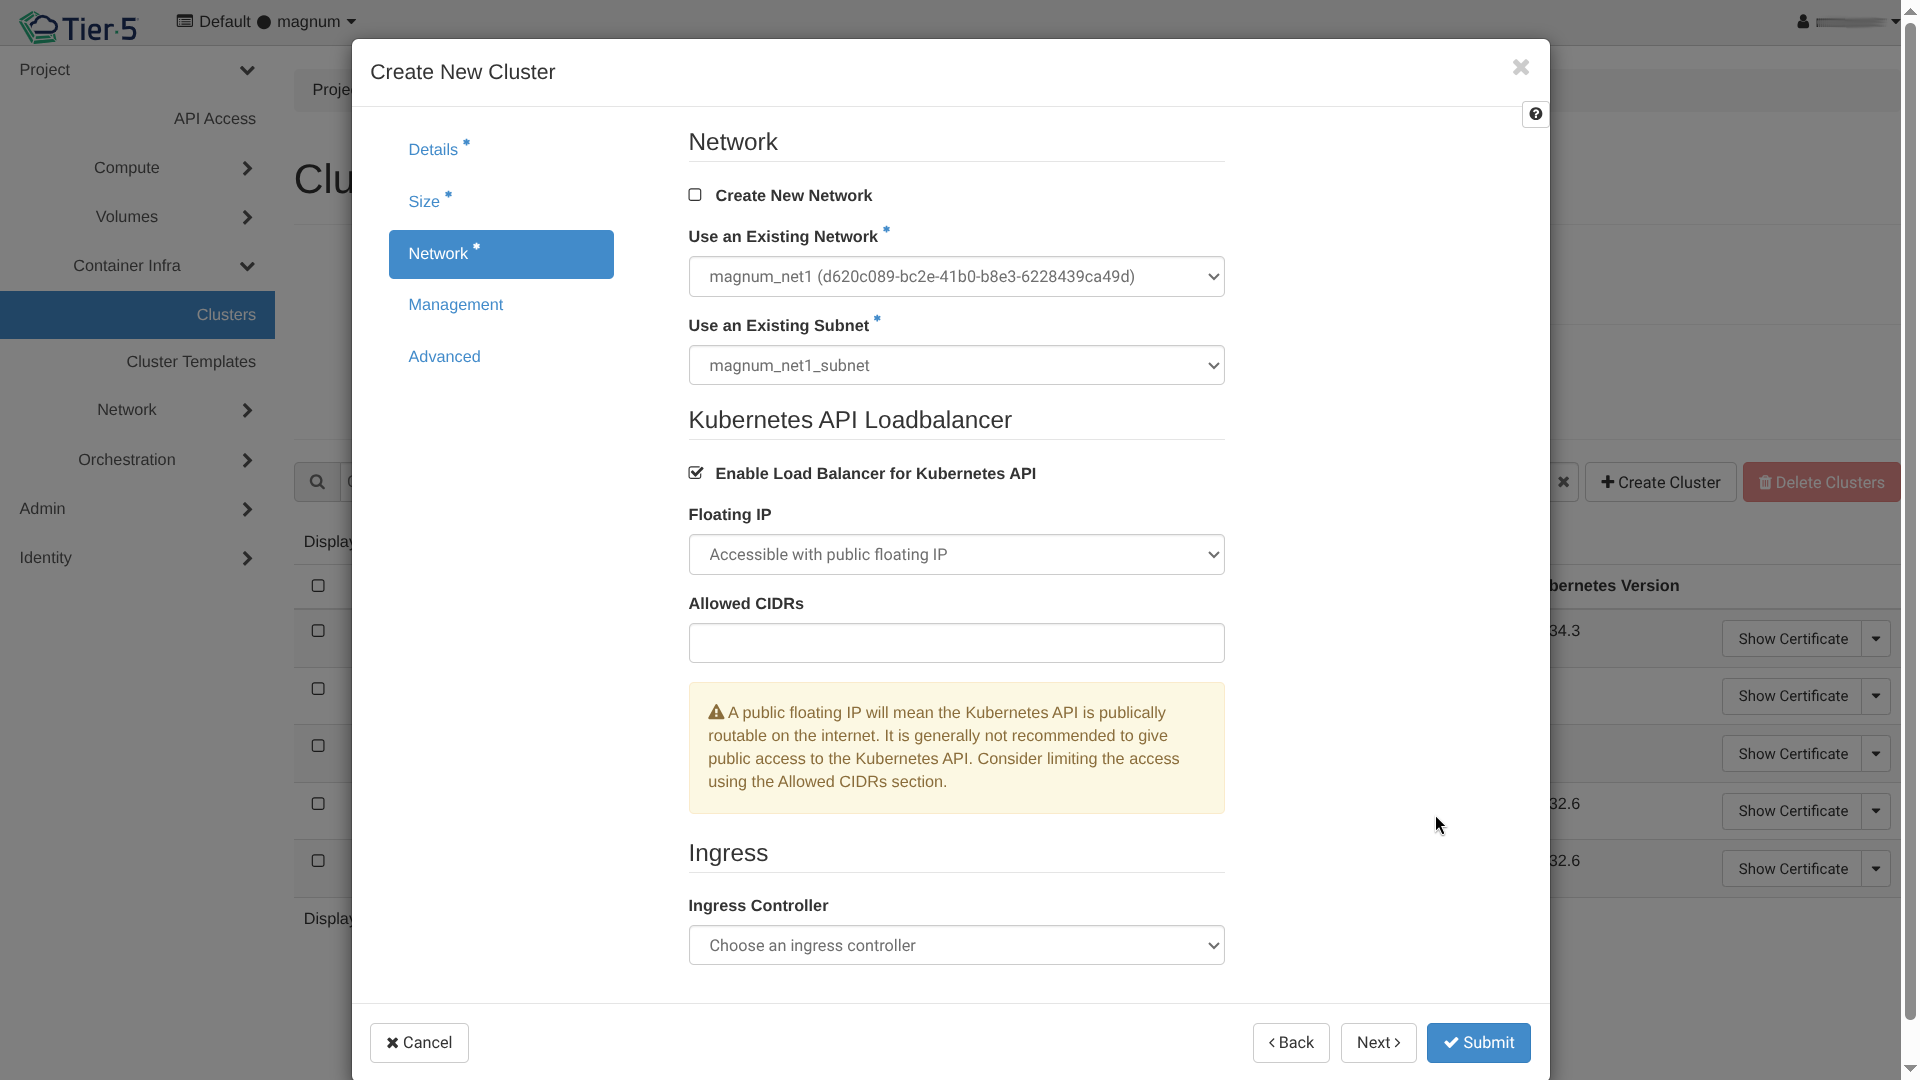
-
Network & Labels:
- Network: Select the network driver (e.g., Calico, Flannel).
- Management: Configure management options.
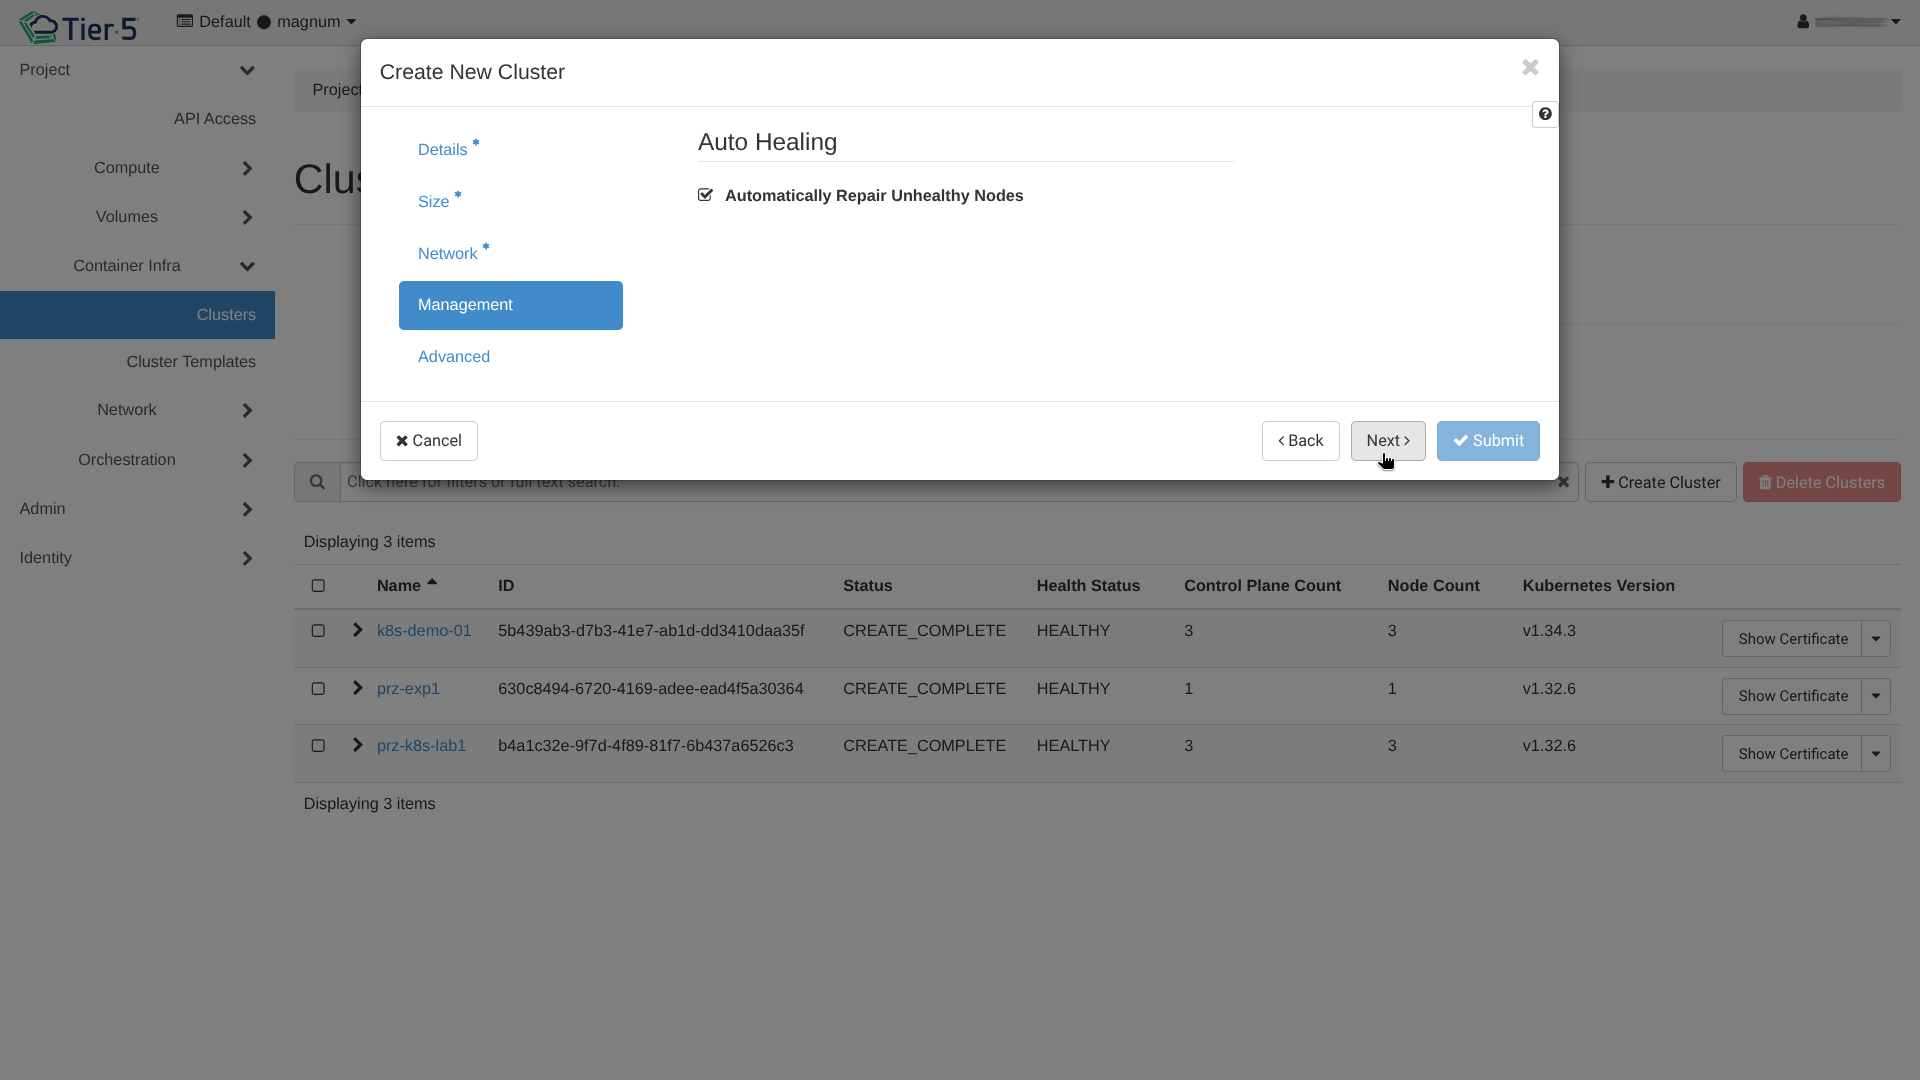
- Advanced: Enable Auto-healing or Auto-scaling if required.
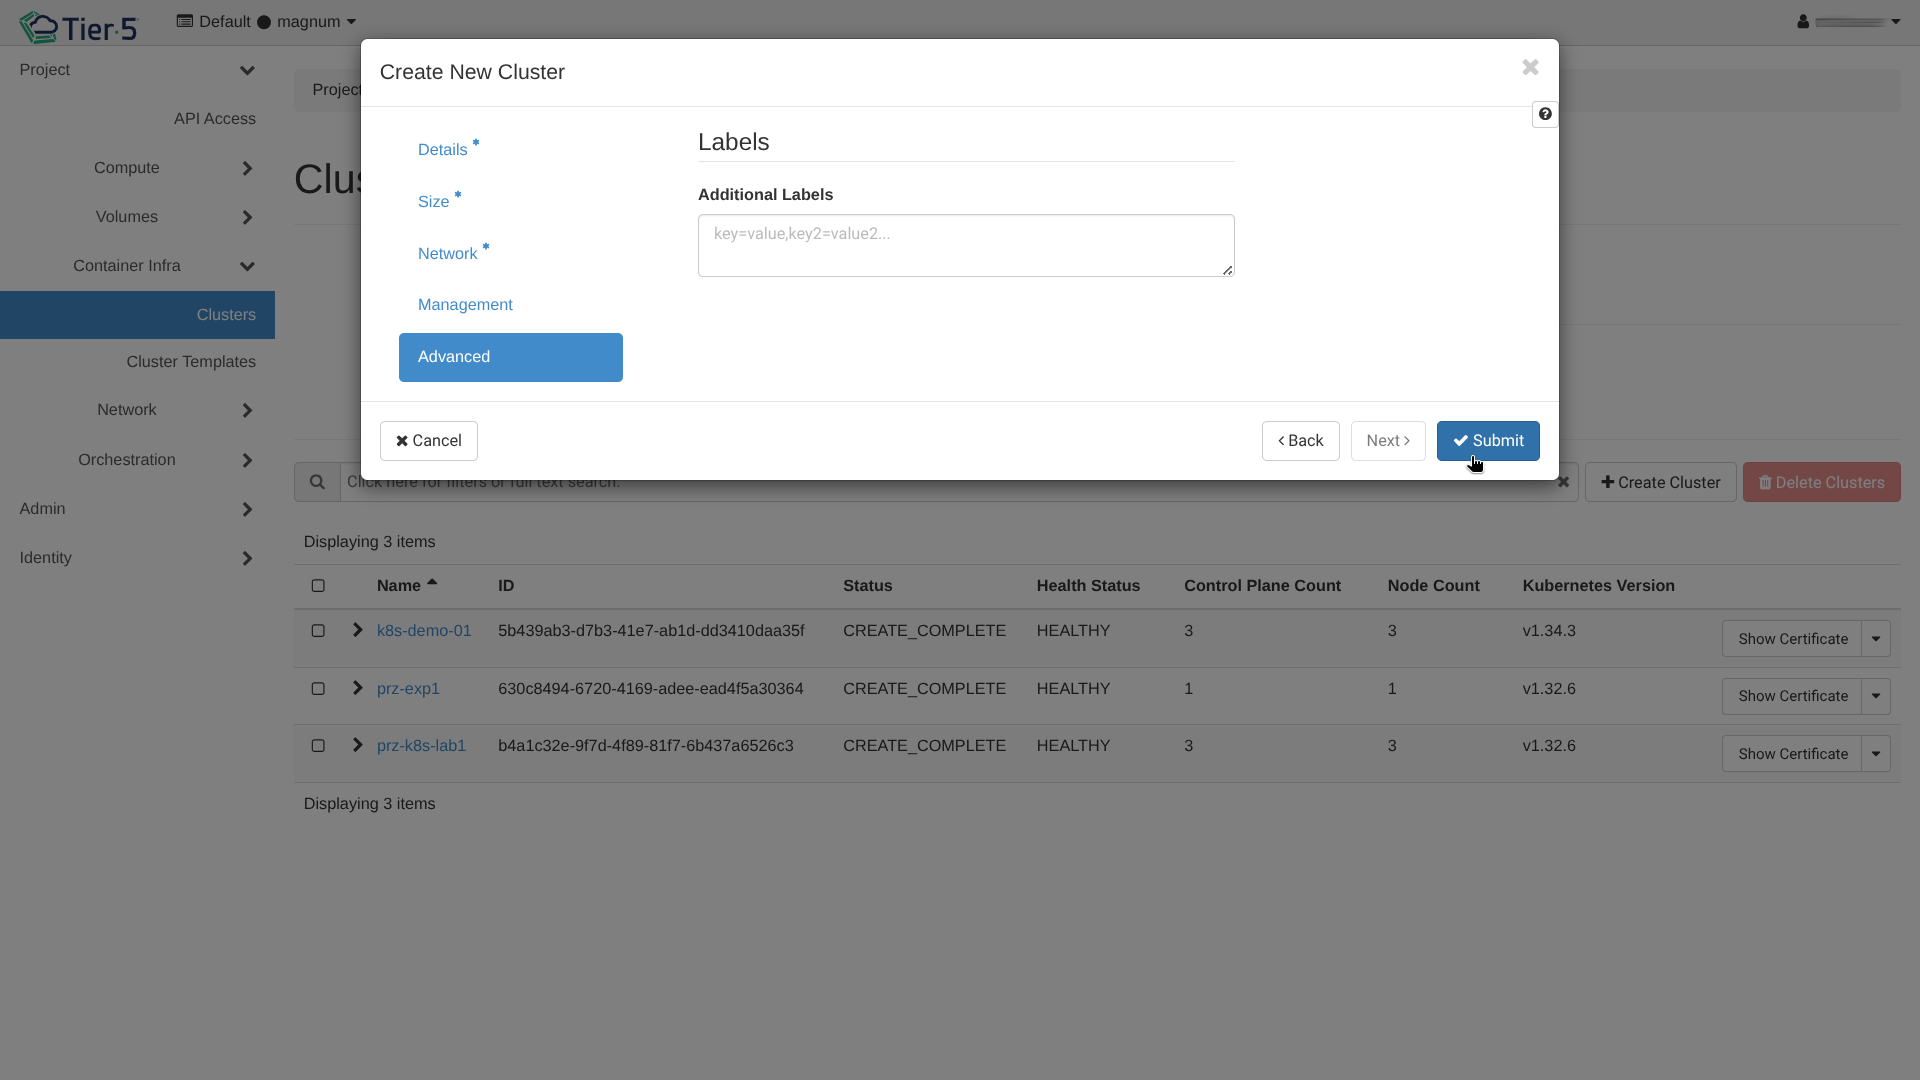
- Network: Select the network driver (e.g., Calico, Flannel).
-
Wait for Creation: The cluster status will move to
CREATE_COMPLETE.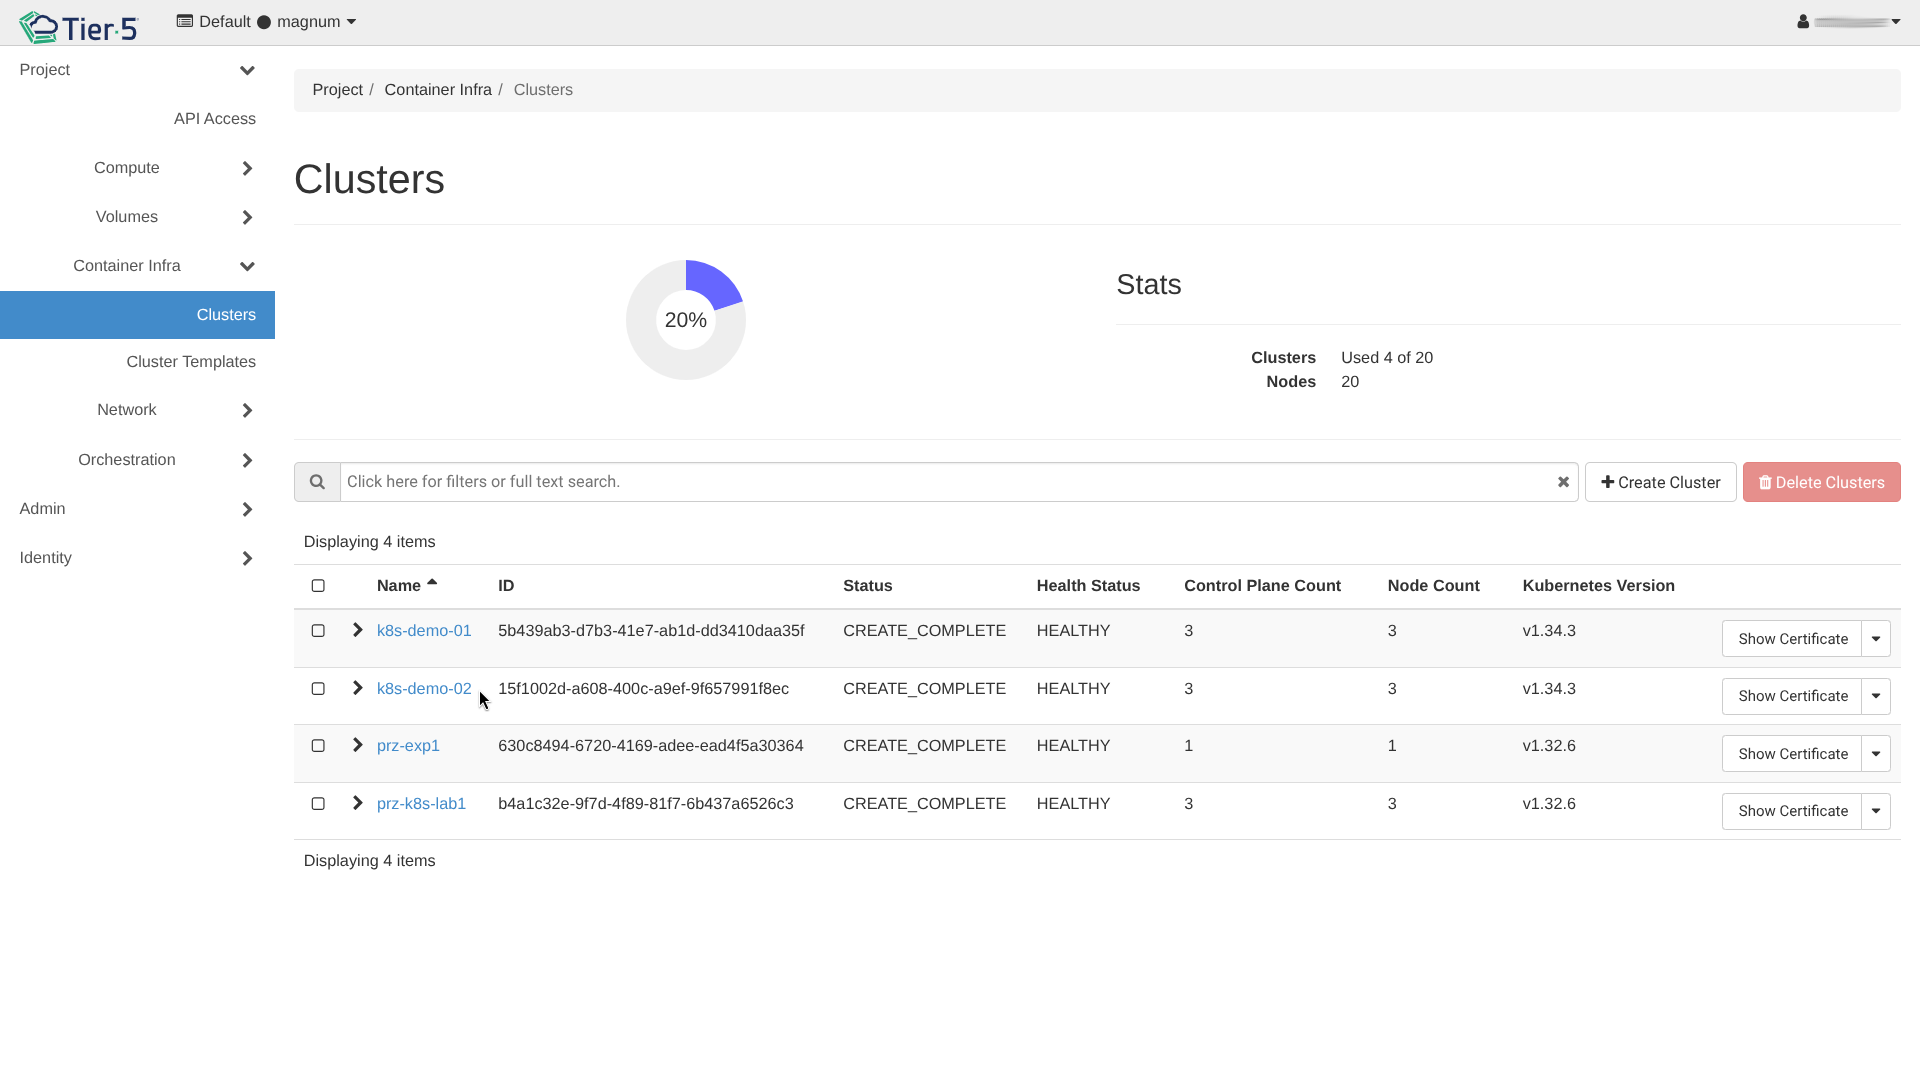
Cluster Access
Once the cluster is created, the configuration file (kubeconfig) can be downloaded directly from the API or Dashboard.
Storage (Cinder)
Managing Volumes
Block storage volumes provide persistent storage for instances.
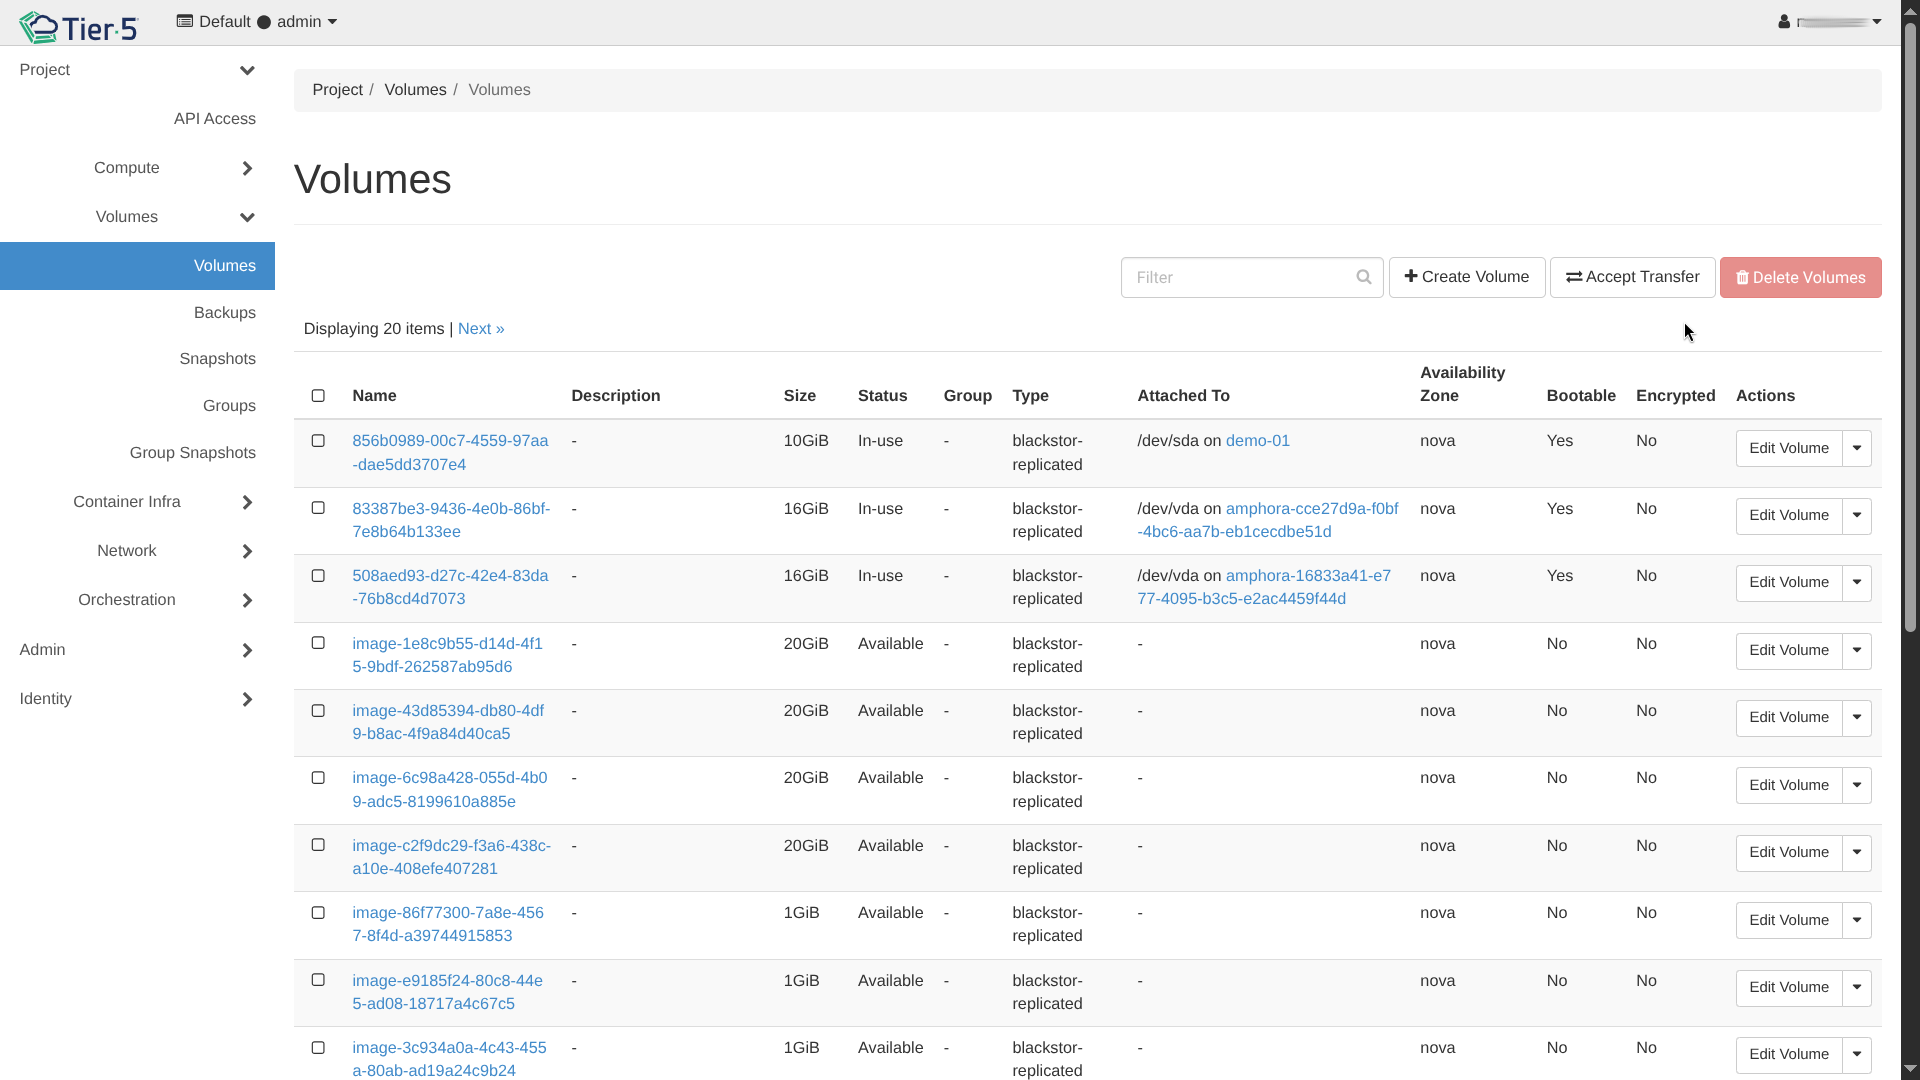
- Create Volume:
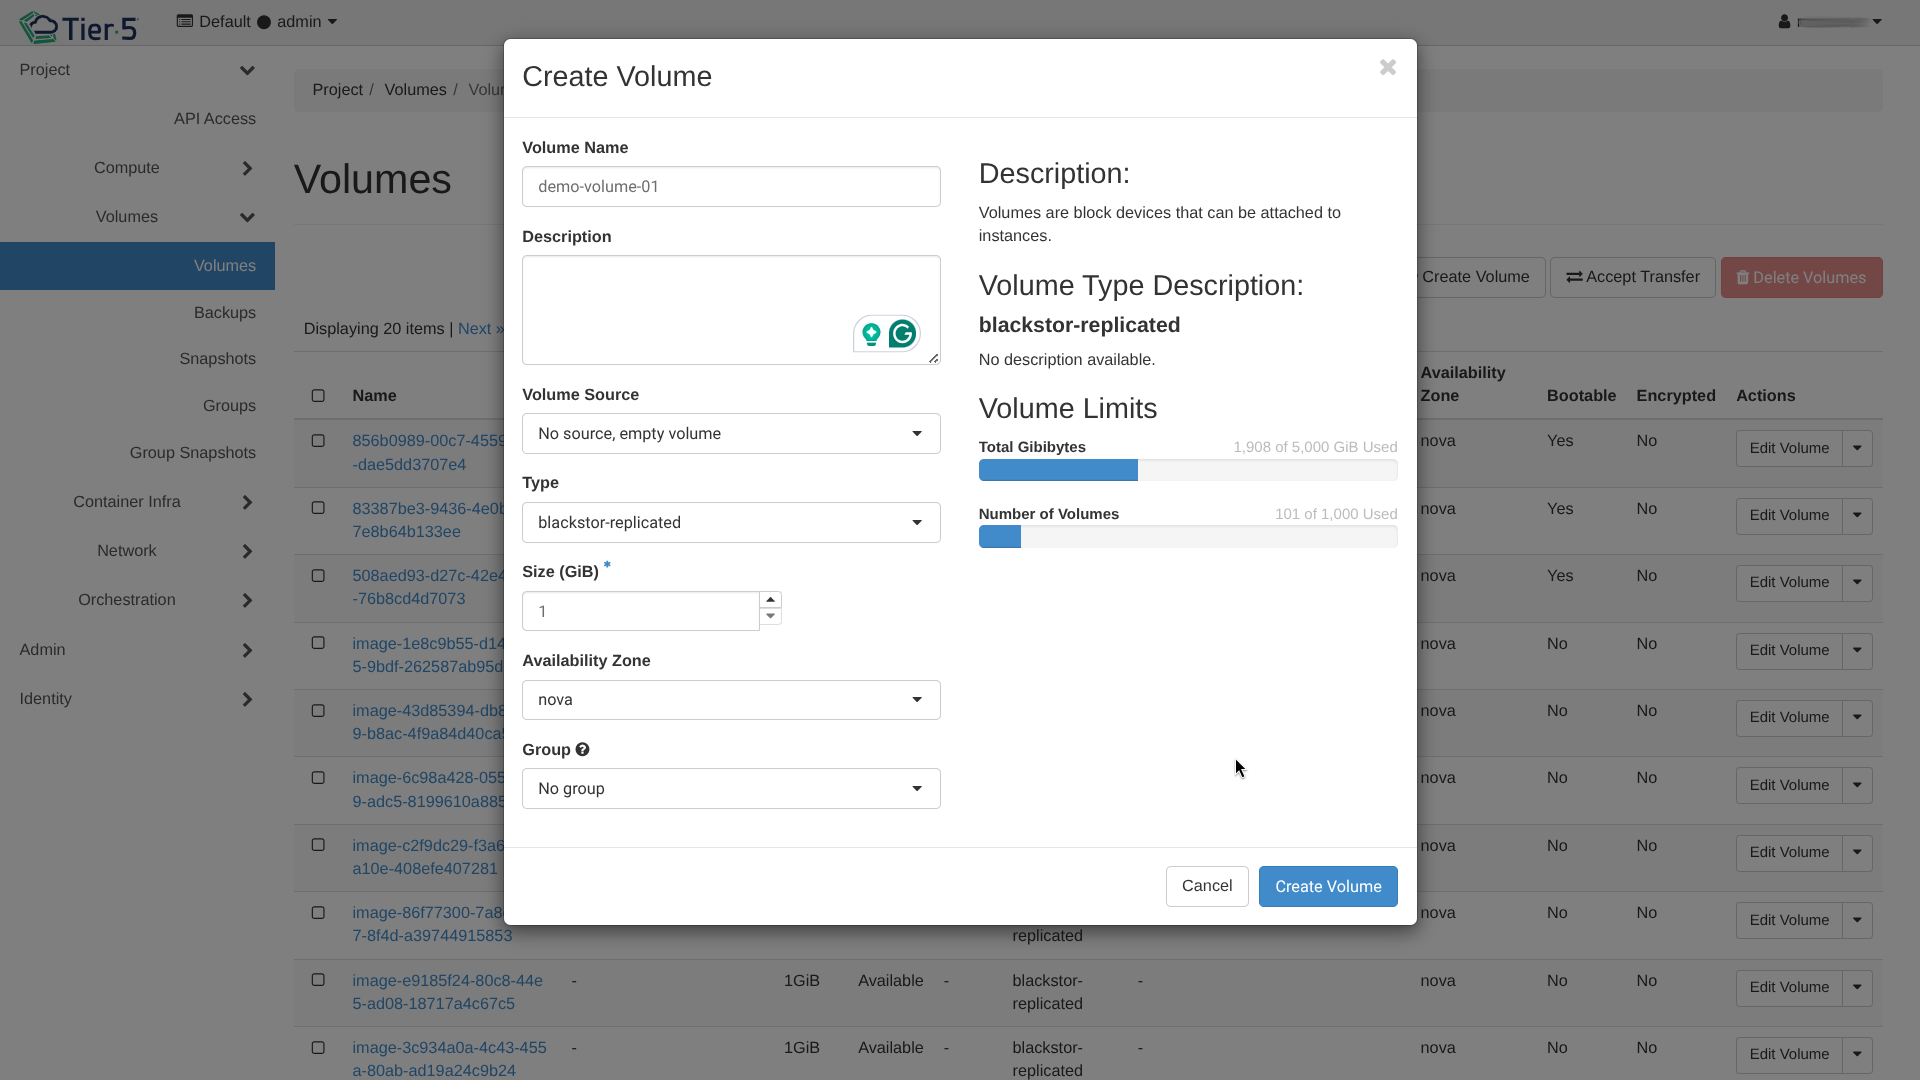
- Type: Select volume performance tier (e.g., HDD, SSD, NVMe).
- Size: Capacity in GB.
- Attach to Instance:
- Once created, use Manage Attachments to connect the volume to a running instance.
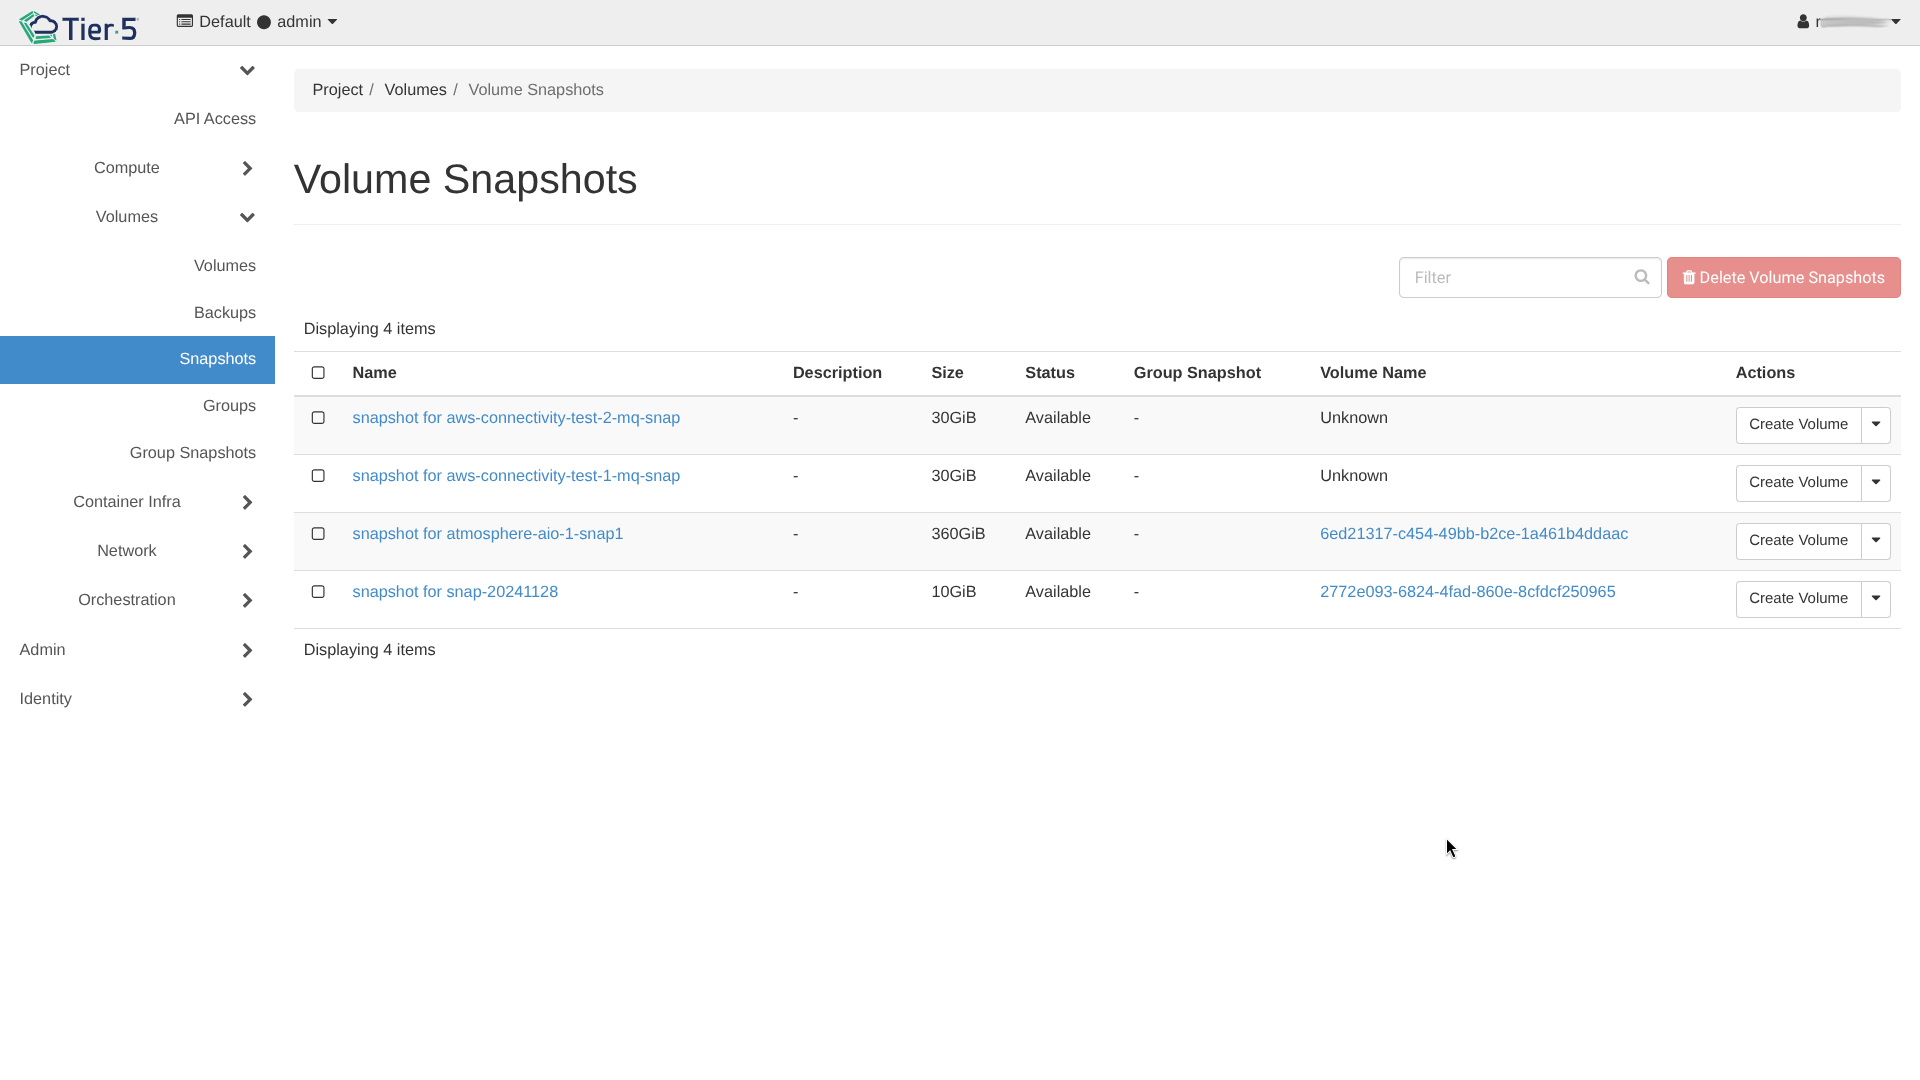
Volume Snapshots
Snapshots allow you to save the state of a volume at a specific point in time.
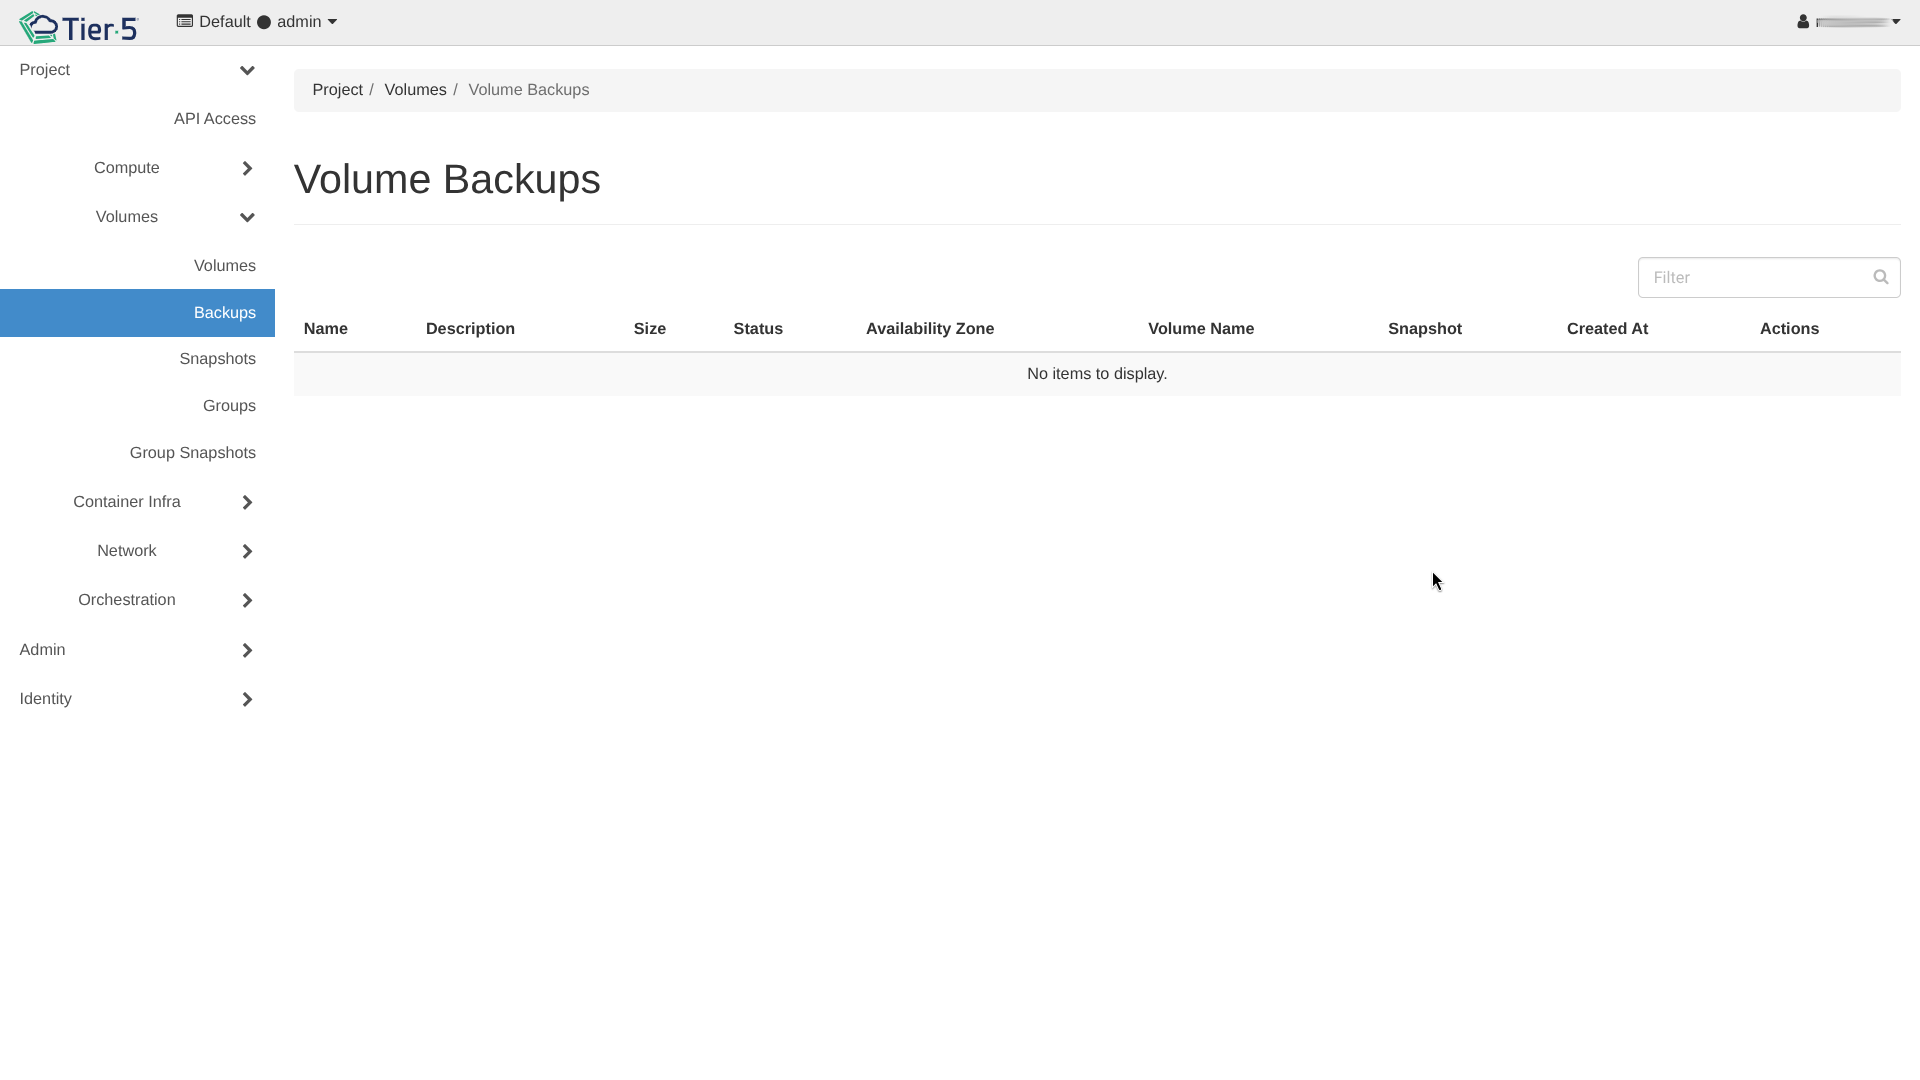
Volume Backups
Backups allow you to store volume data off-site or on minimal cost storage.
NFS Backups Only
Currently, Tier5 supports only NFS backups which must be configured as an extra service. Please contact the Tier5 support team to enable this feature for your tenant.
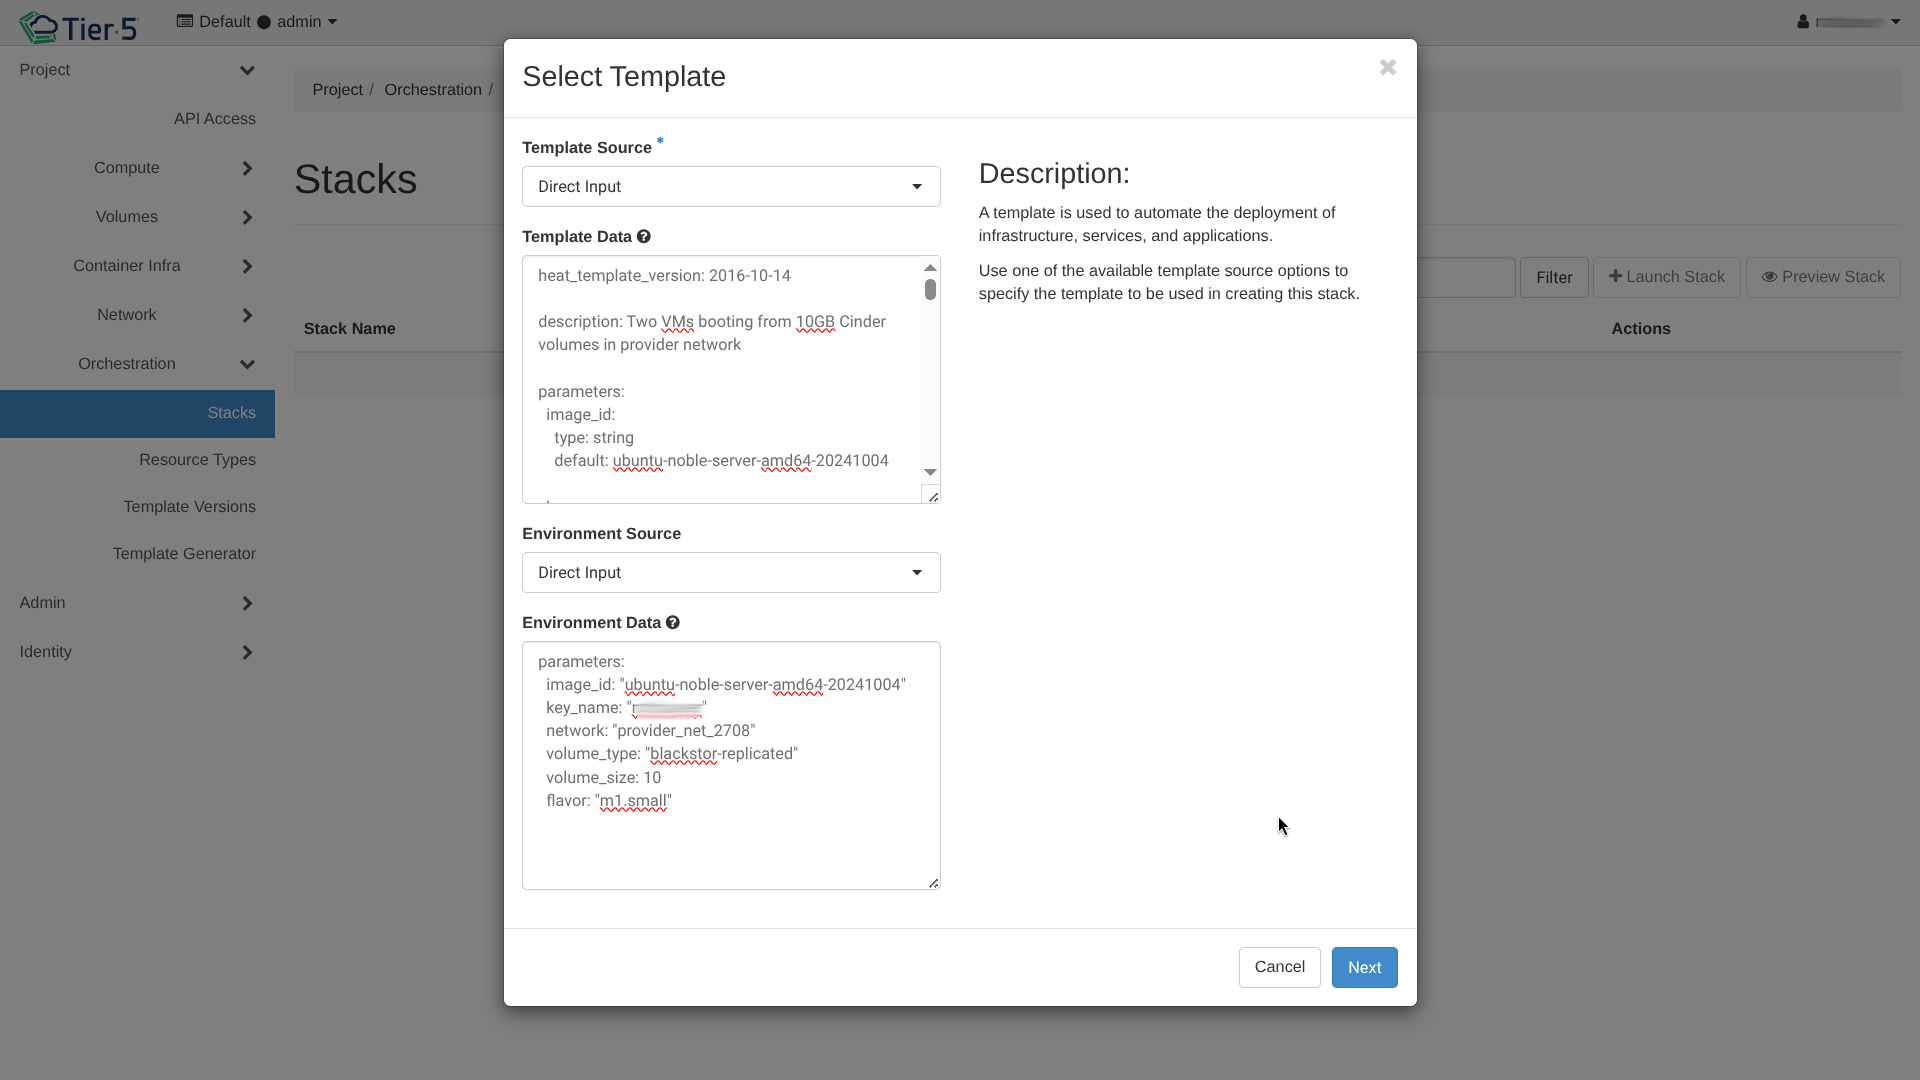
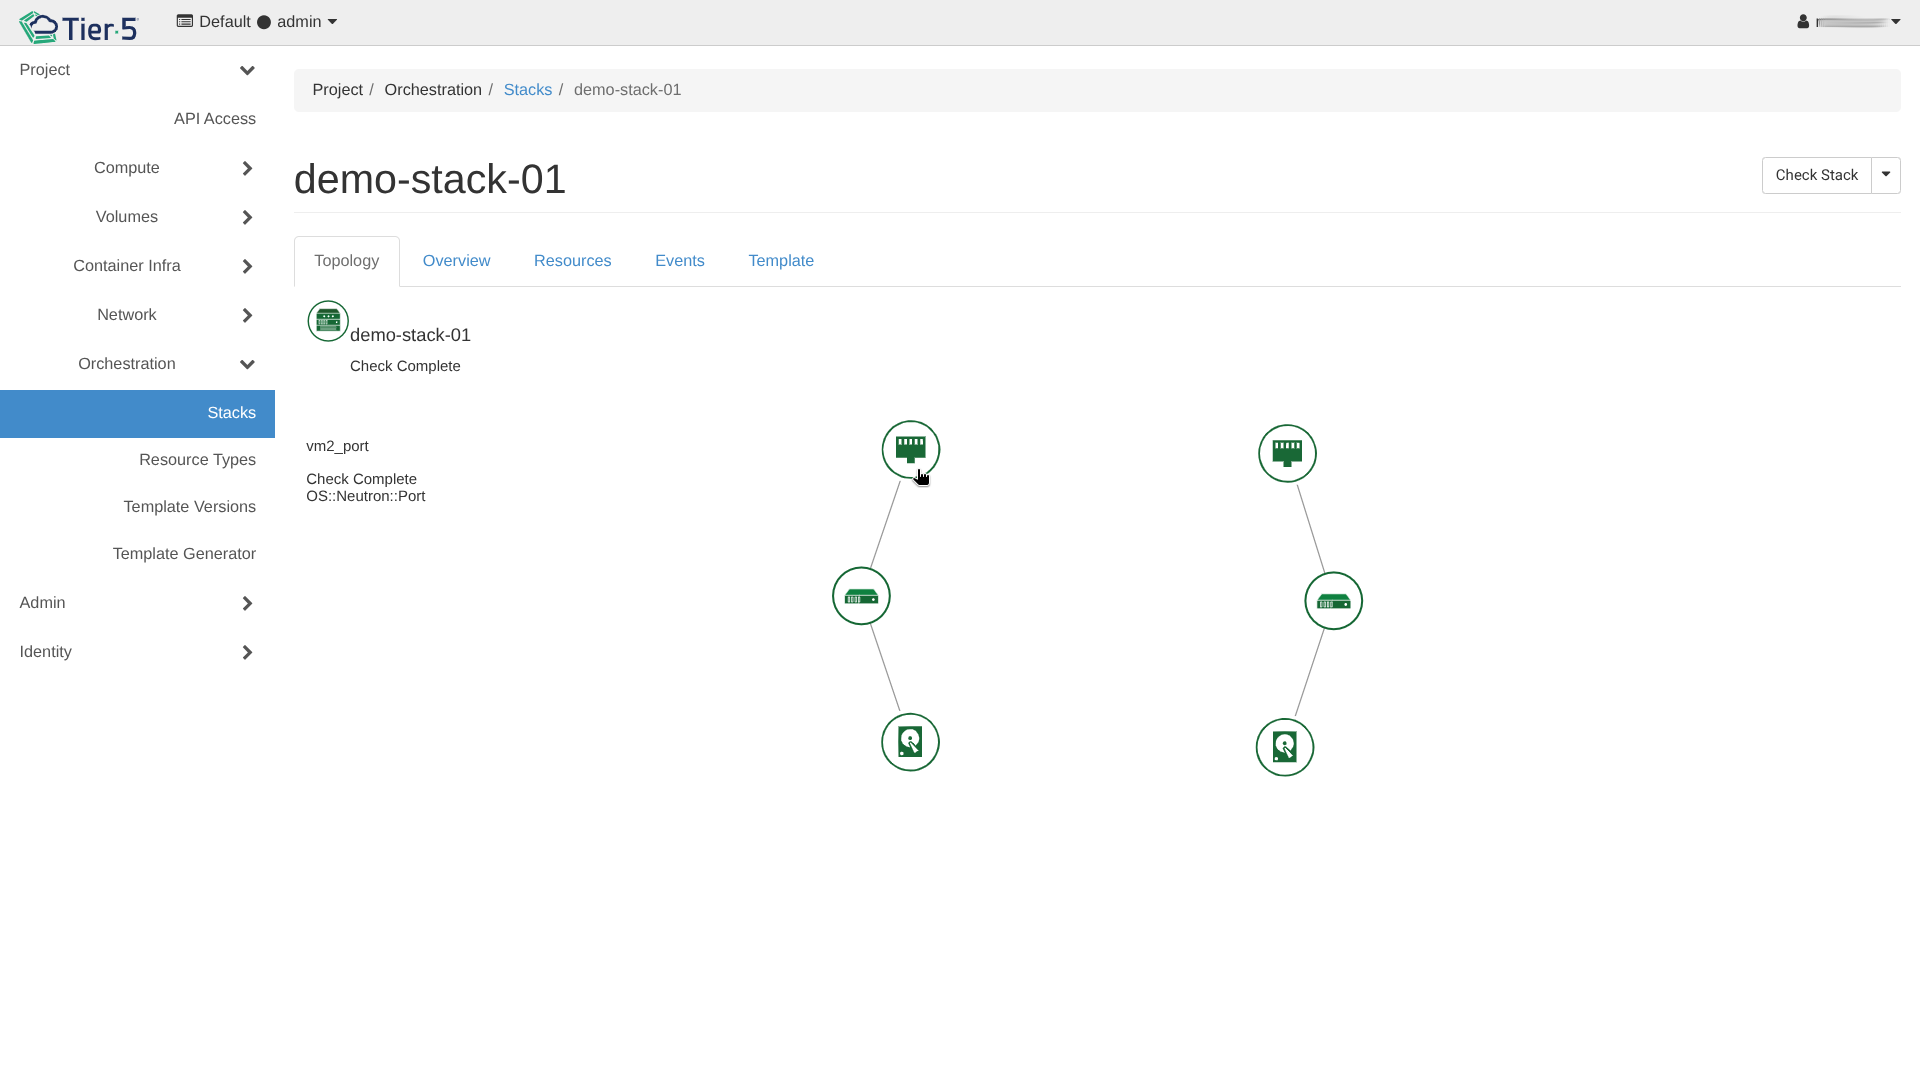
Orchestration (Heat)
Heat allows you to deploy complex infrastructure defined in templates (Infrastructure as Code).
Stacks
A "Stack" is a running instance of a template.
- Launch Stack:
- Upload a HOT (Heat Orchestration Template) or AWS CloudFormation template and ENV variables.
- Configure stack inputs and launch.

- Upload a HOT (Heat Orchestration Template) or AWS CloudFormation template and ENV variables.
- Monitor Events:
- Watch the deployment log to ensure all resources (networks, instances, LBs) are created successfully.
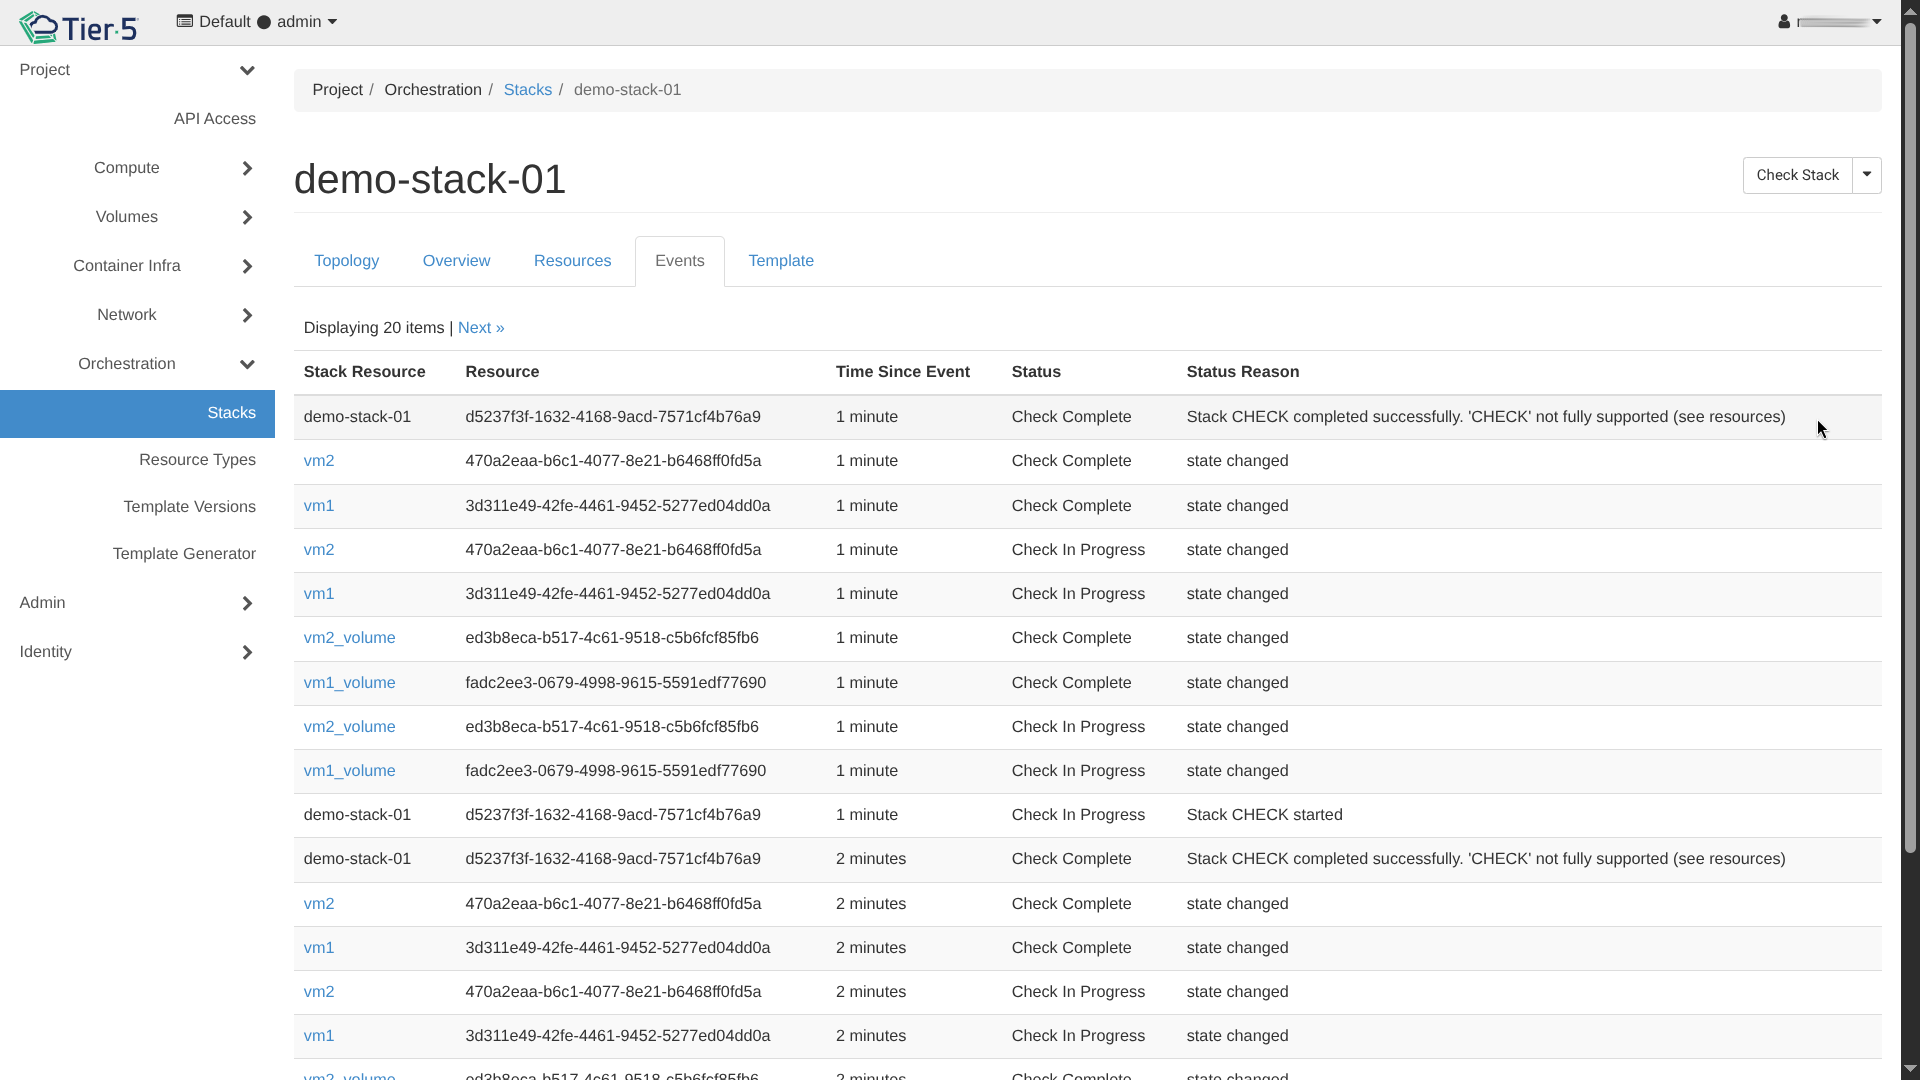
- Watch the deployment log to ensure all resources (networks, instances, LBs) are created successfully.
- Topology:
- Visualize the structure of your stack.
- Visualize the structure of your stack.